ClassPoint is an all-in-one teaching tool integrated into Microsoft PowerPoint. It is designed to help educators present more efficiently without switching between different apps and improve their teaching with PowerPoint.
By enhancing PowerPoint with advanced annotation and presentation tools, interactive audience questions, and a gamified reward system that doesn’t require student devices, ClassPoint creates more engaging/captivating presentations.
With a user-friendly interface and native PowerPoint integration, you can easily learn how to improve your student engagement with ClassPoint. Let’s get started on how to use ClassPoint!
Get Familiar – The Interface

Once ClassPoint has been downloaded and installed, you will see the Inknoe ClassPoint Tab in the PowerPoint ribbon where you can create your ClassPoint account. Some of the ClassPoint features can be set up & managed from the ClassPoint Tab in edit mode. Then during your presentation, the ClassPoint Toolbar & Class code will appear with all the ClassPoint tools to use during Slideshow mode.
1. ClassPoint Tab
First you will see your Class List where you can add your participant list to ClassPoint, so you can randomly draw names, award stars, or streamline their joining process.
Then you will see all the interactive questions. When you click on an activity, the activity button will be added to your slide, and you will notice the side panel will open for you to customize your question.
There are also some presentation tools you can manage in edit mode, as well as view the Quiz Summary from Quiz Mode, Reset question responses, annotations, or draggable objects, and open the settings.
In Settings you can edit your profile, view your subscription status, and adjust your slideshow options to hide the class code or toolbar, customize levels, and change your language.

2. Toolbar
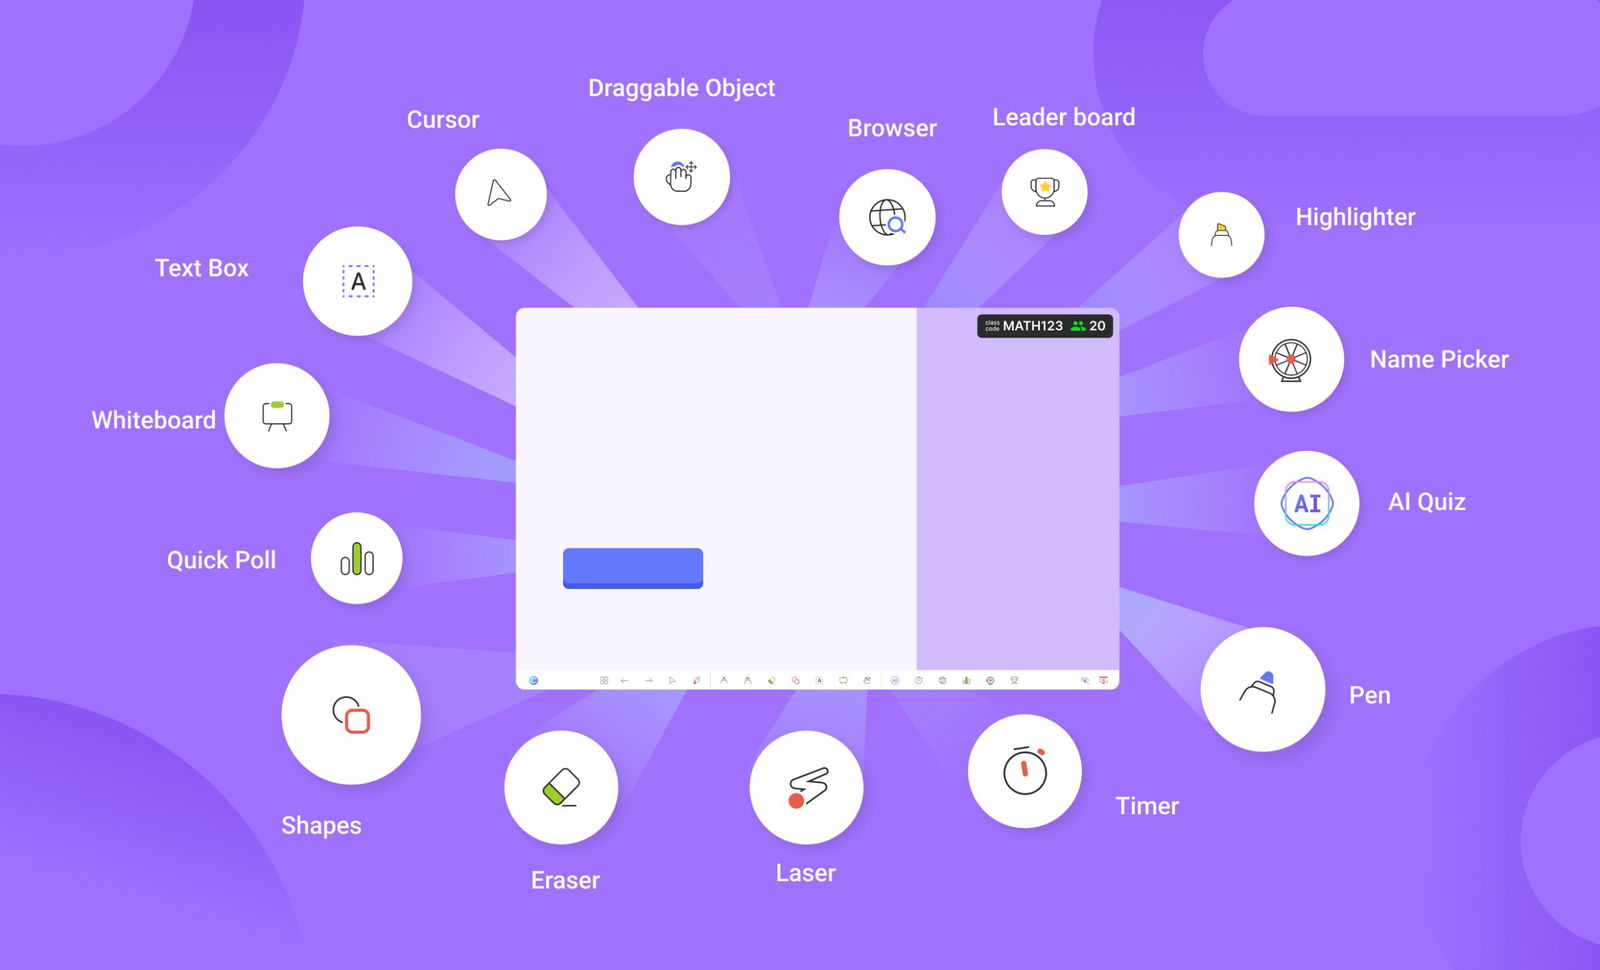
When you start your presentation, you get access to the ClassPoint toolbar. The toolbar houses all your annotation tools and teaching tools to help in your presentation delivery and audience engagement throughout your presentation. It also includes the Leaderboard, which you can open anytime.
3. Class code -My Class
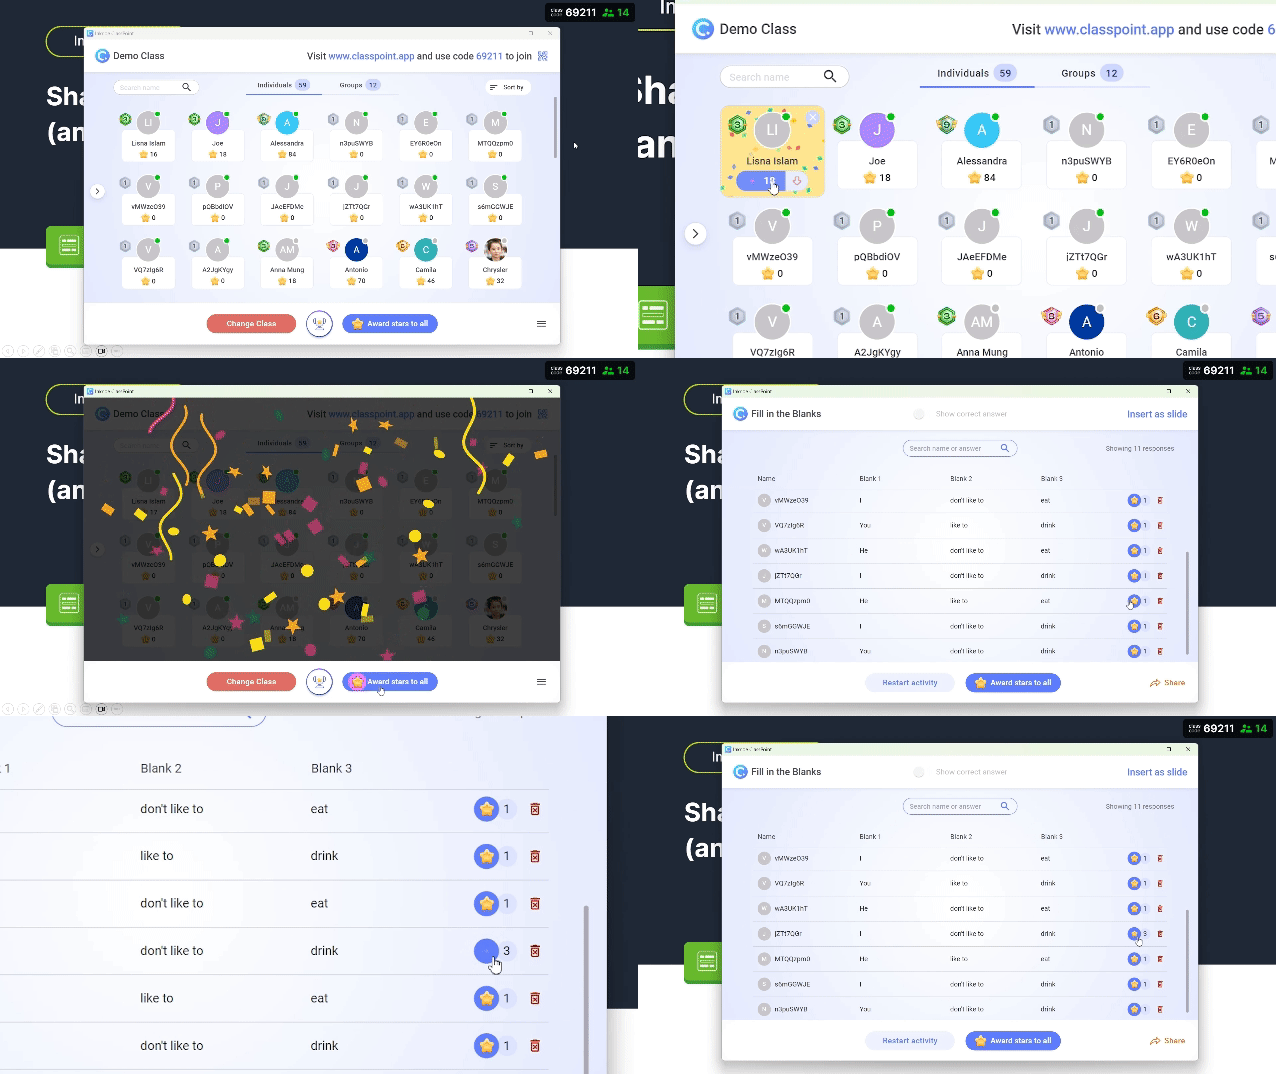
In the top right corner, you will see the class code displayed. Click on it to open the My Class window, where you can select your class, view participant information, award stars, & more. If students are joining your class on their device, they will use this code to join!
Check out this article for a quick refresher on the installation process.
Presentation Tools
ClassPoint’s Presentation Tools are added to your PowerPoint presentations to help you elaborate on concepts, capture attention, and inspire active participation. Once you are in presentation mode, these tools are available in the ClassPoint toolbar.
1. Annotation tools
Focus your audience’s attention starting with the laser pointer; you can press down to add disappearing ink and switch to the hidden spotlight using the ‘S’ key.
Further aid audience understanding by adding notes on your slides with pens, highlighters, text boxes, and shapes. And, adjust the pen thickness, color, and text or shape fill from the secondary menu.
And to expand on any thought, instantly add a Whiteboard Background slide to your presentation to continue explaining and visualizing concepts! Choose from pre-made whiteboard templates or customize them by adding your own whiteboard background.
2. Teaching tools
ClassPoint also has added teaching tools to improve your lessons & help manage your in class activities right in PowerPoint.
Try using Draggable Objects to move your slide content around during your presentations to interact with your teaching material or create an activity out of your slide! In edit mode, select the objects you want to move around, then enable drag. Then in presentation mode, click the Draggable Objects hand to freely move your objects!
ClassPoint also includes other teaching tools including a timer or stopwatch, an Embedded Browser so you can search and pin your favorite interactive learning sites, and a Name Picker so you can randomly select names in an exciting and efficient way.
Lastly, you can also run a Quick Poll and collect responses from every single audience member if they are using their device to gather opinions, feedback, understanding checks, & more.
Ask Audience Interactive Questions
Get your participants involved in your presentation by turning your PowerPoint slide into an interactive question with ClassPoint. There are 8 different activities to choose from! From Word Cloud to Video Upload, you can gather audience opinions, practice learning, or assess your students knowledge in many engaging ways.
1. Create your question slide
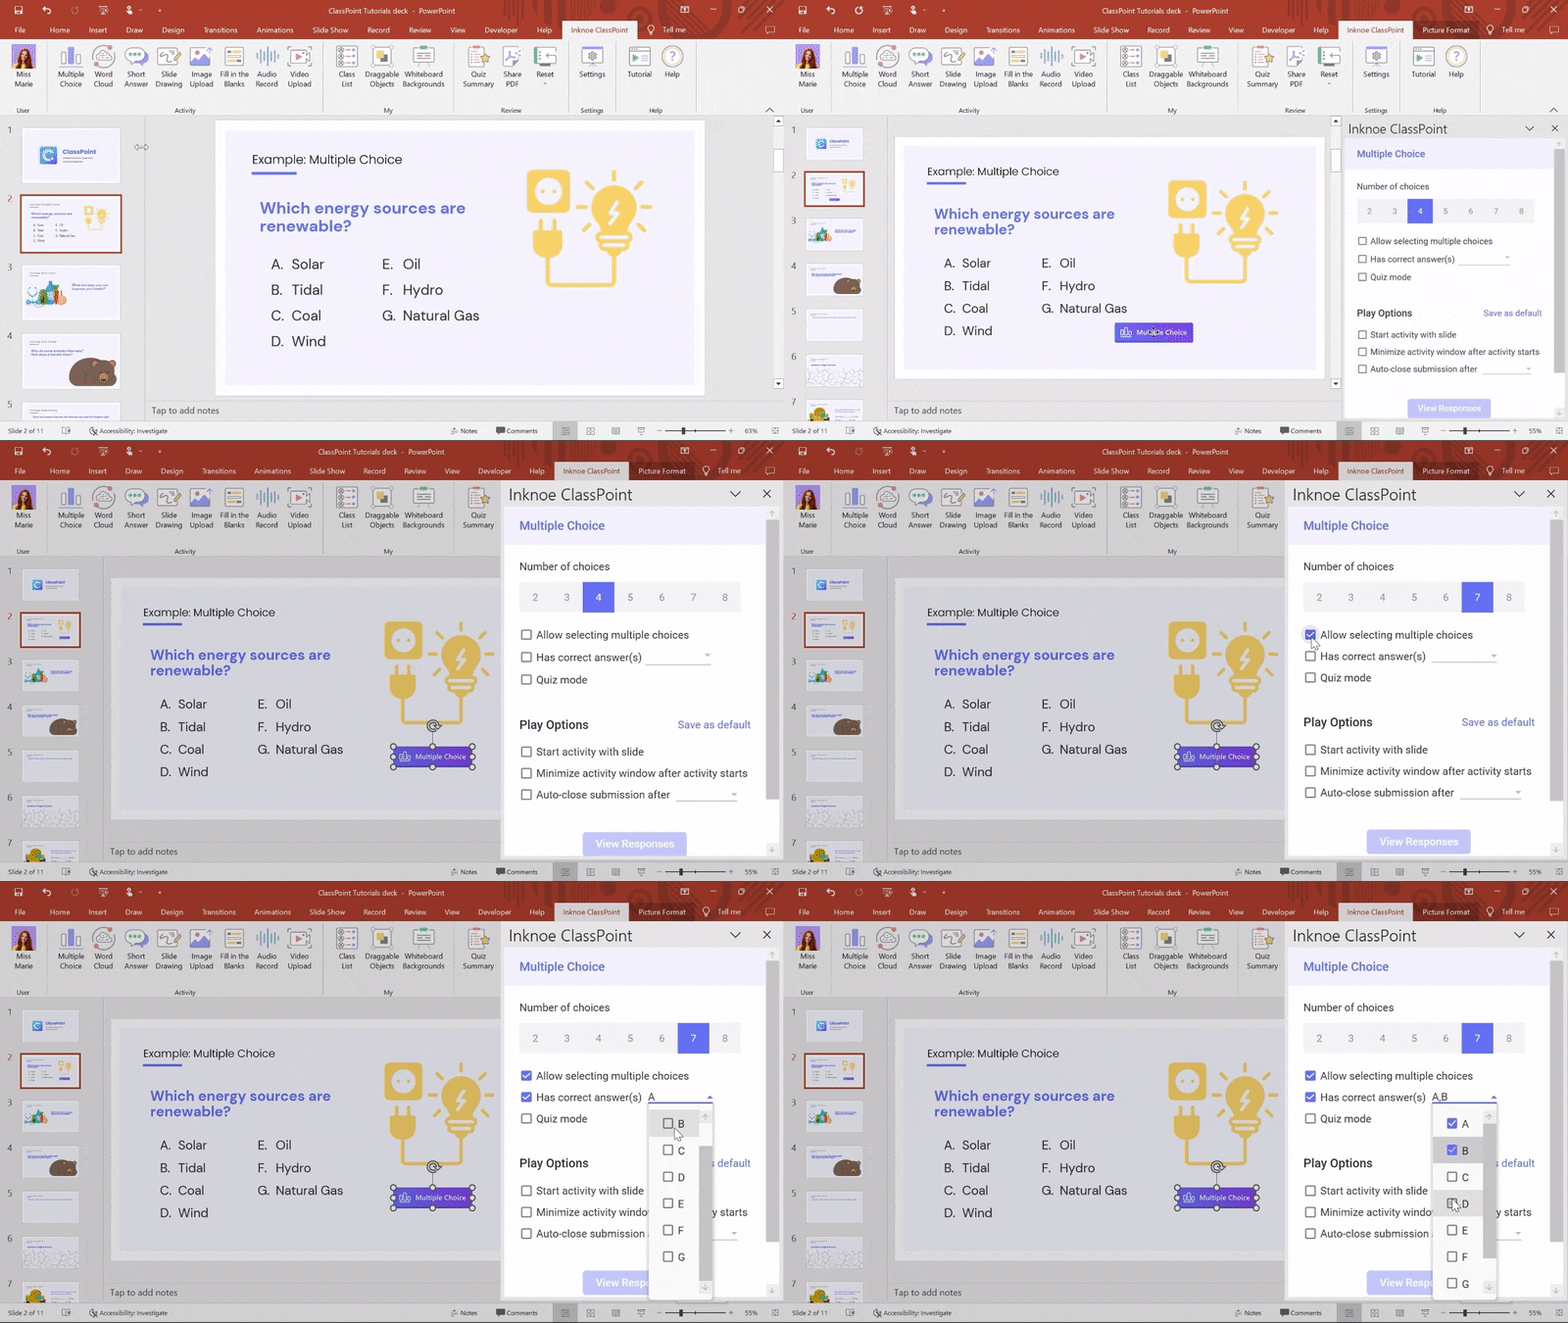
First, create a slide that you want to turn into an interactive activity by writing your question. Your slide is your question, so include the prompt, any images, and if you are running a multiple choice question, include the answer choices.
Now, to make the question interactive, click the activity button on the ClassPoint tab! You can move and resize the button on your slide.
Once you add or click on your button, the side question panel will open where you can set your question settings. Each question type has its own customizable settings depending on the question. For example, you can set the correct answer or answers for Multiple Choice and Fill in the Blank, you can require a caption for some media question types, and you can hide student names.
Then set the Play Options. Every question has the options to auto start the activity, auto-minimize the activity responses window, or set an activity timer. You can save any selections as the default play options.
2. Collect live student responses
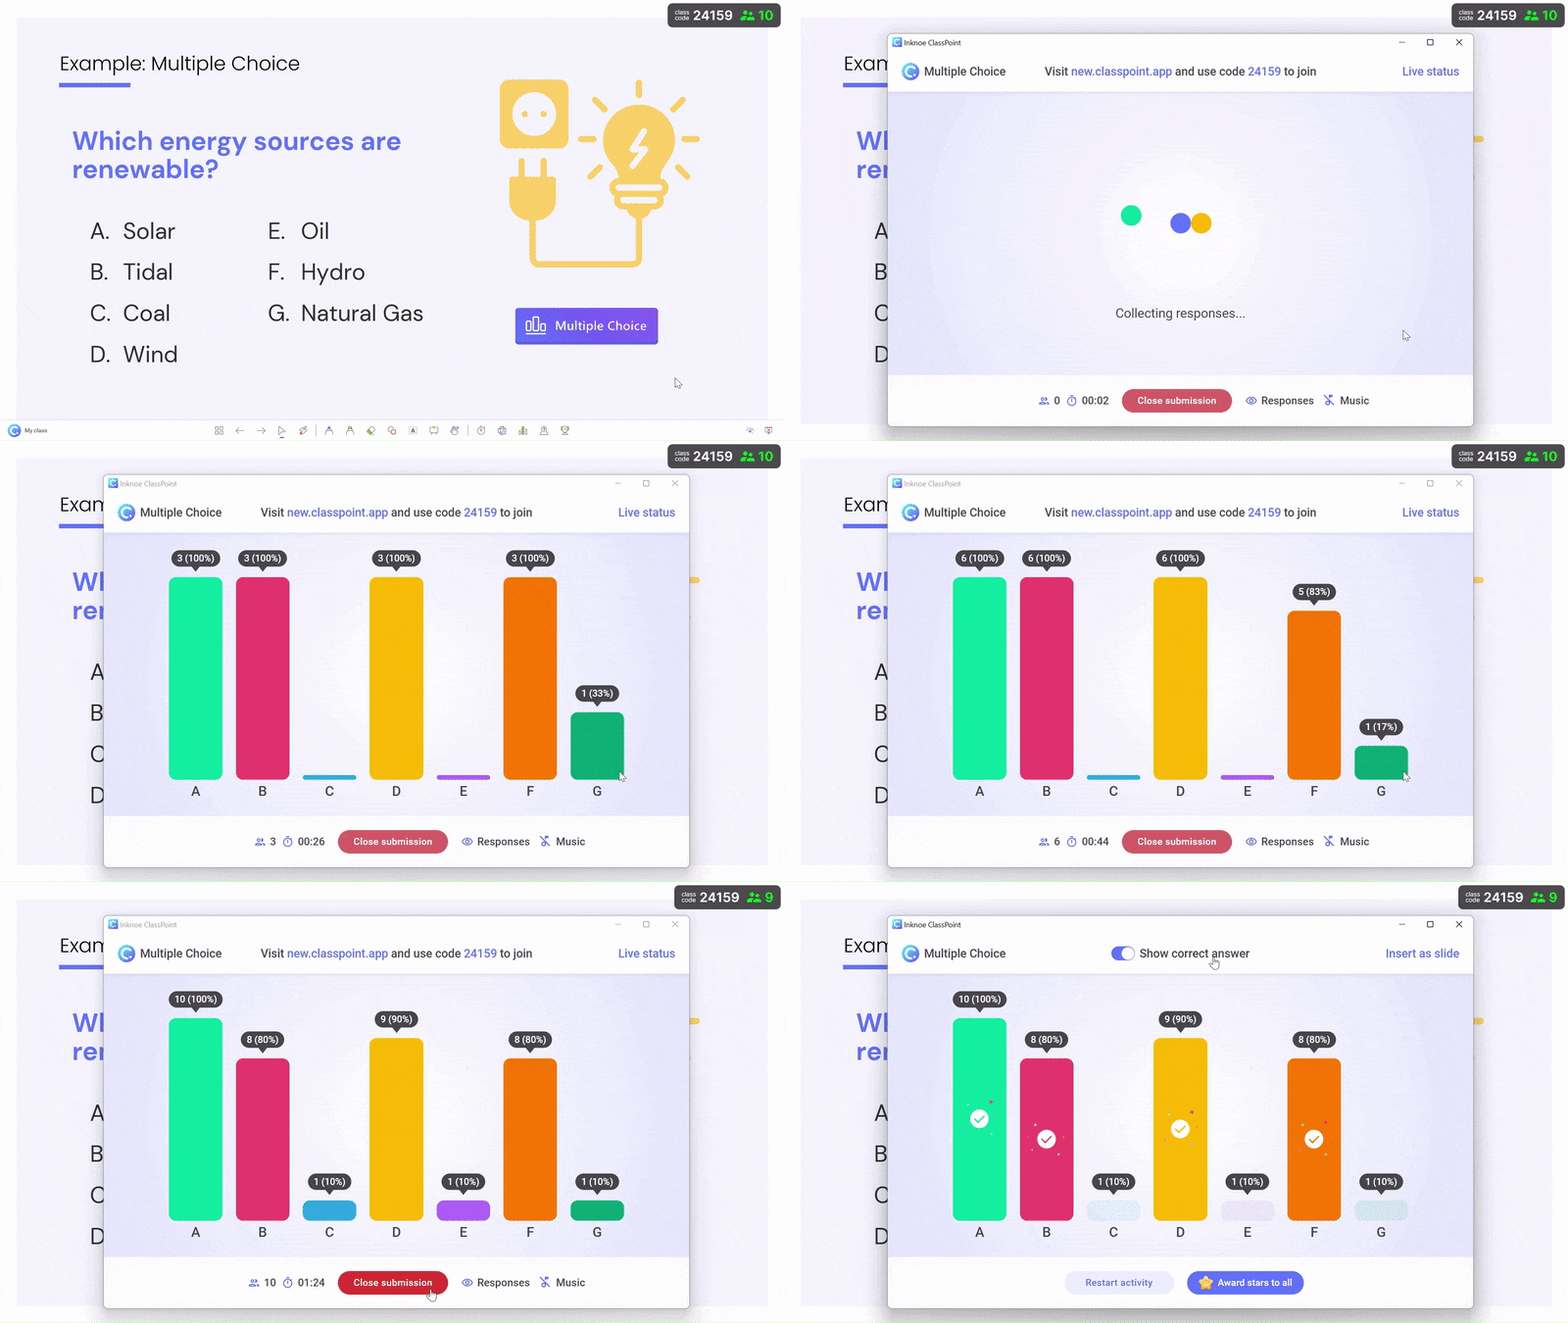
When you are live in presentation mode, your students can participate in your interactive questions by joining your class at www.classpoint.app and entering your class code and their name.
Then, you can run your interactive questions by clicking on the activity button on your slide! Watch the responses come in live, review them as class, insert them as a slide, or download results depending on the question type! All question submissions will automatically save to the button on your slide.
Use ClassPoint’s Gamified Star Rewards
Turn your presentations & lessons into a gamified learning journey for participants by awarding stars and revealing the Leader board.
1. Create Saved Classes
To award student’s stars, create a class inside Class List in edit mode by adding your student names list. Then during your presentation, open the My Class window to select and start a class.
2. Award Stars
As your audience participates in your lesson, asks an excellent question, answers a questions right, volunteers, wins a game etc. you can freely give out stars whenever you’d like from My Class. You can also give out stars from Name Picker and any of the interactive questions, but students do not need to be using a device to earn stars!
3. Levels, Badges, and Leader Board!
As they collect stars, they will earn levels and achieve new badges! And you can amp up the competitive fun by revealing the current and total class rank from the Leader board found on the Toolbar.
You set the rules! ClassPoint’s gamification system is free for you to choose what to give stars for whether that be in-person activities, participation points, or from ClassPoint’s interactive questions. And inside Gamification Settings, you can customize your levels and the points needed to reach each level badge.
That’s it! / ClassPoint Tutorials
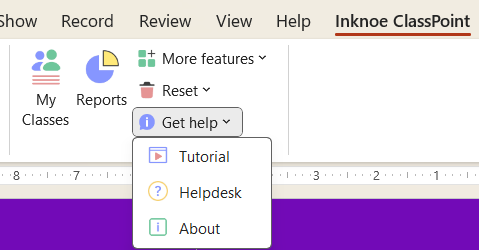
You can watch tutorials on all of these features by visiting the YouTube playlist in this blog or inside ClassPoint in PowerPoint, simply click the Tutorials icon on the ClassPoint Tab to watch the video tutorials.
If you haven’t downloaded ClassPoint yet, create your free account today.
