
Are you ready to take your PowerPoint presentations to the next level? In this guide, we’ll show you how to create five cool PowerPoint transitions that can keep your audience engaged and enhance the flow of your slides. Bonus: we’re giving away a free downloadable file that includes all the templates for the transitions we’re teaching you!
Whether you’re preparing a classroom lecture, a business pitch, or any other presentation, these transitions are easy to implement and will add a polished, professional touch. Plus, with these tips, you’ll be able to create dynamic presentations that are both visually captivating and informative. Let’s dive in and explore how to master these cool PowerPoint transitions, step by step! Read on or watch below:
Get Your Free PowerPoint Transitions Templates
Up your presentation game with our exclusive collection of PowerPoint transition templates.
#1 Checkerboard Transition
The Checkerboard transition is an attention-grabbing effect that breaks your slide into smaller sections, making your content more digestible and visually appealing.

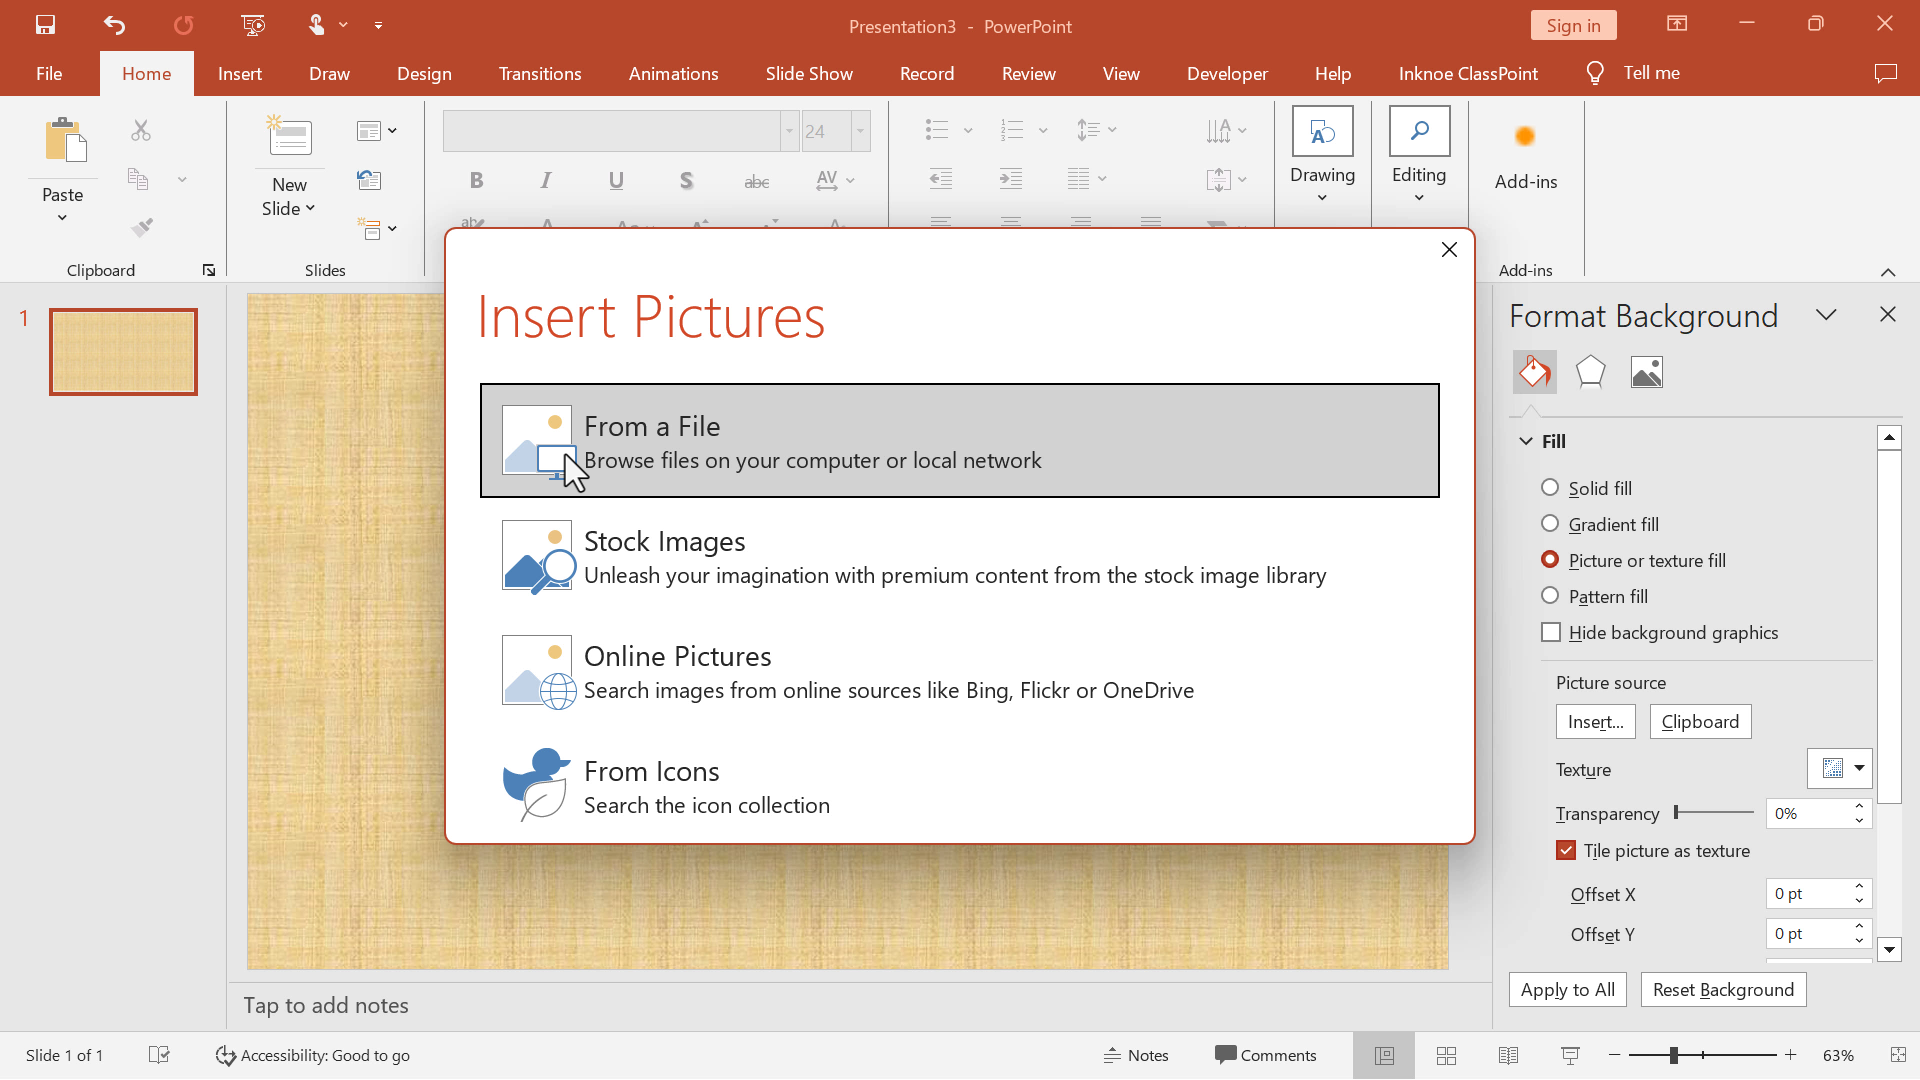
Step 1: Add Image
Start by adding a background image to your slide. This will act as the base for your checkerboard design.
Step 2: Insert Table
Insert a 7×5 table and stretch it across the entire slide to cover the background image.
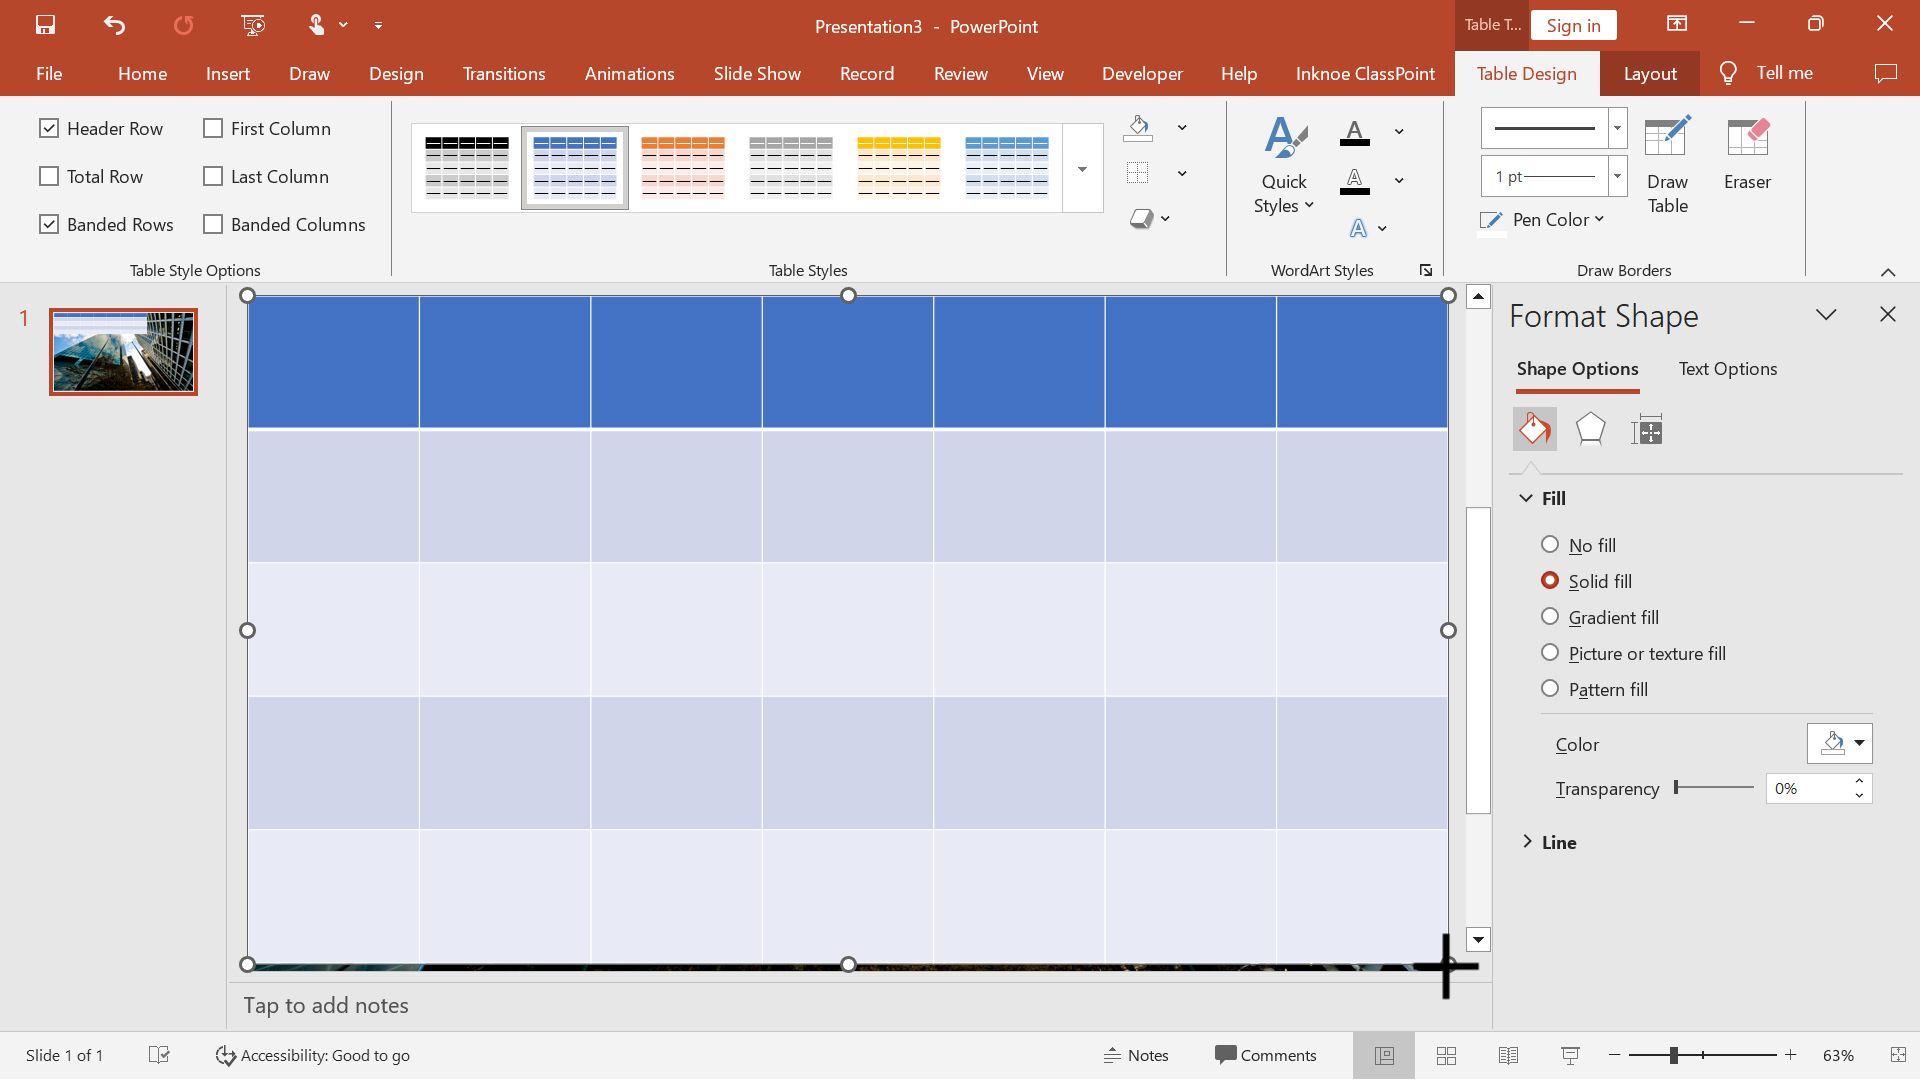
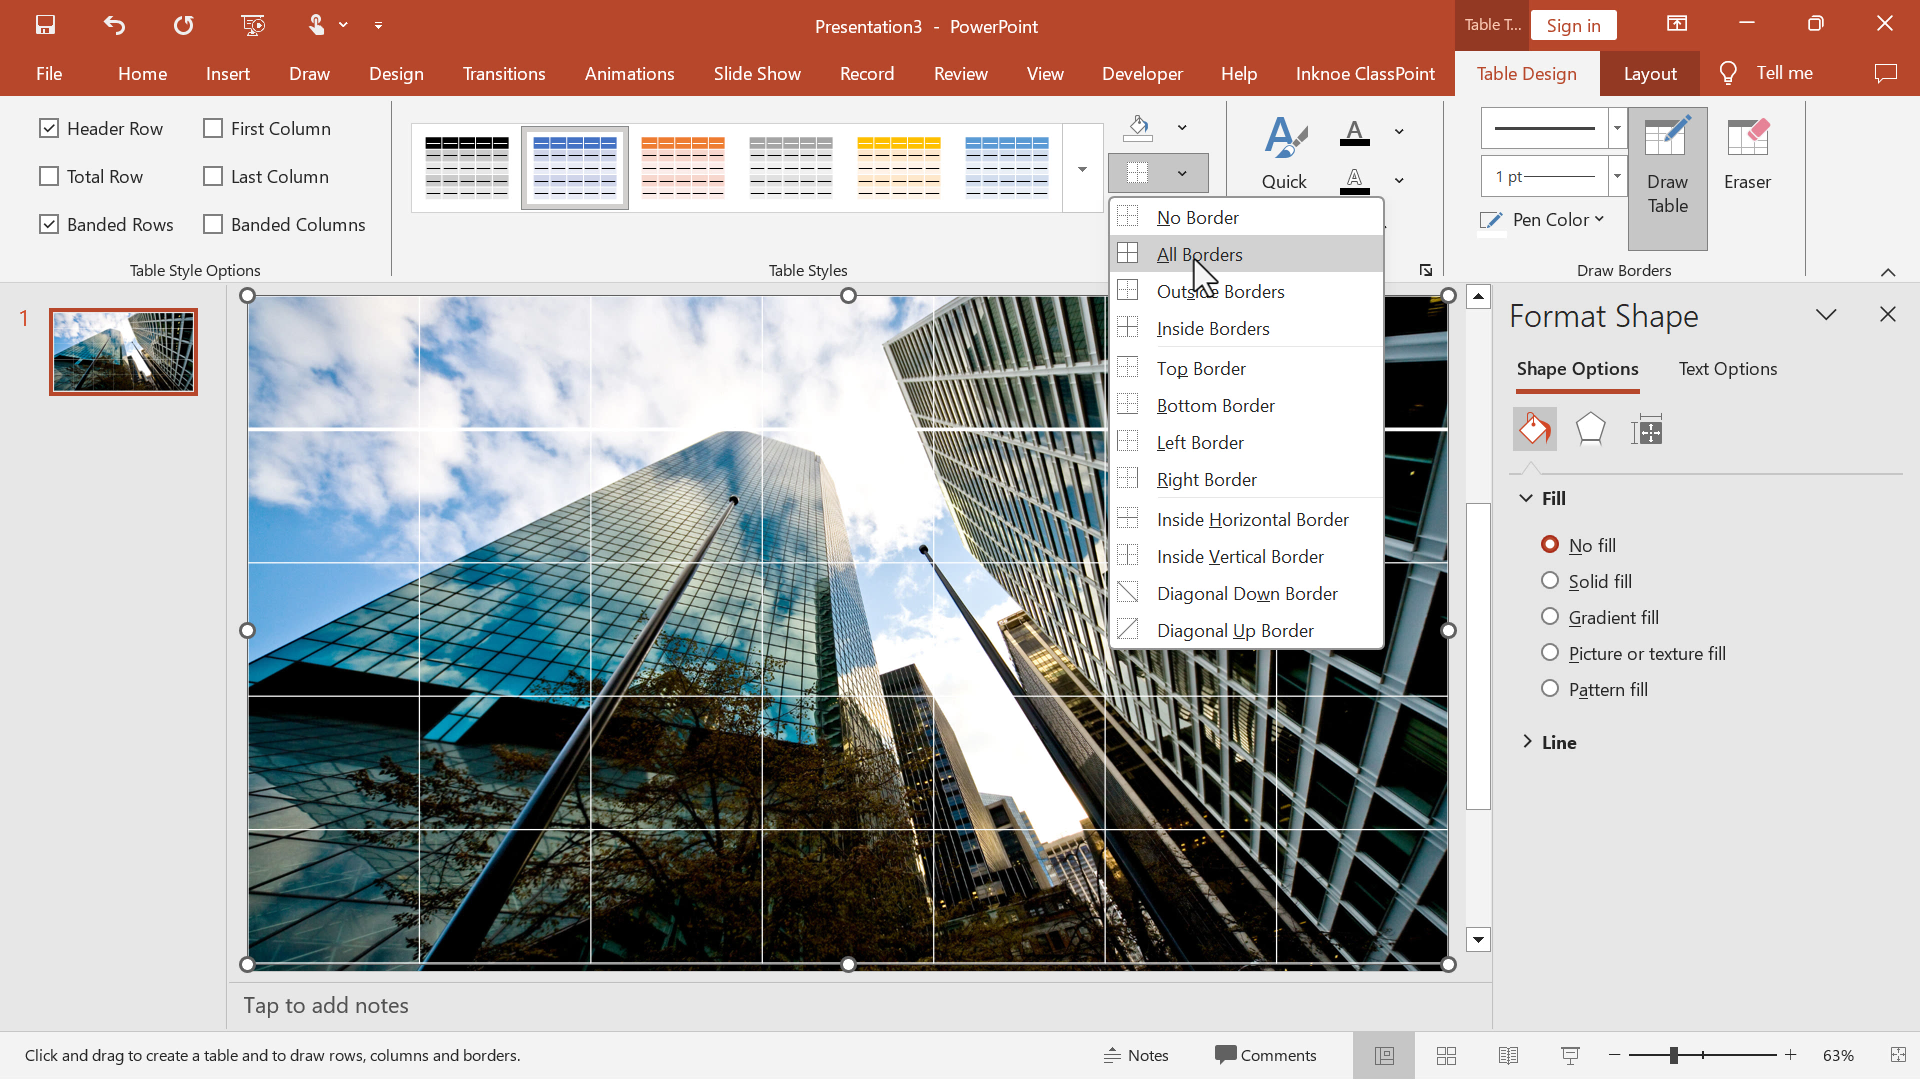
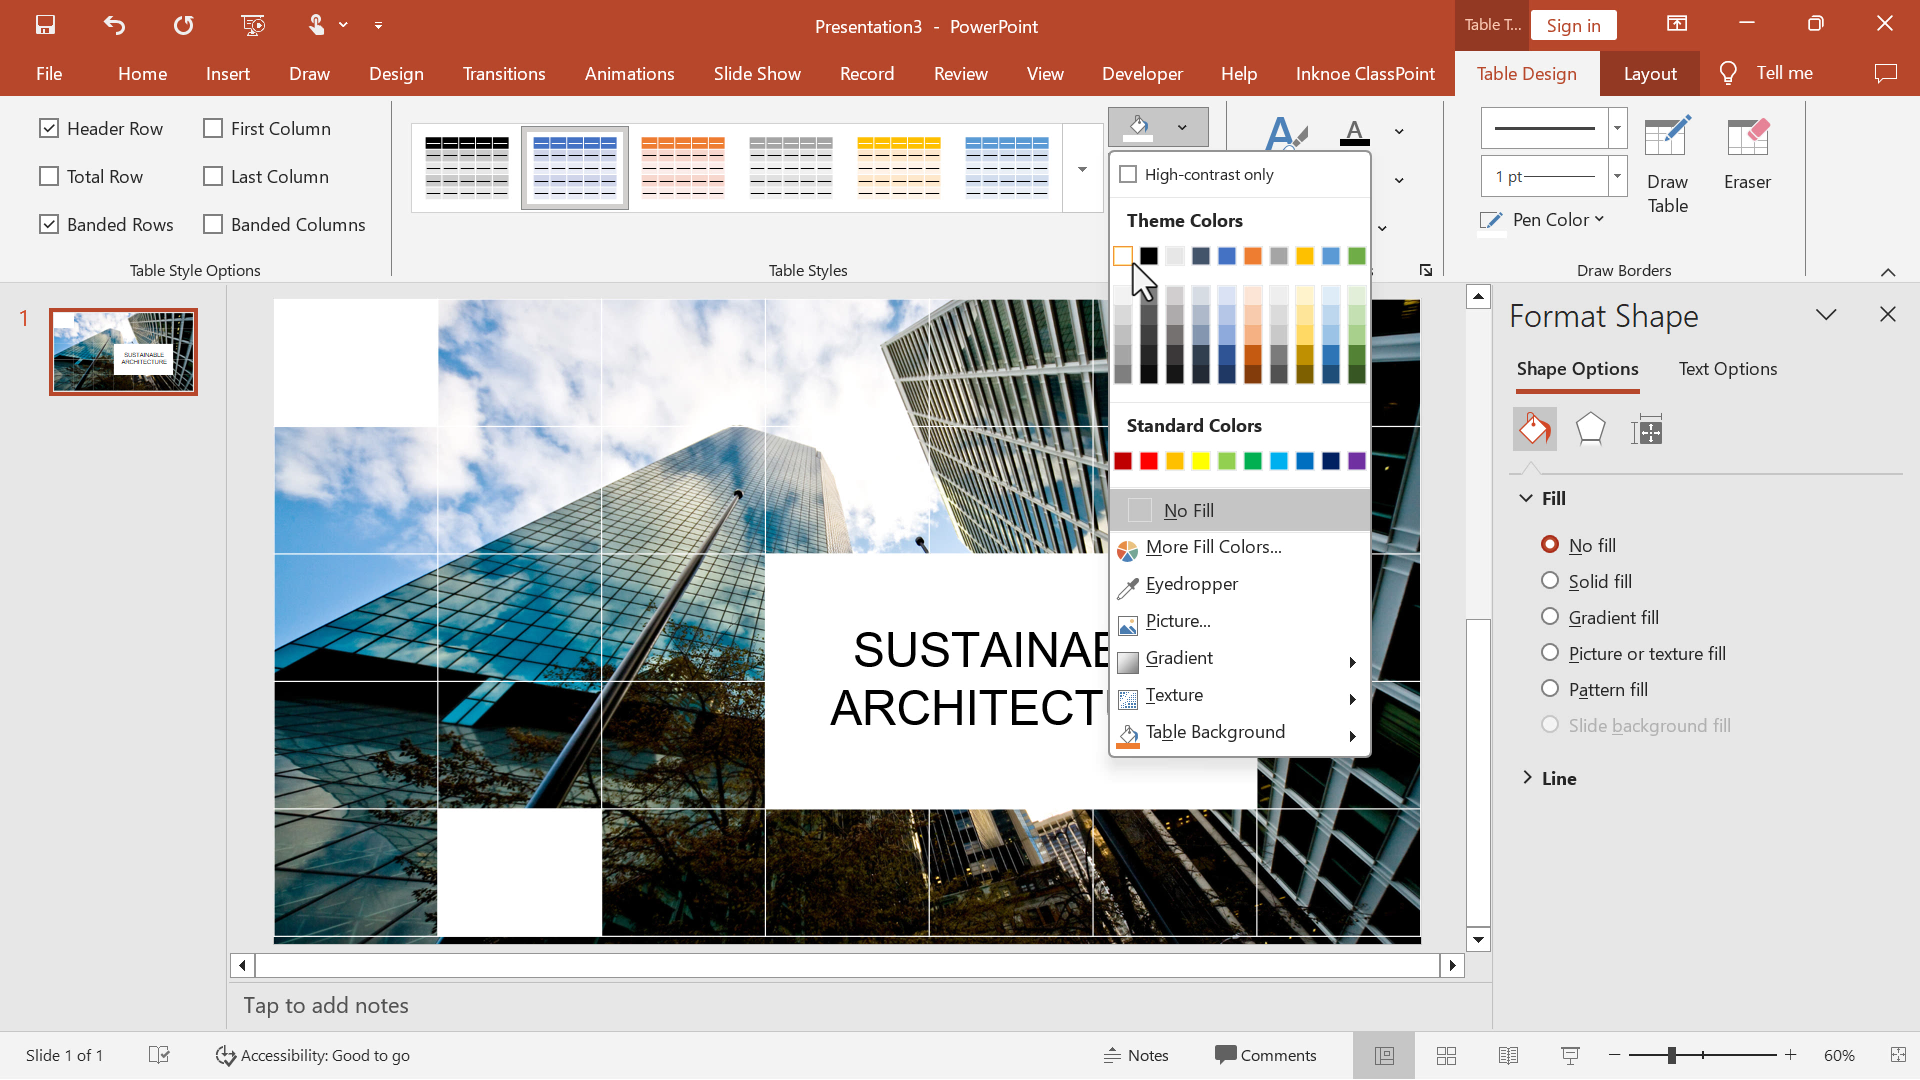
Step 3: Format Table
Select the entire table from the edge, then:
- Set the pen color to white
- Remove the shading to make the table transparent
- Apply borders to all cells
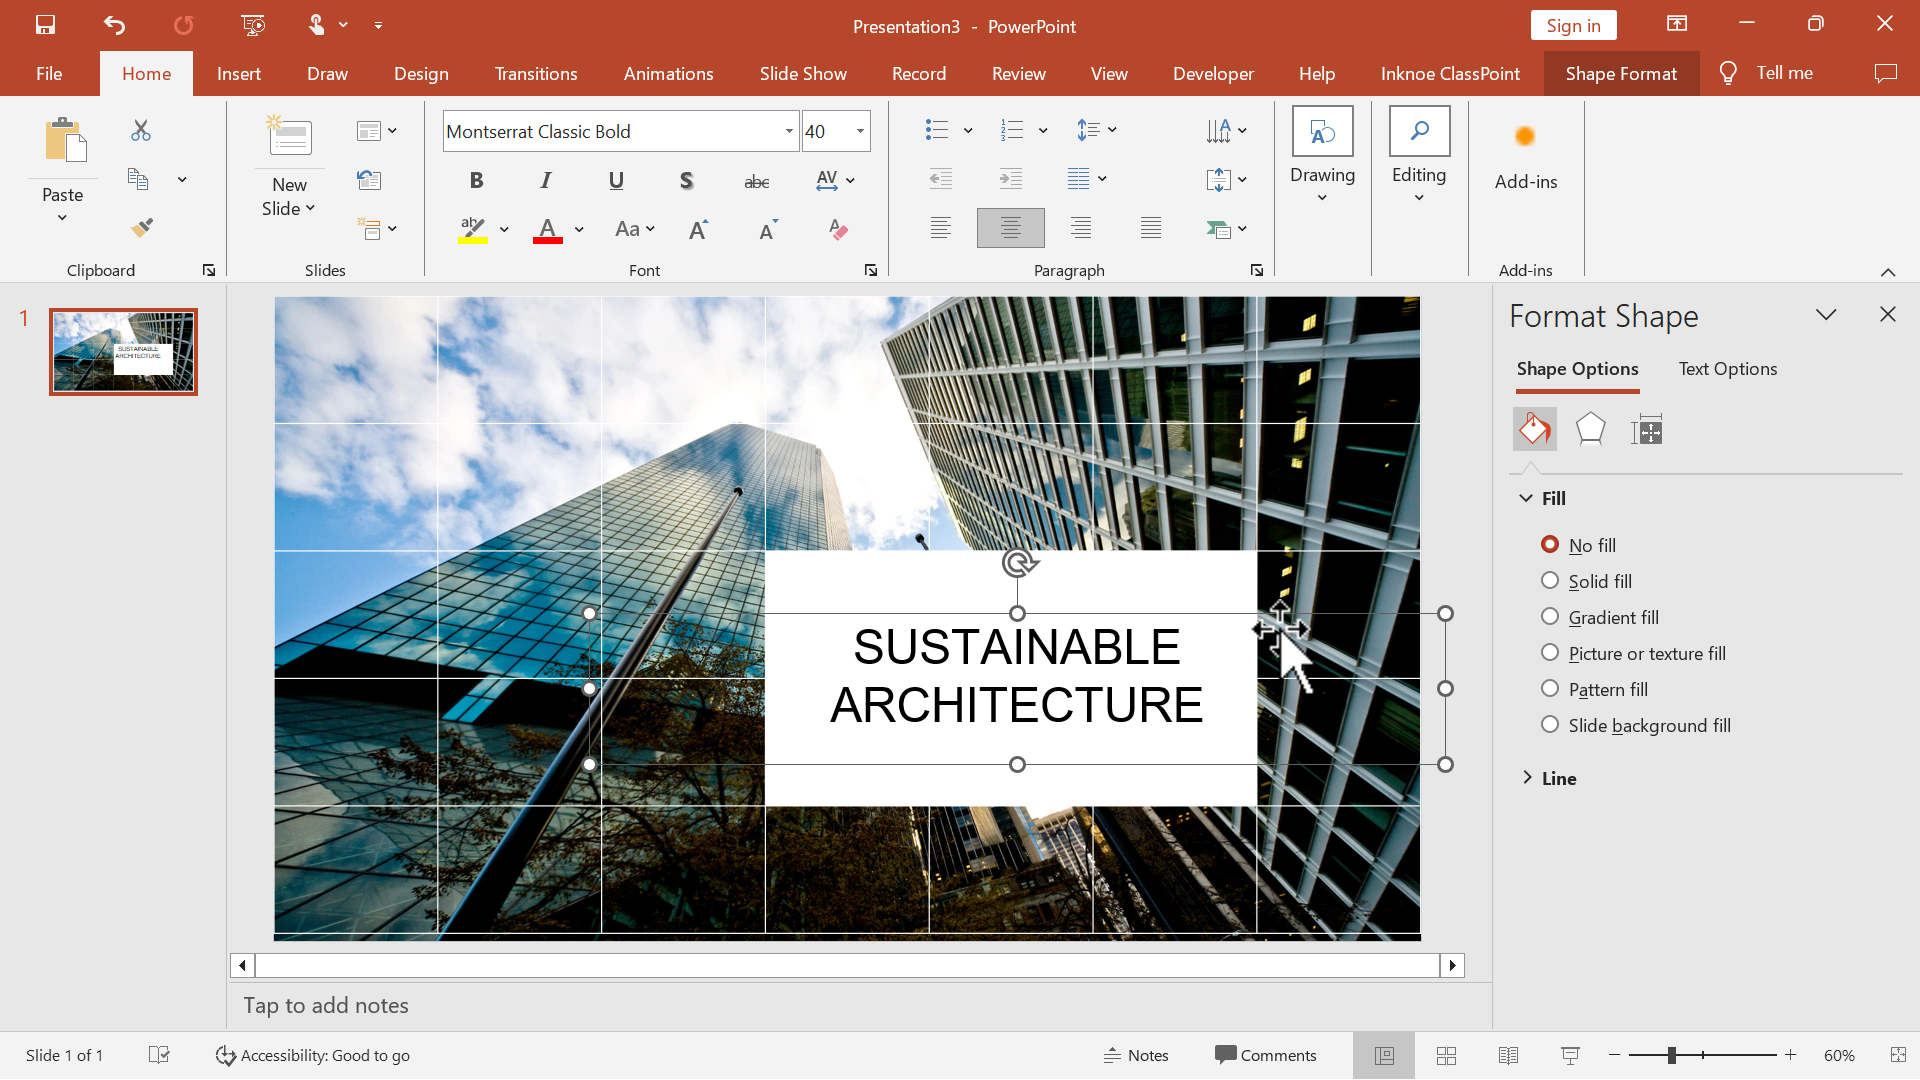
Step 4: Add Text
Choose specific cells for your text. Set the shading of those cells to white and enter your text.
Step 5: Fill More Cells
For a fun visual effect, fill random cells with white shading to add texture!
Step 6: Continue with all Slides
Repeat the process on the next slide, but change the location of your text and randomly colored tiles for variety.
Tip: Try leaving the text boxes blank to add in annotations later. Read on to learn how!
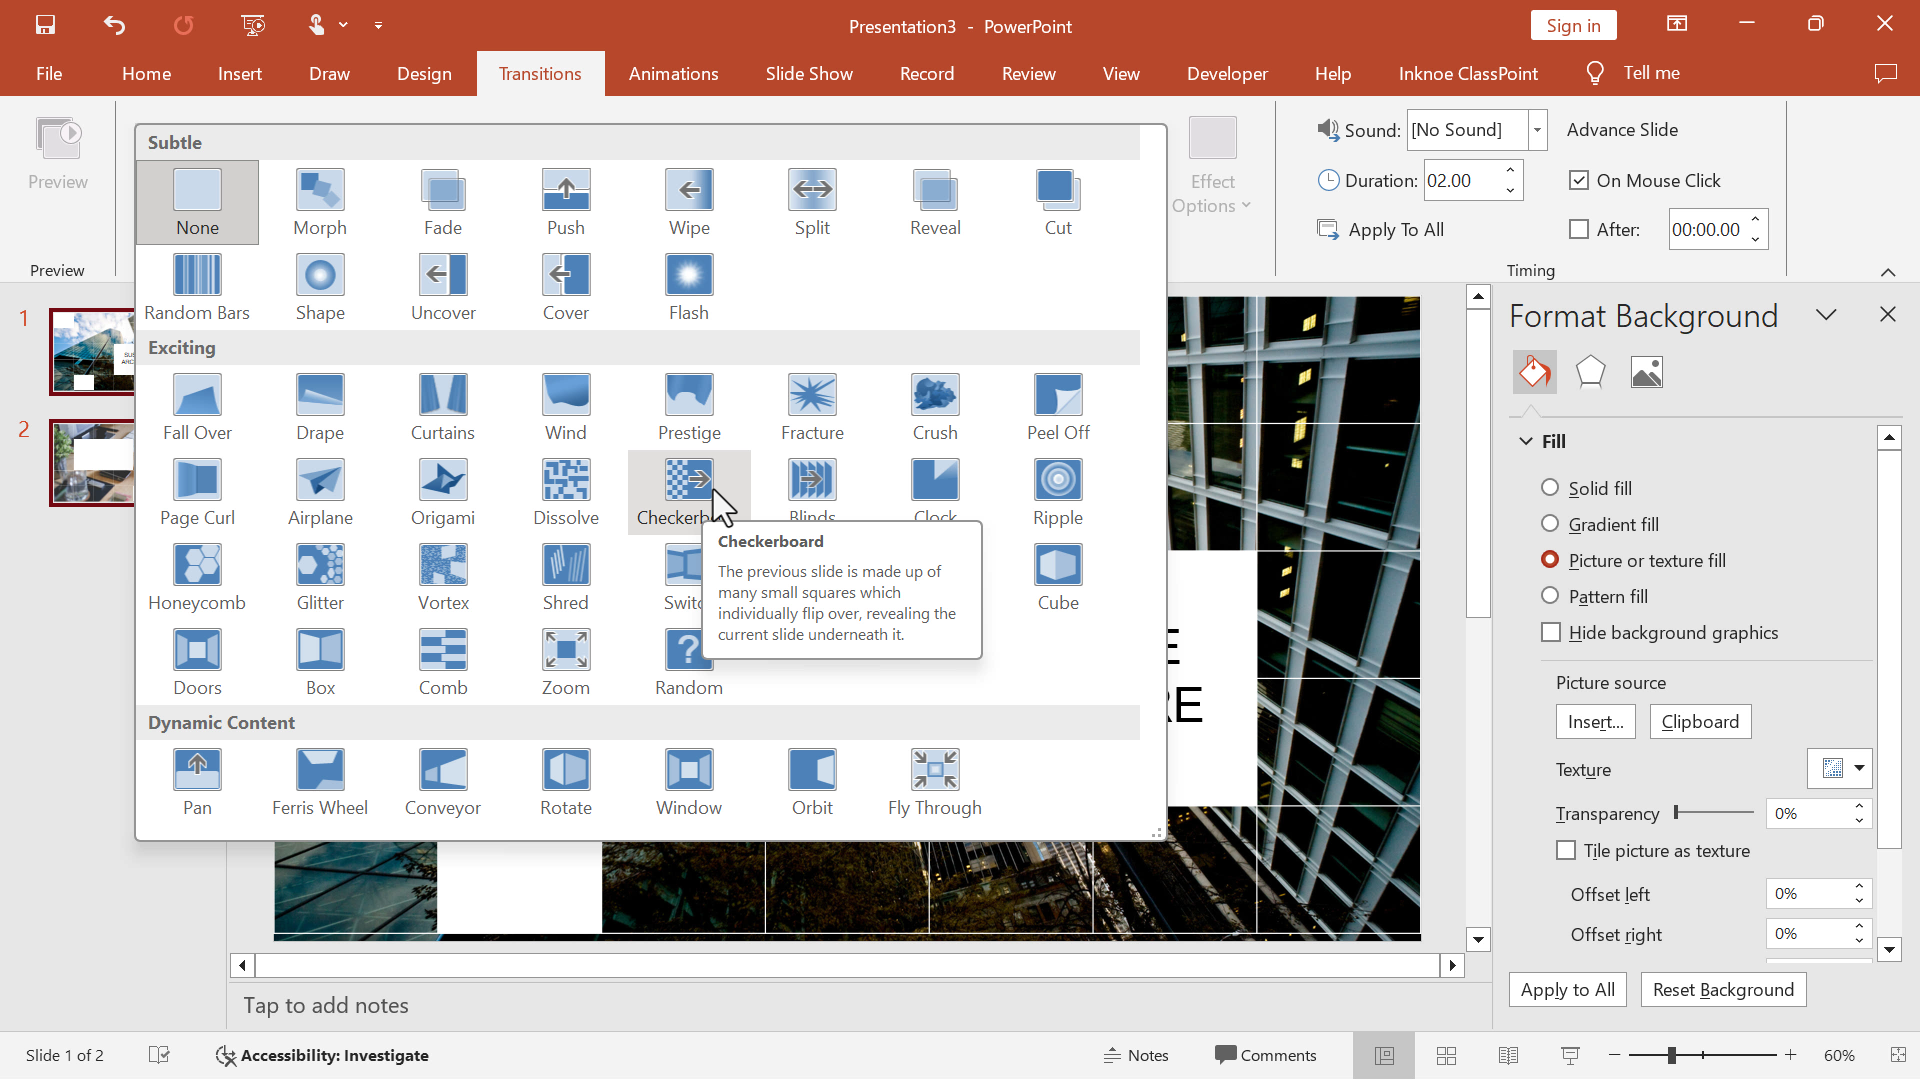
Step 7: Add Transitions
Once all slides are ready, select them all with CTRL + A and apply the Checkerboard transition from the Transitions tab.
Bonus Interactive Tip
Leave some of the white spaces blank and use ClassPoint’s annotation tools during your presentation to fill them in on the spot, keeping your audience engaged!

ClassPoint is a free PowerPoint add-in to make any presentation more interactive and engaging. Once downloaded and installed (it’s free) enter presentation mode, and begin to use the pens, highlighters, shapes, and text boxes.

#2 Comb Transition
The Comb transition offers a sleek sliding effect that’s perfect for emphasizing text over images.

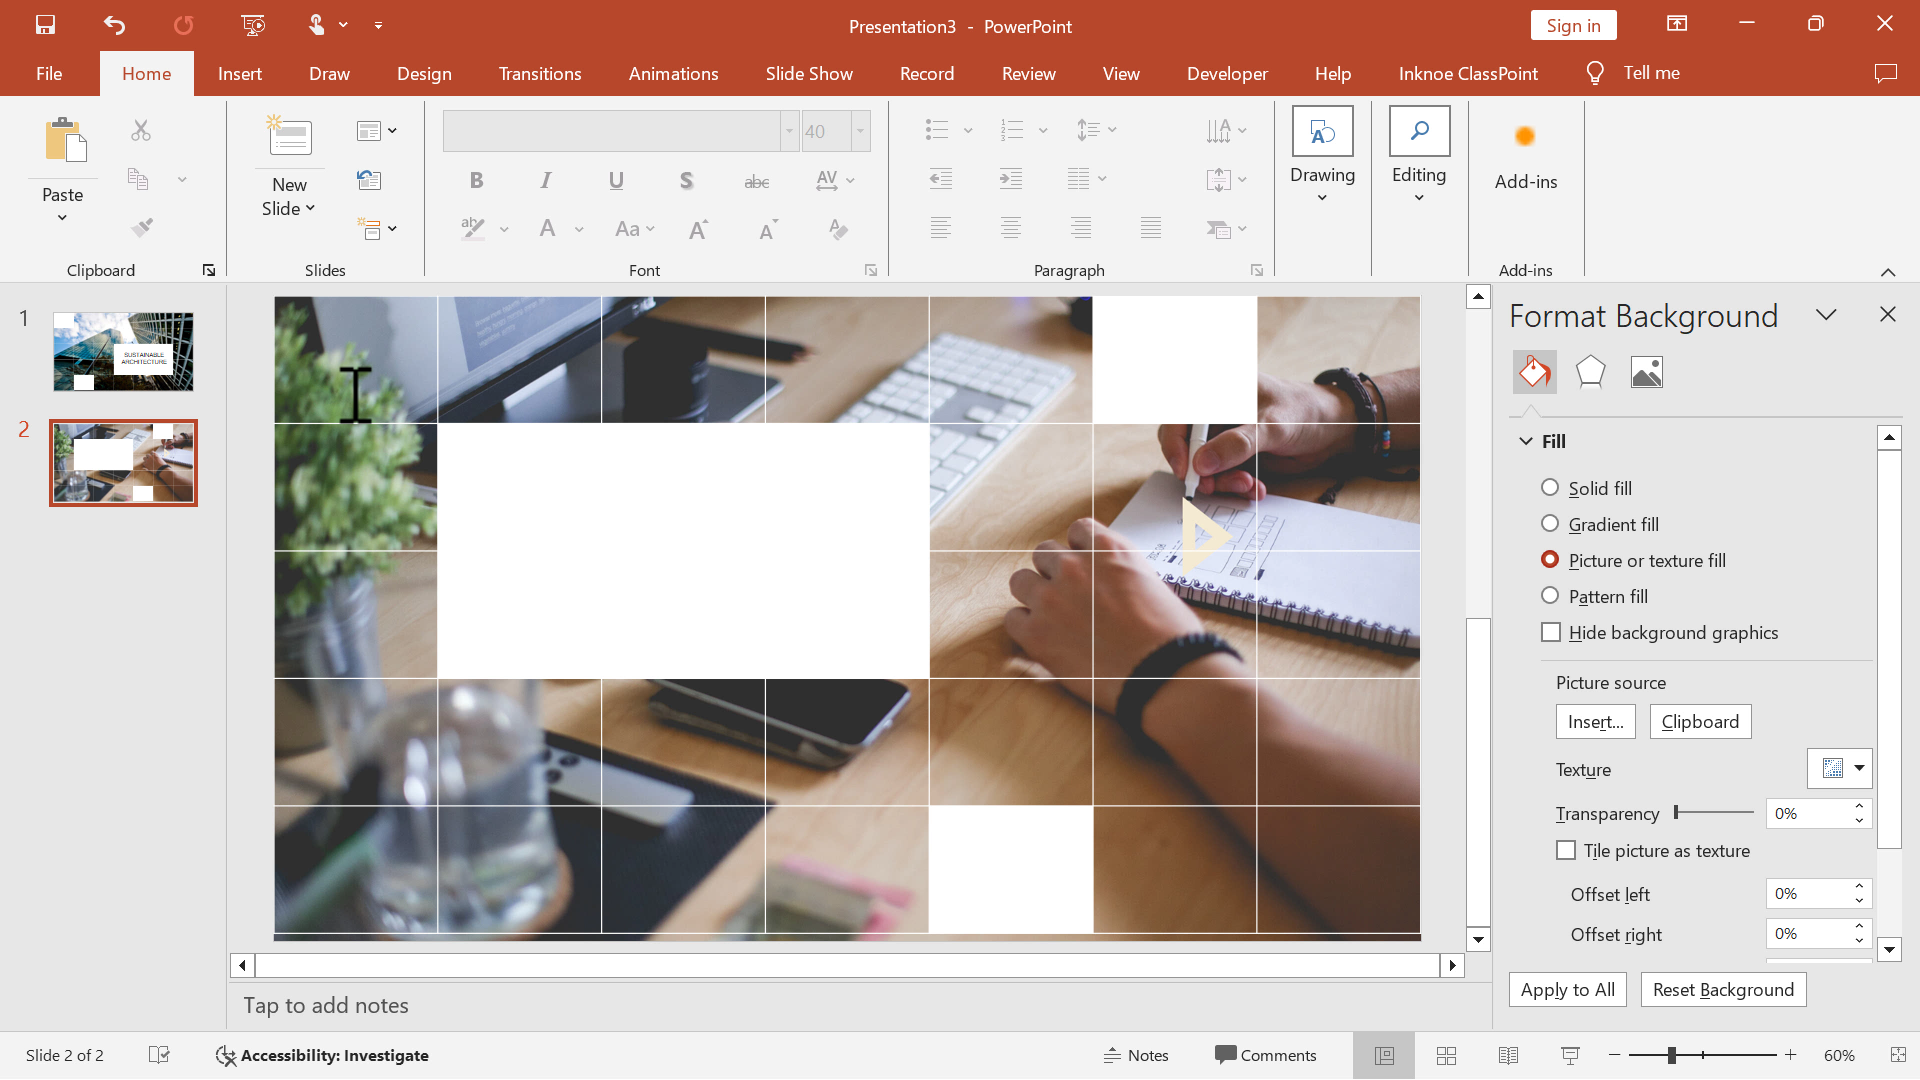
Step 1: Insert a Background Photo
Begin by inserting a photo that you want to highlight in your presentation as the background image.
Step 2: Insert a Table
Insert a 1×7 table and stretch it across the entire slide.
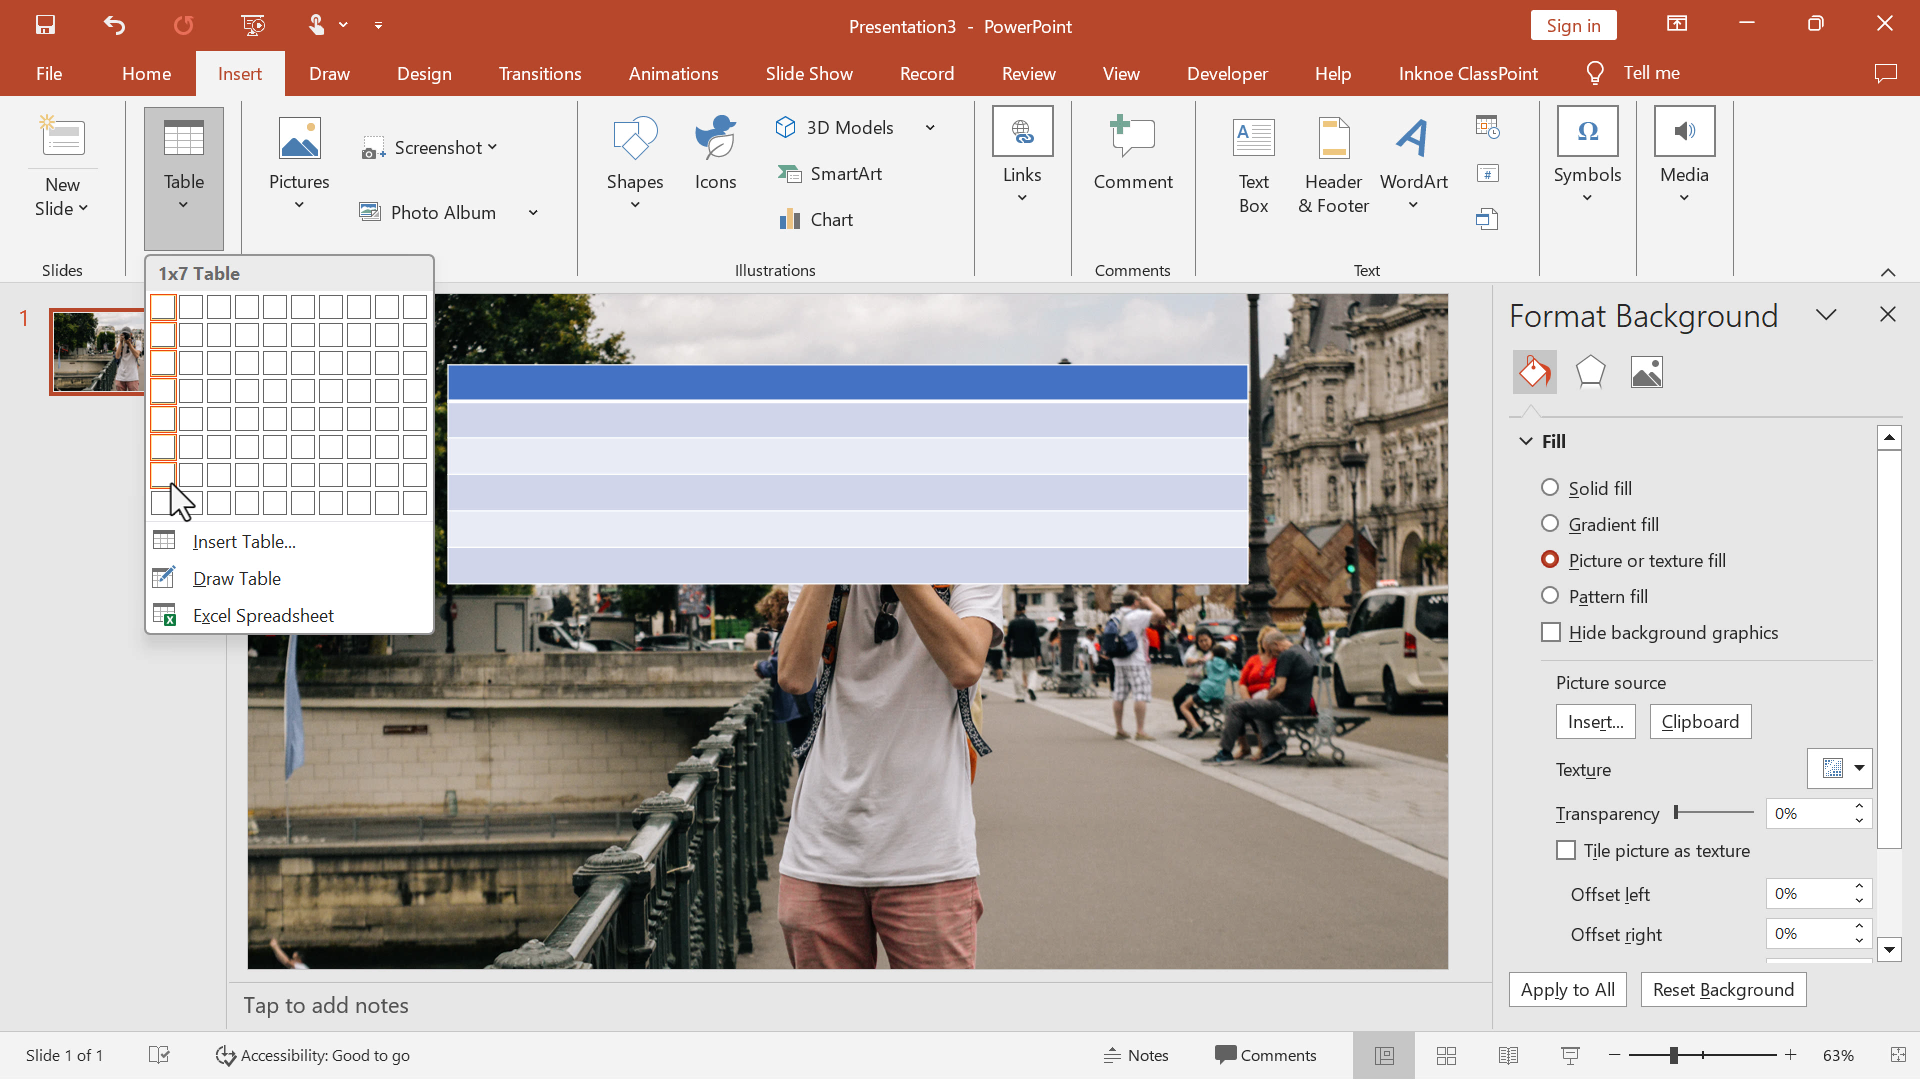
Step 3: Format Table
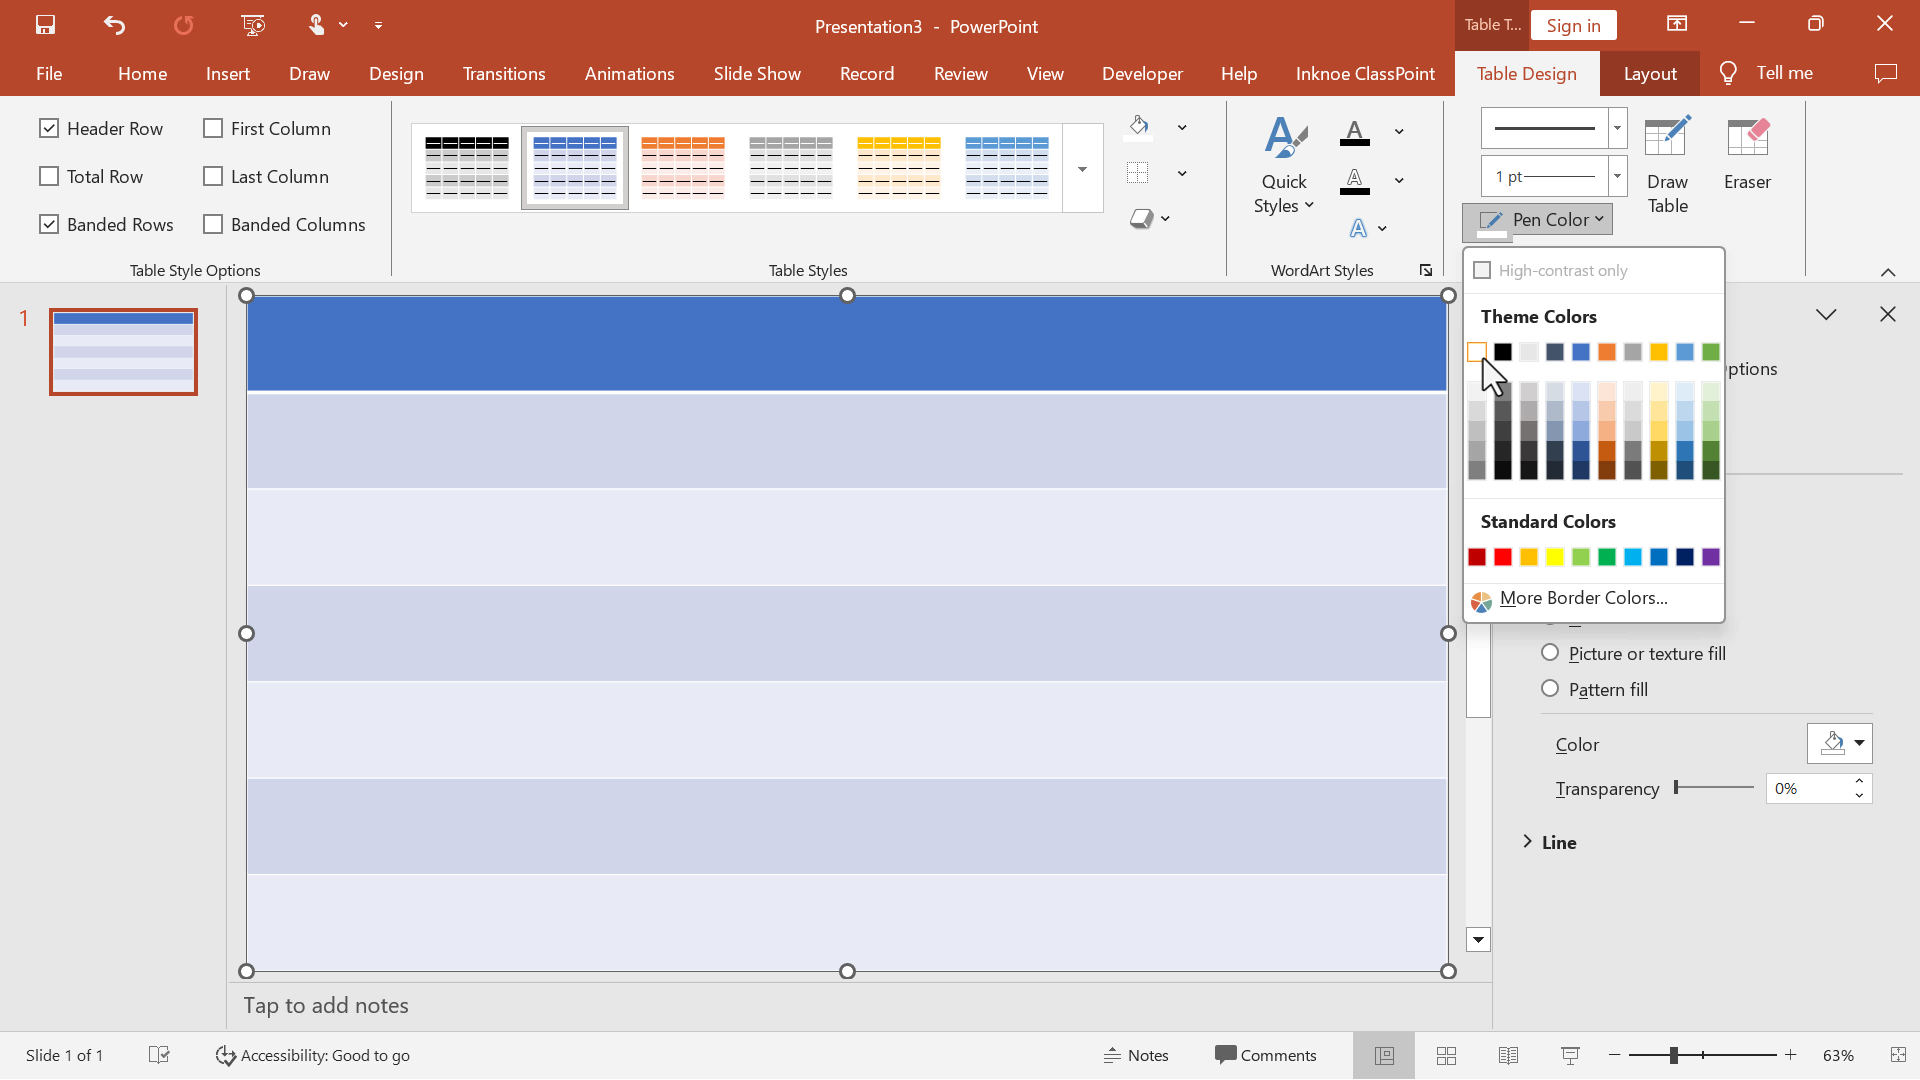
Select the table from the edge then:
- Set the pen color to white
- Apply borders to all cells
- Remove shading from the table to make it transparent
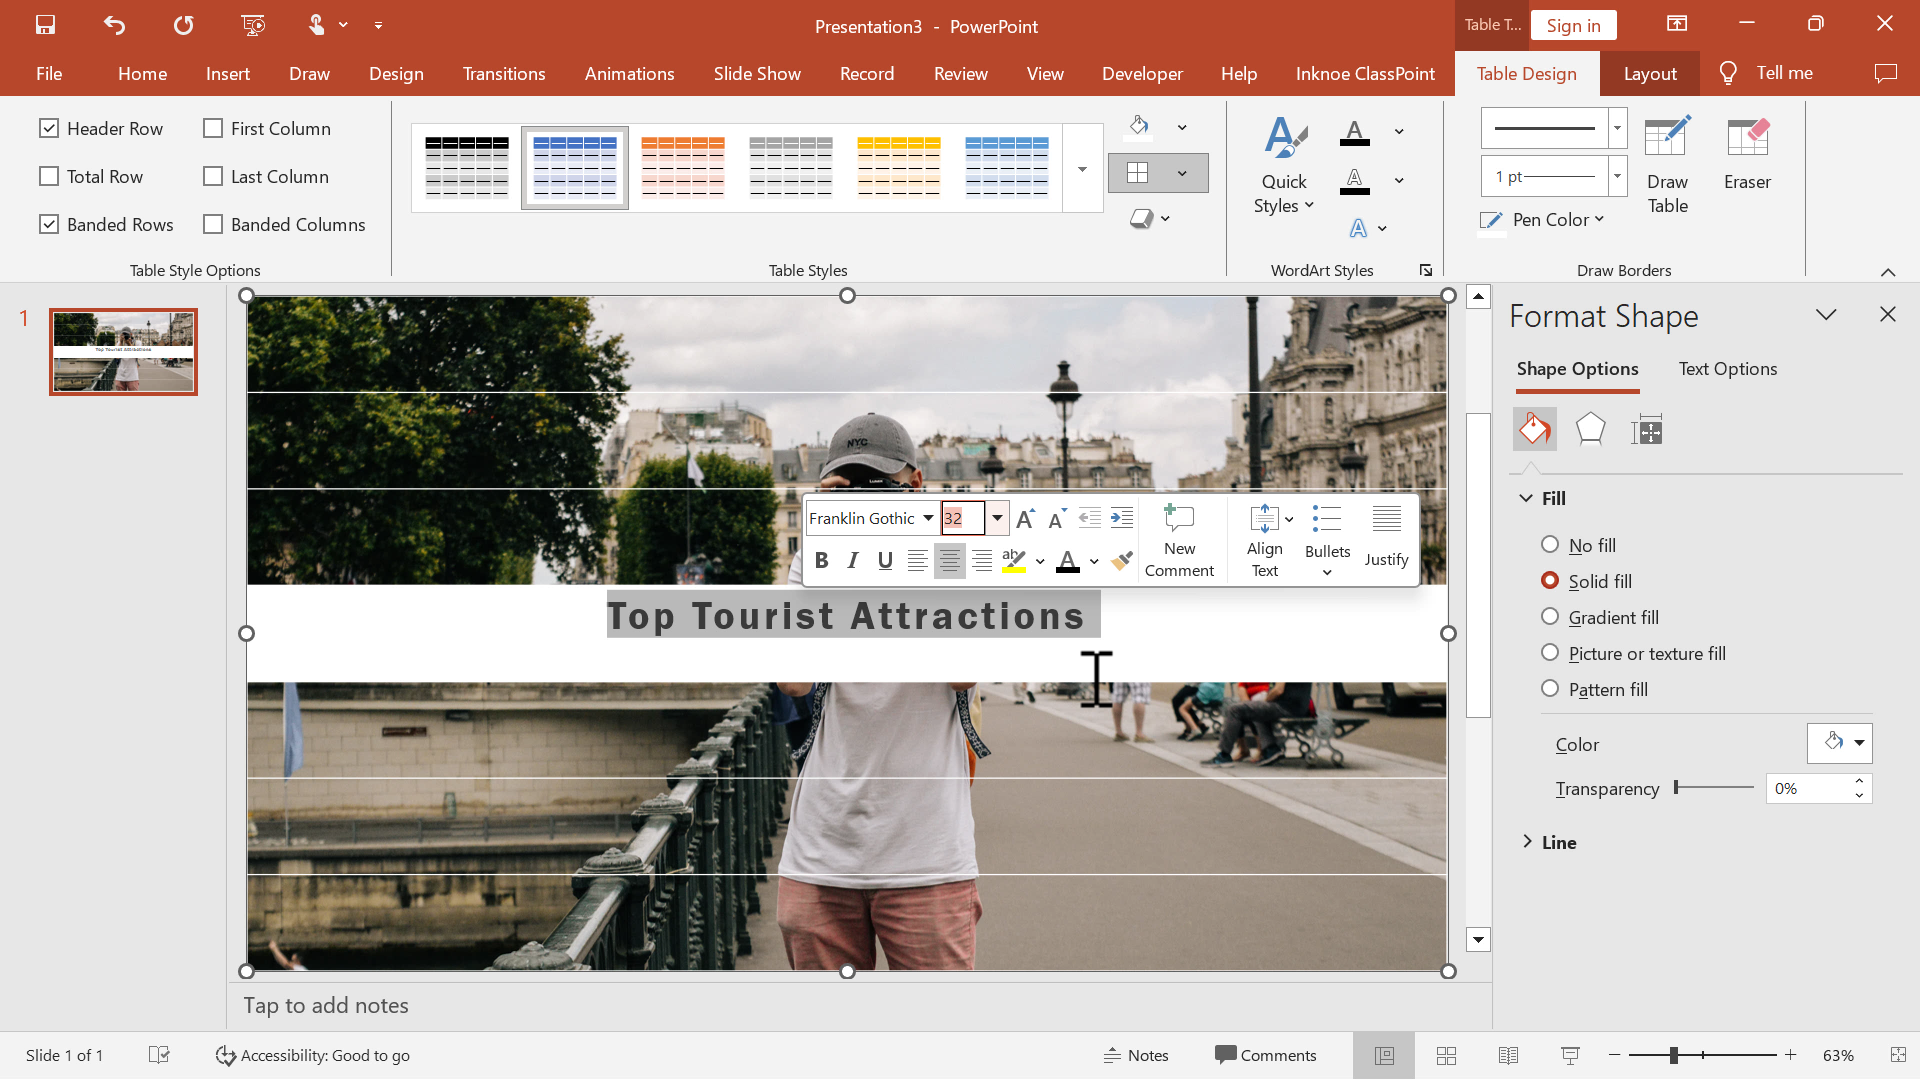
Step 4: Add Text
Choose specific cells for your text, set the shading to white, and add your text content.
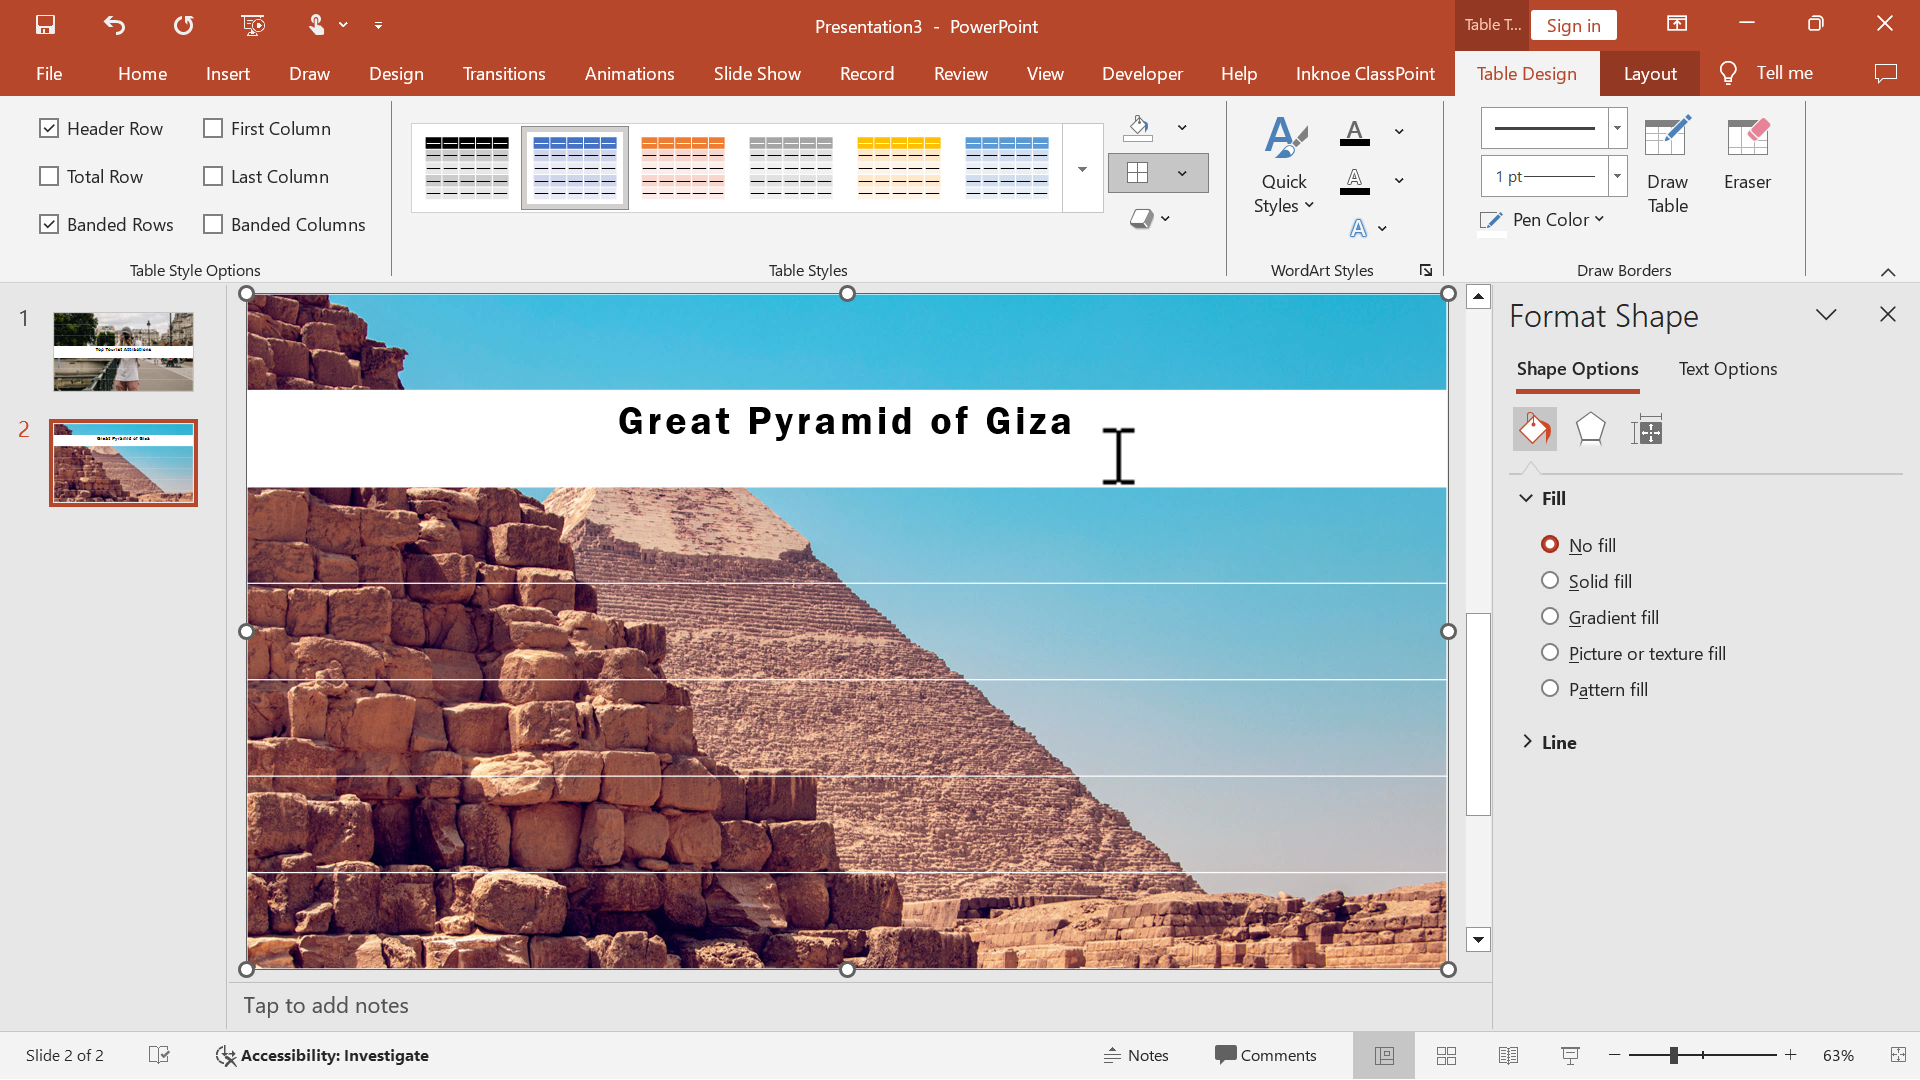
Step 5: Repeat for All Slides
Repeat the process for all slides to maintain consistency.
Step 6: Apply Transition
Select all slides and apply the Comb transition from the PowerPoint Transitions tab.

Bonus Interactive Tip
Enhance your images by opening a live browser during the slideshow and annotating key points directly on the screen for a more interactive experience.
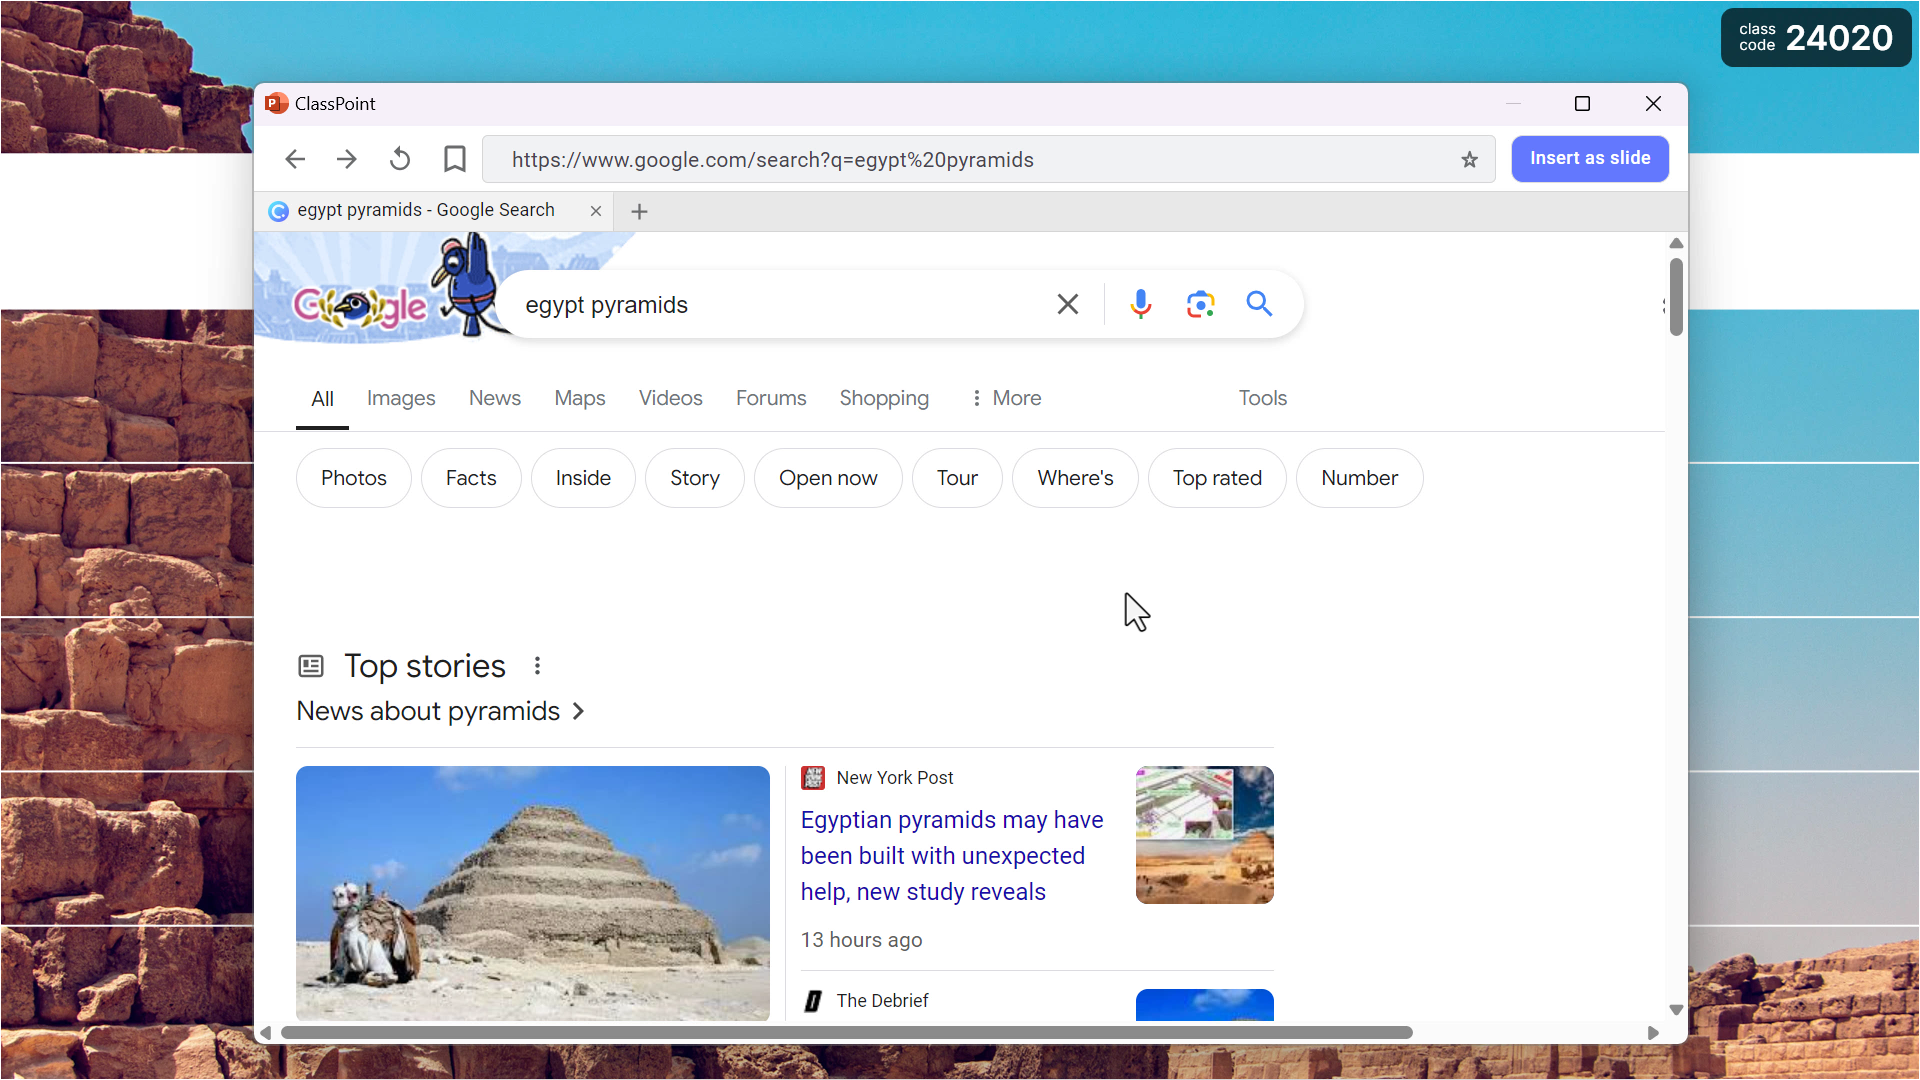
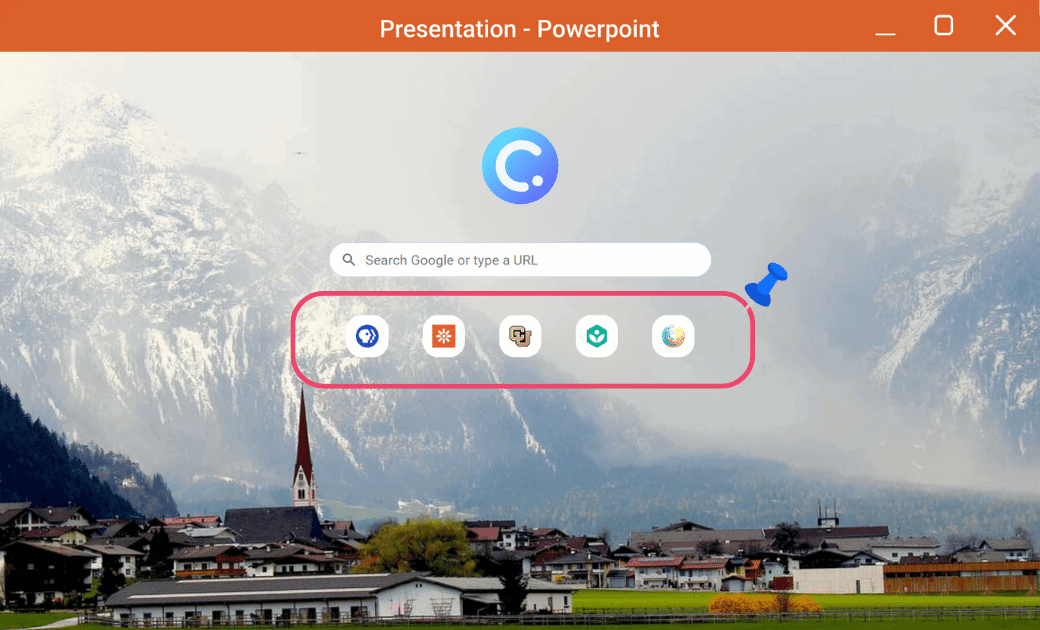
When in your presentation, click on the browser icon on the toolbar and search the web. Open multiple tabs, pin, and bookmark sites.
#3 Page Curl Transition
The Page Curl transition mimics the effect of flipping through a book and adds a touch of sophistication to your presentation.

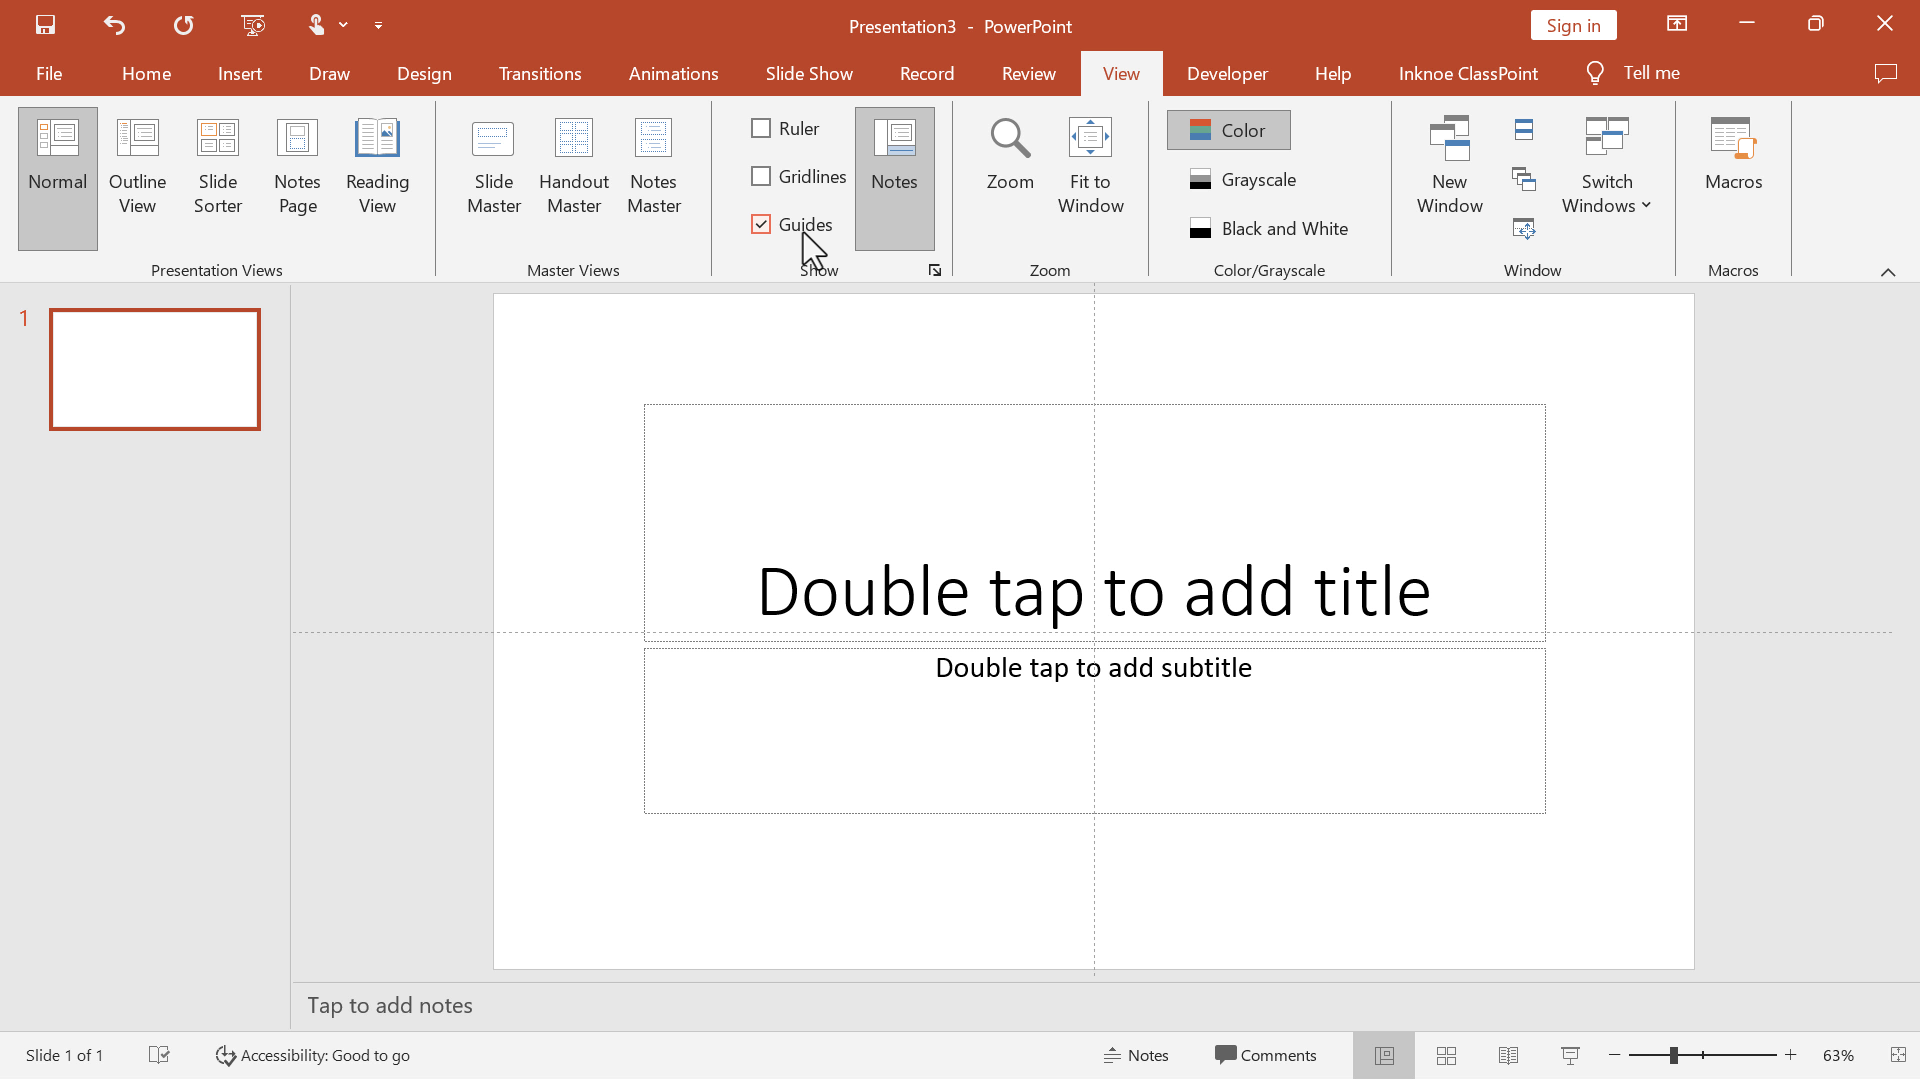
Step 1: View Guides
Go to the View tab in the PowerPoint ribbon and turn on guides to help align the elements we will add in the next steps.
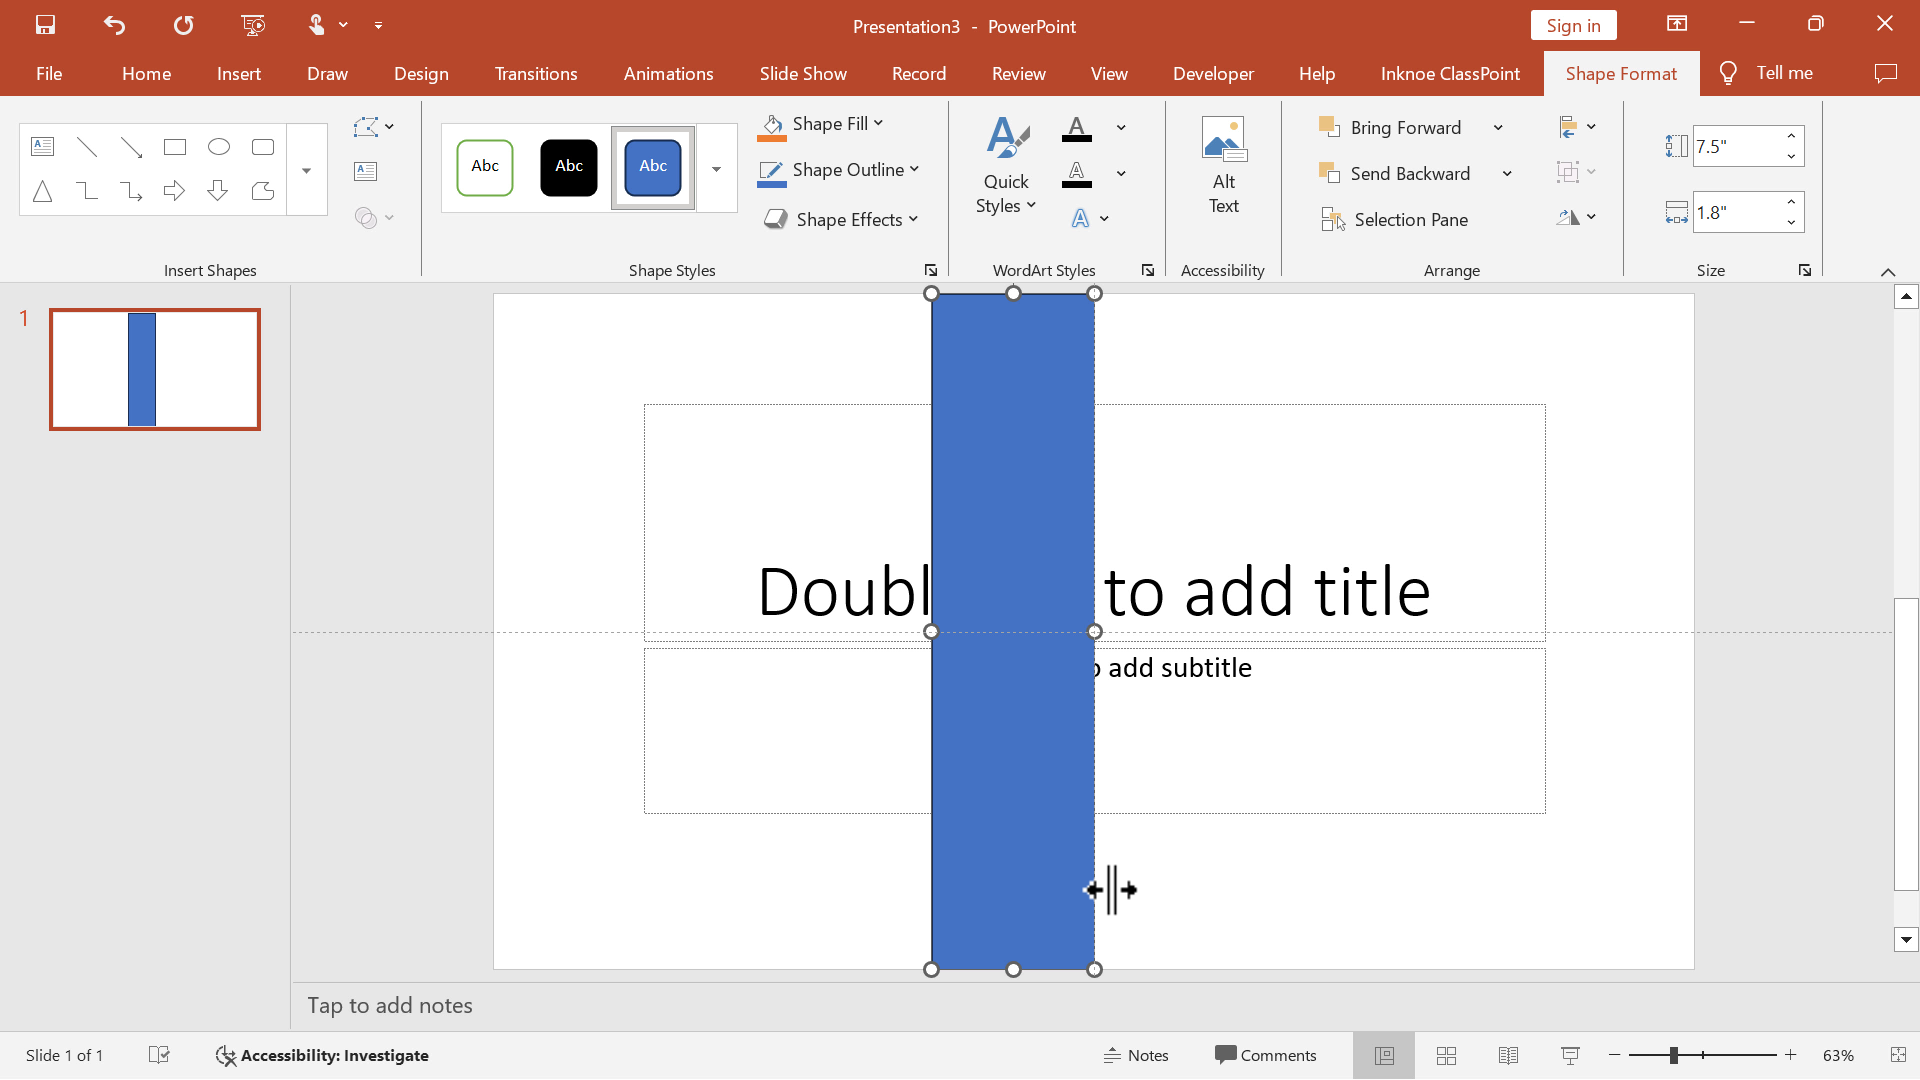
Step 2: Insert Shape
Add a thin, long rectangle covering the left half of the slide, using the guides to help.
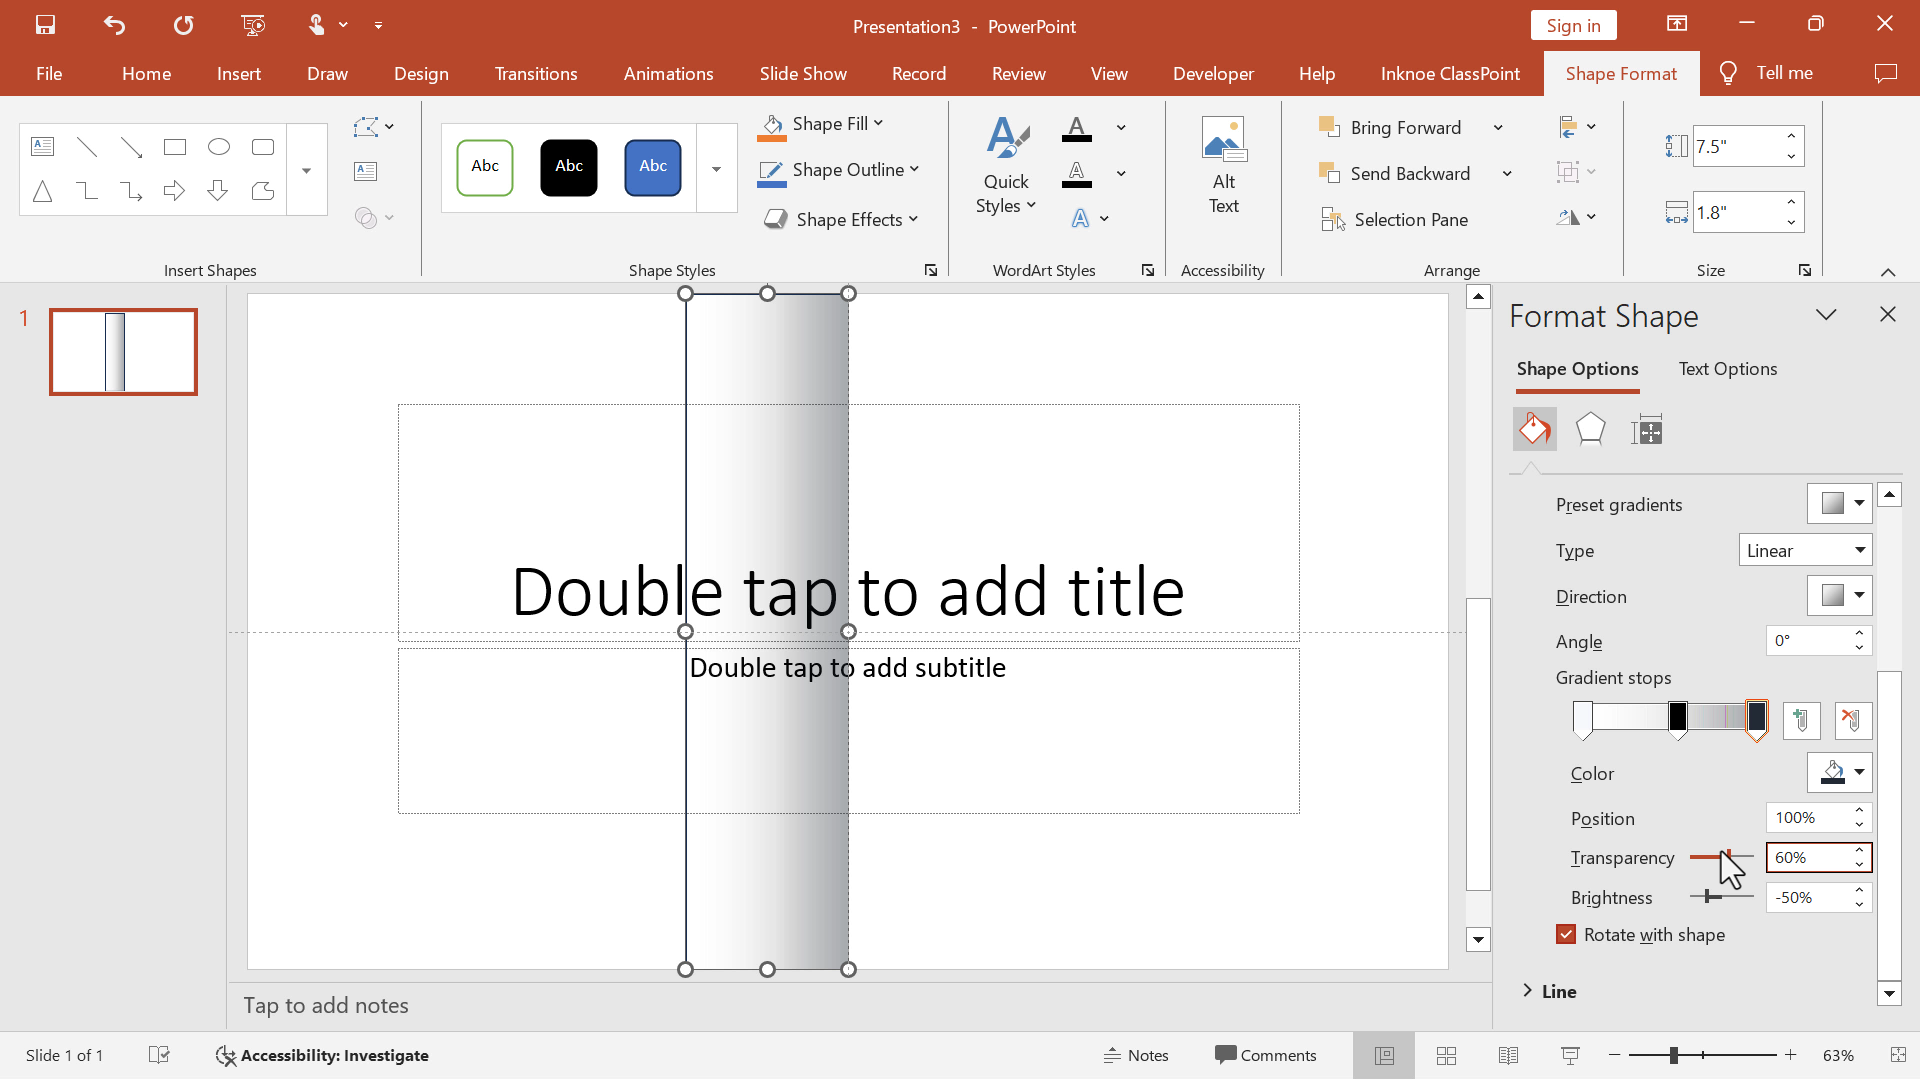
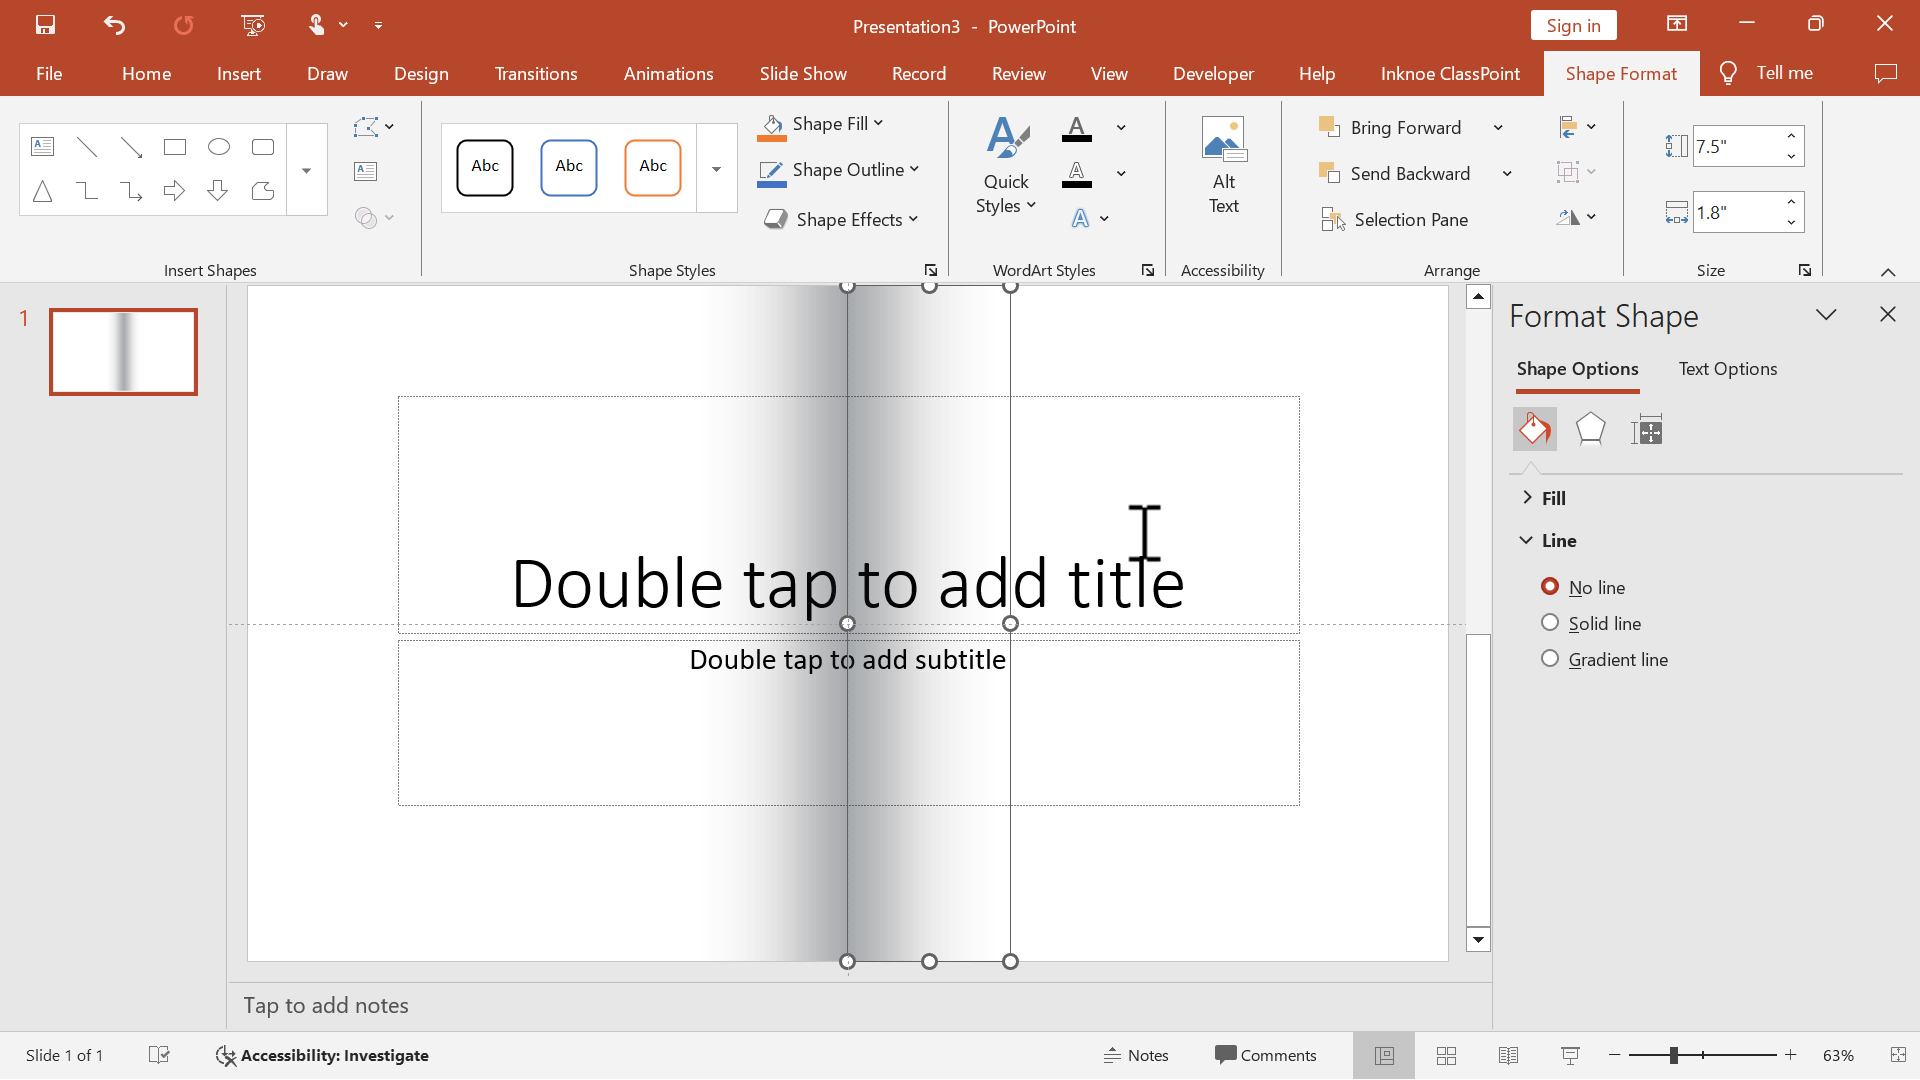
Step 3: Format the Shape
First, apply a gradient fill. Then:
- Remove one gradient arrow
- Set the first arrow’s transparency to 100%
- Change the the second arrow color to black and 90% transparency
- Change the third arrow to black and 60% transparency
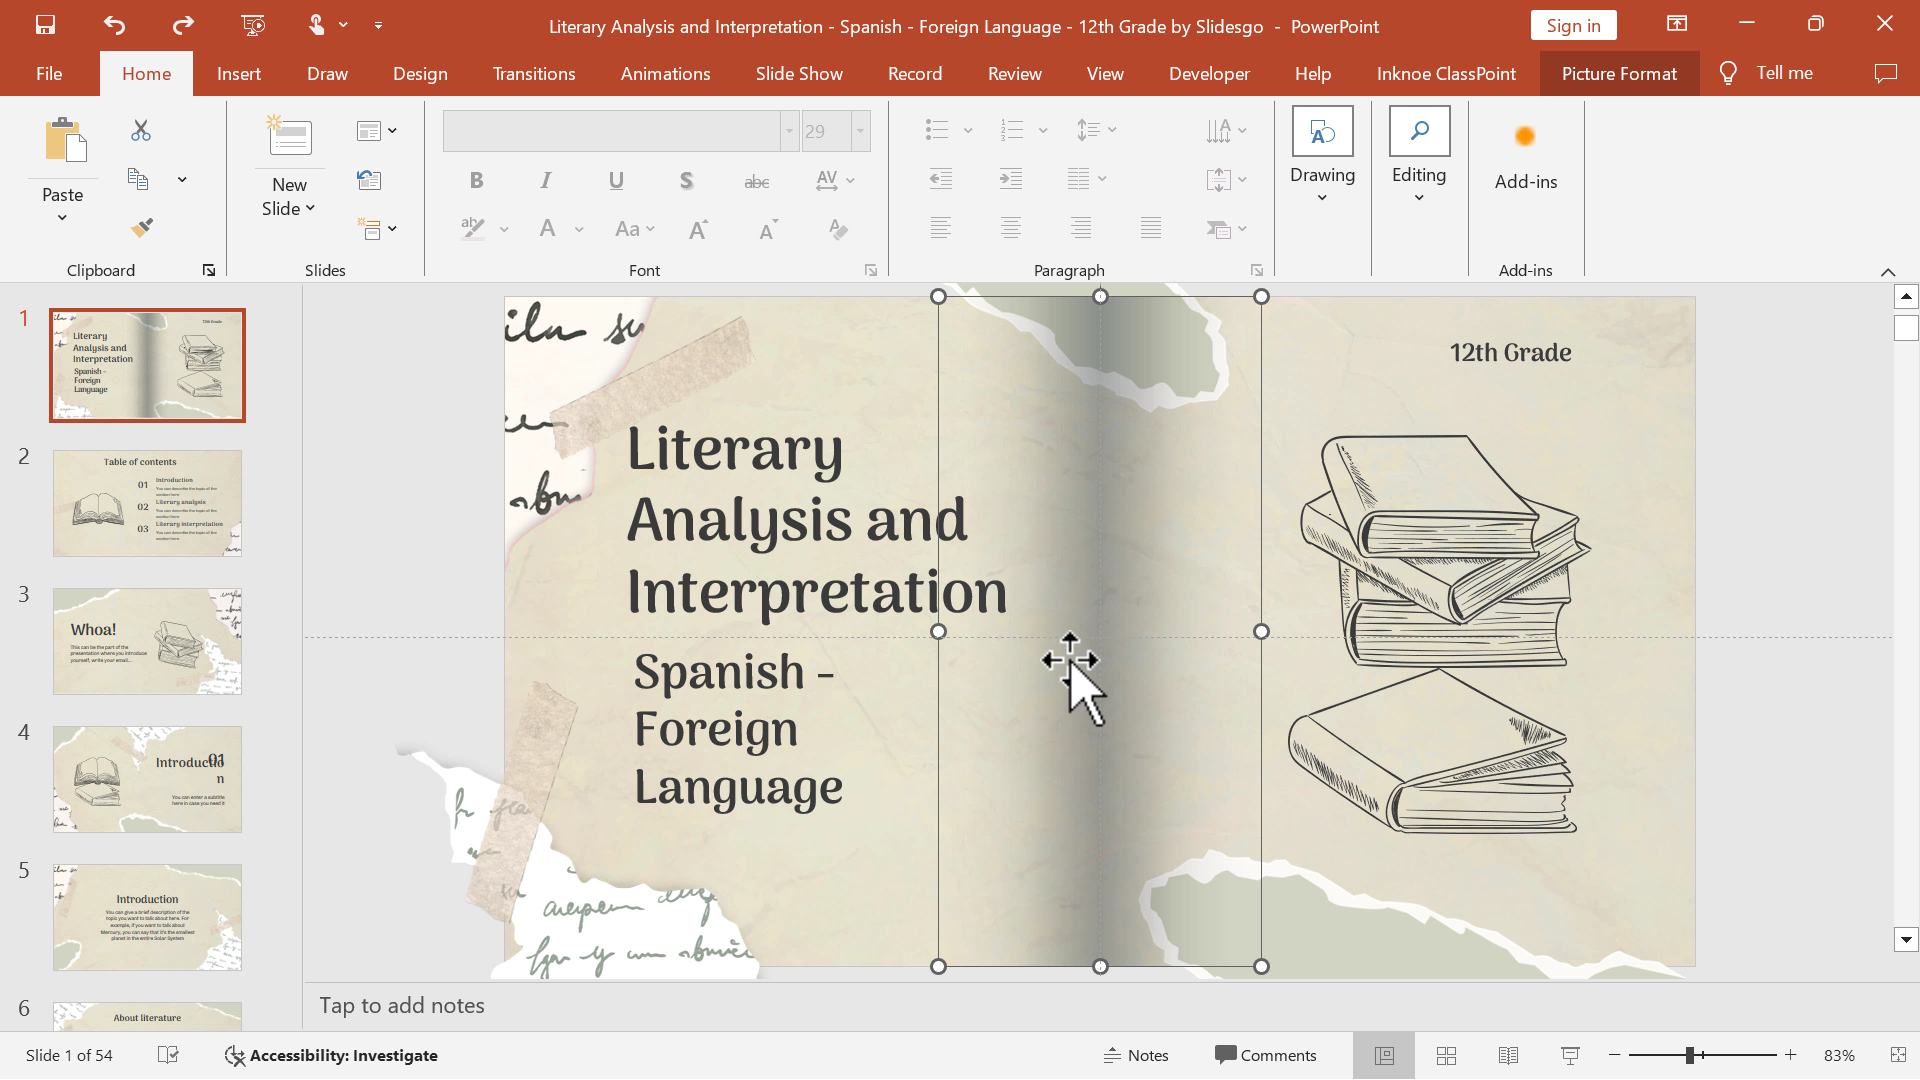
Step 4: Duplicate Shape
Duplicate the shape and flip it horizontally to cover the right half of the slide.
Step 5: Add the Content
Now, add in text boxes to finish creating your slides.
Step 6: Duplicate Slides
Continue to duplicate the slides and adjust your text for the rest of the slides in your presentation.
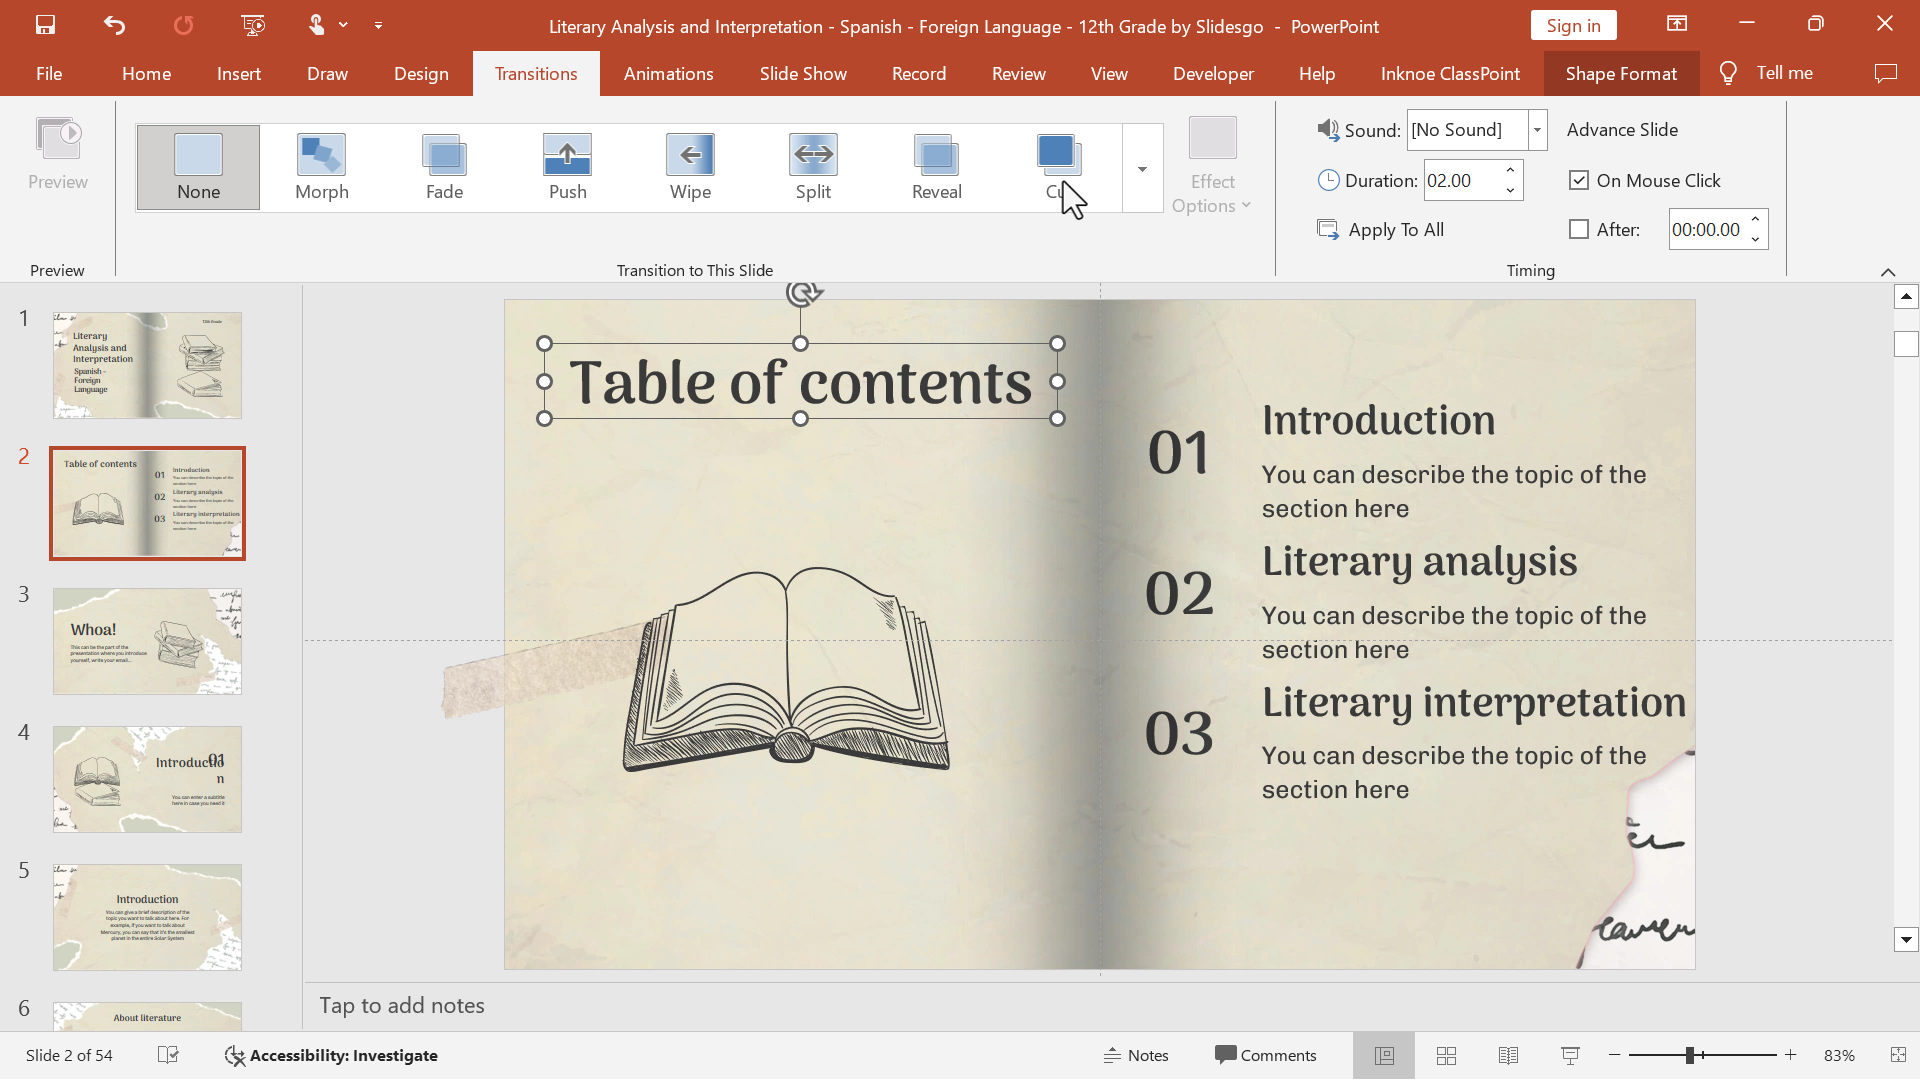
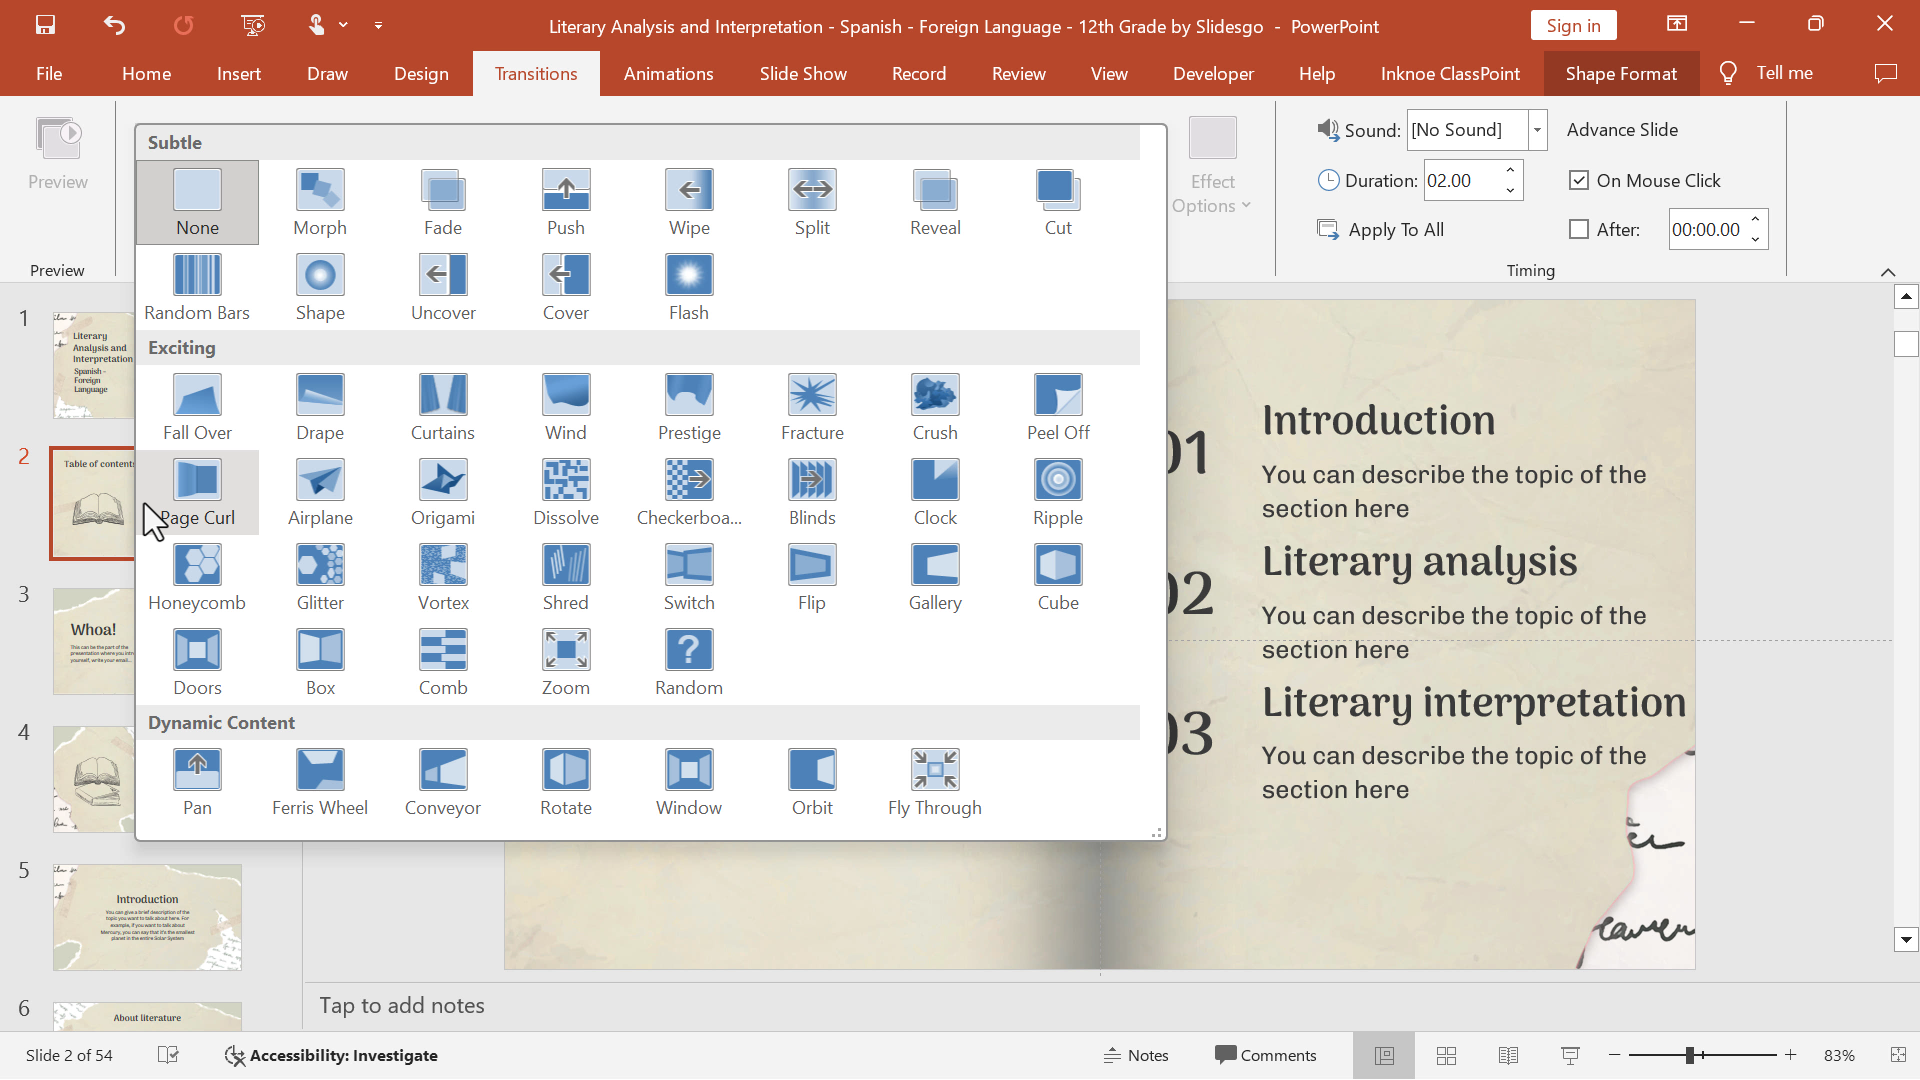
Step 7: Apply Transition
Select all slides and apply the Page Curl transition from the PowerPoint Transitions tab.
Bonus Interactive Tip
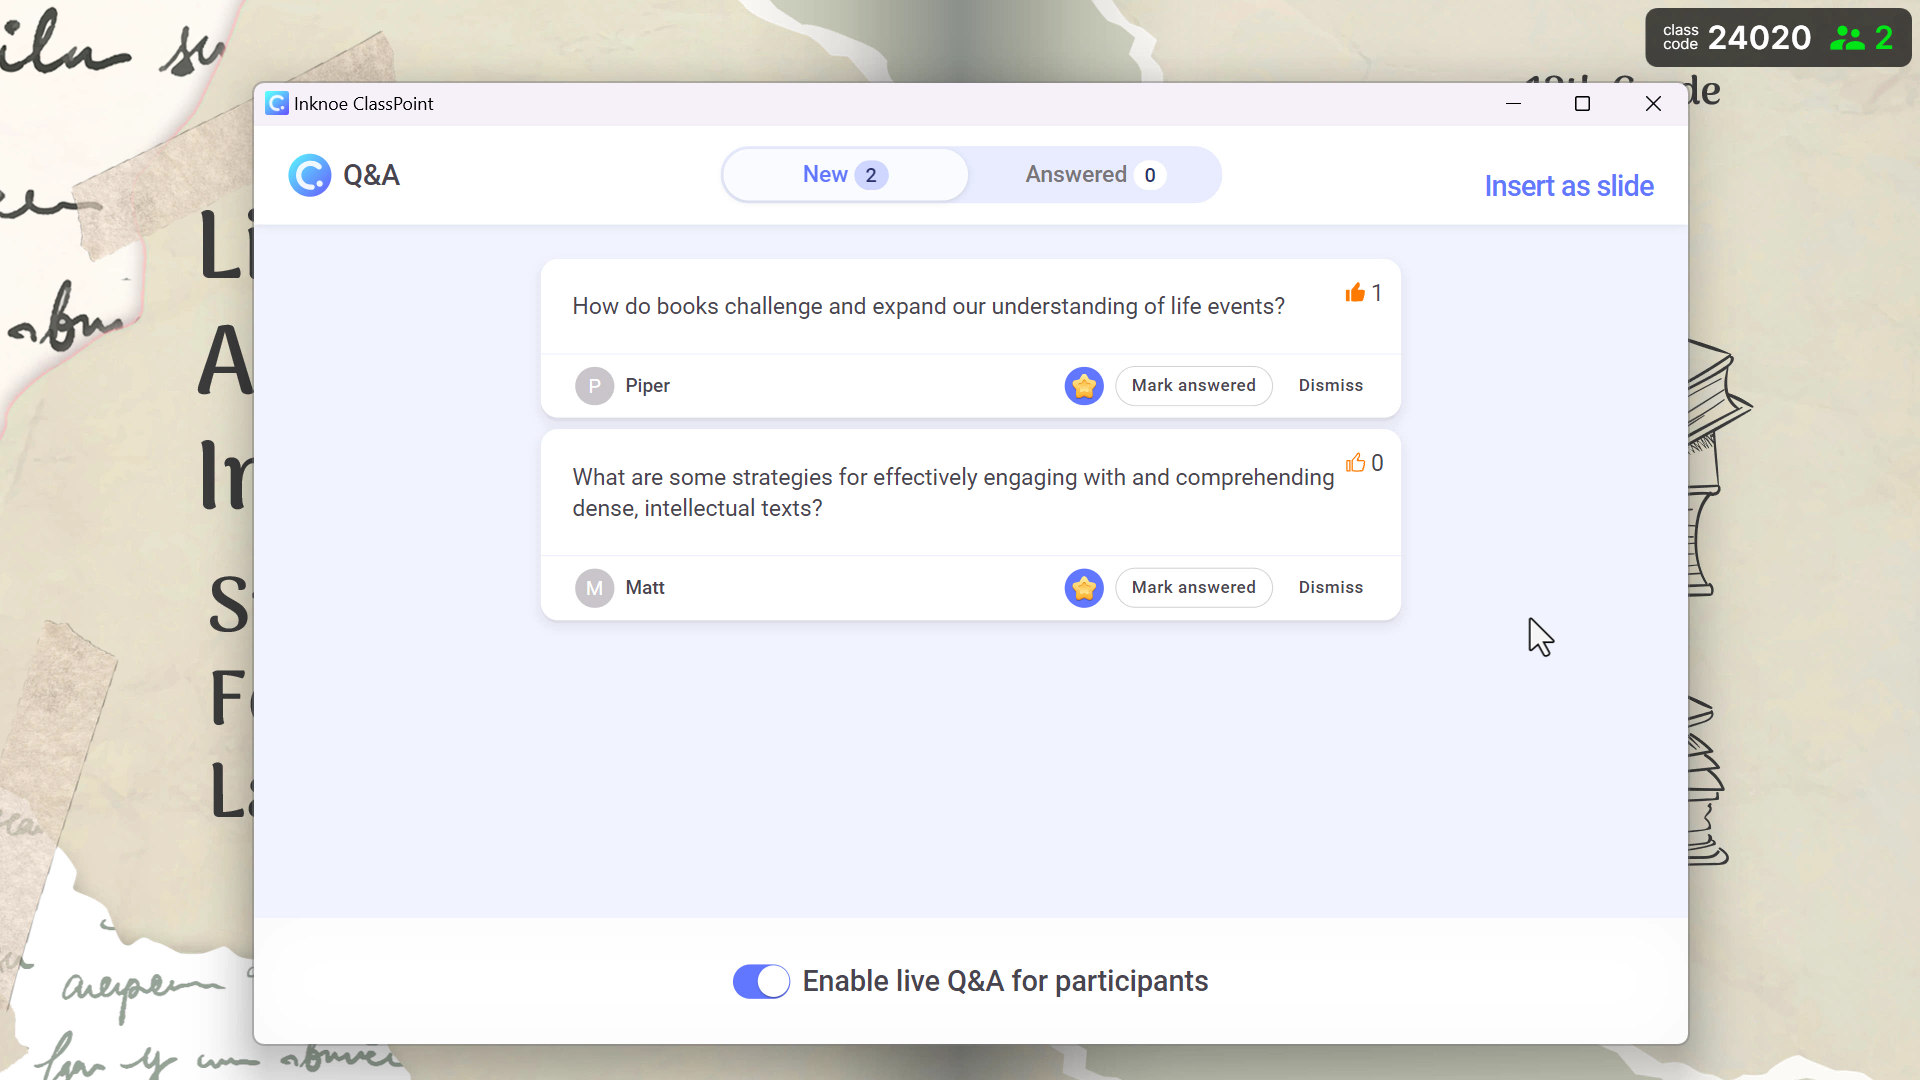
Between sections, engage your audience by running live Q&A sessions using ClassPoint’s features, where they can submit questions directly to your presentation.
This is a ClassPoint Premium feature! Fill out the form to learn more and chat with our team.
Get in Touch
ClassPoint Premium is perfect for organizations looking for customized, interactive PowerPoint presentations. Get in touch to learn more
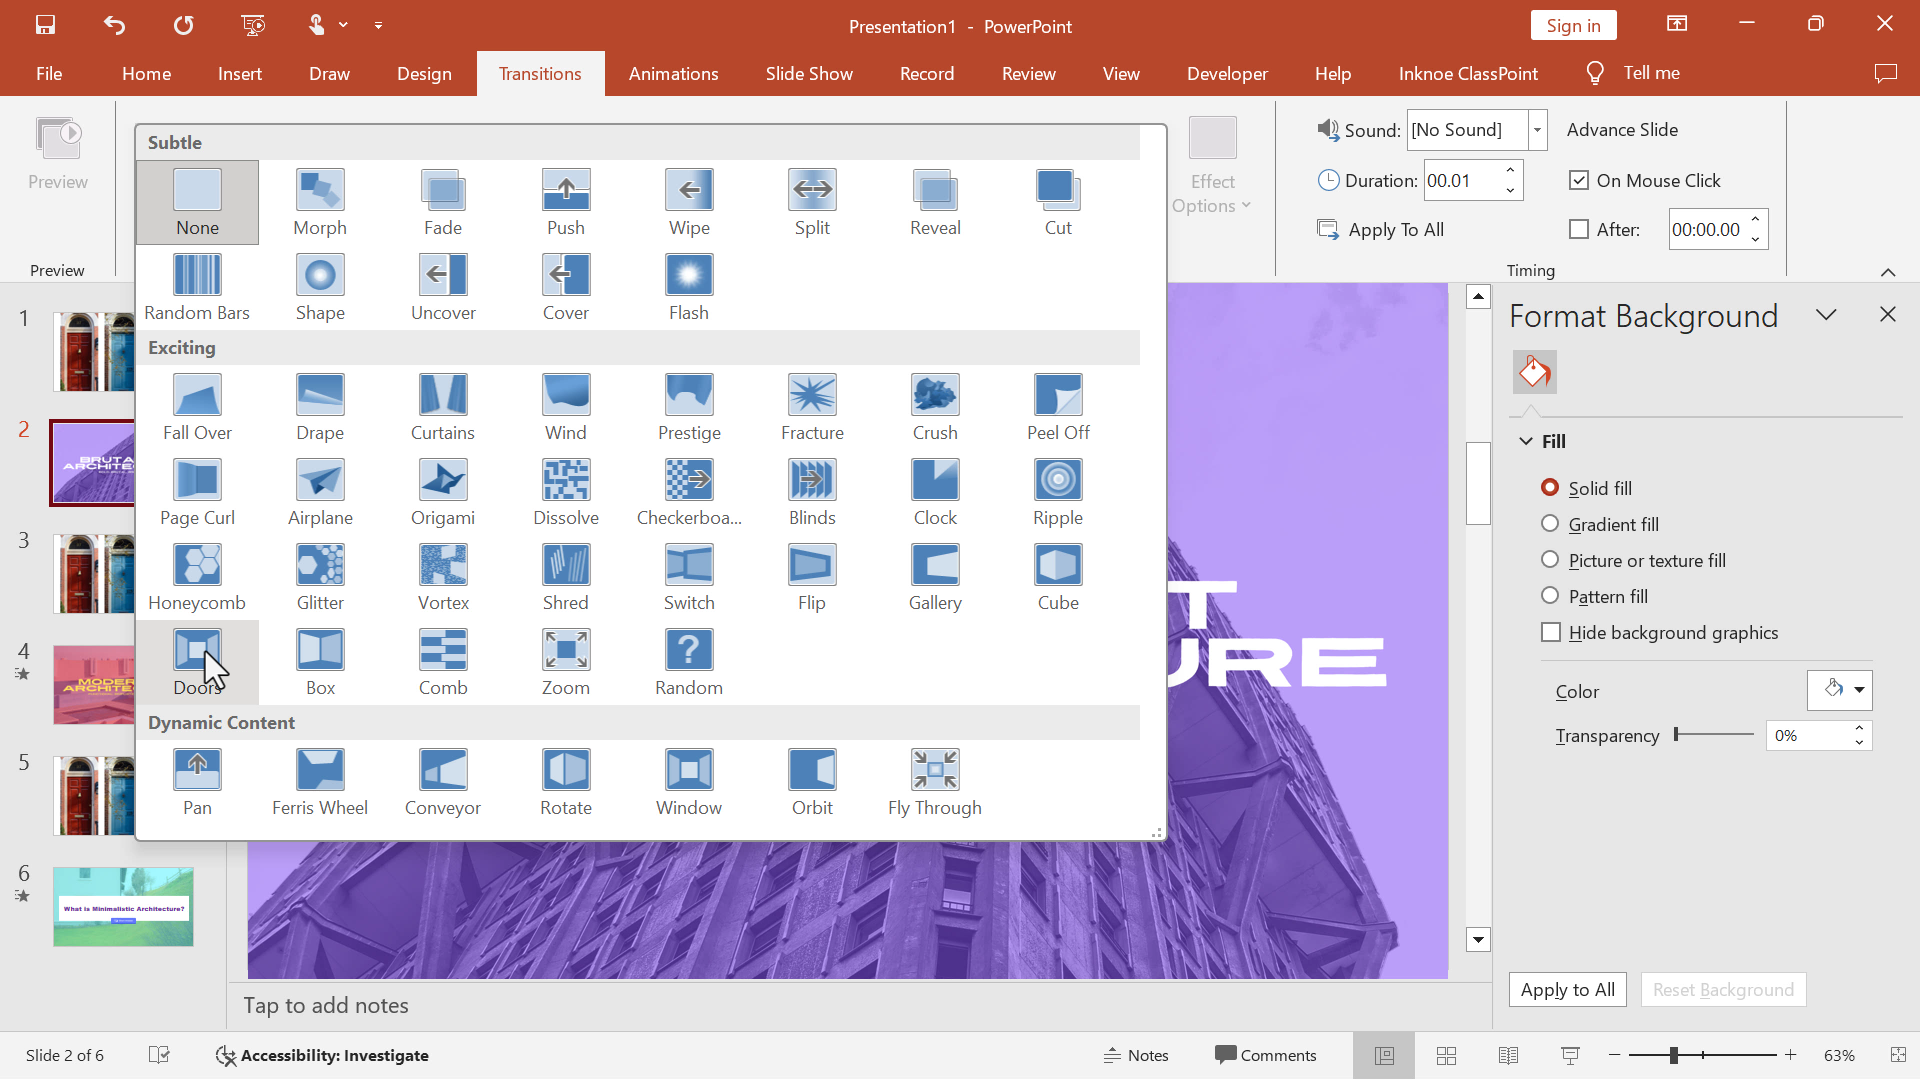
#4 Doors Transition
The Doors transition is an interactive and playful way to reveal new information by simulating the opening of doors.
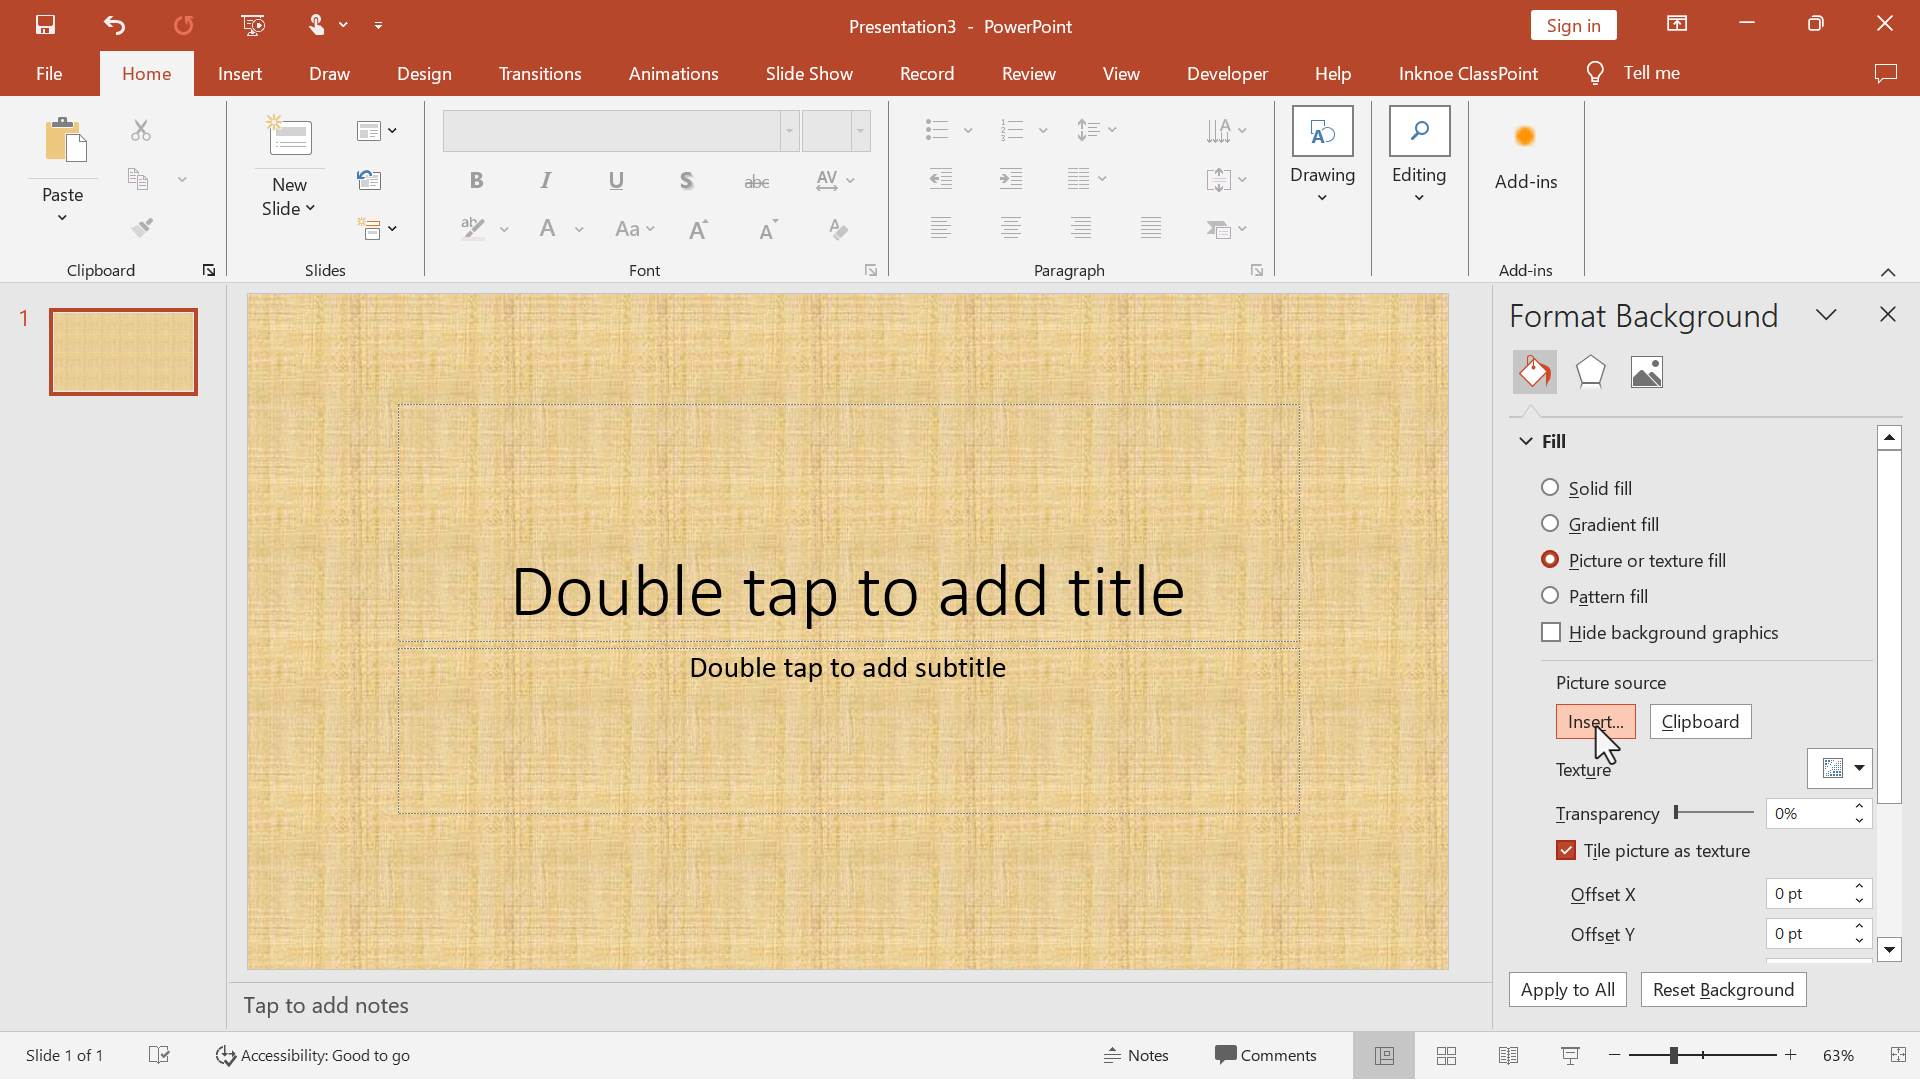
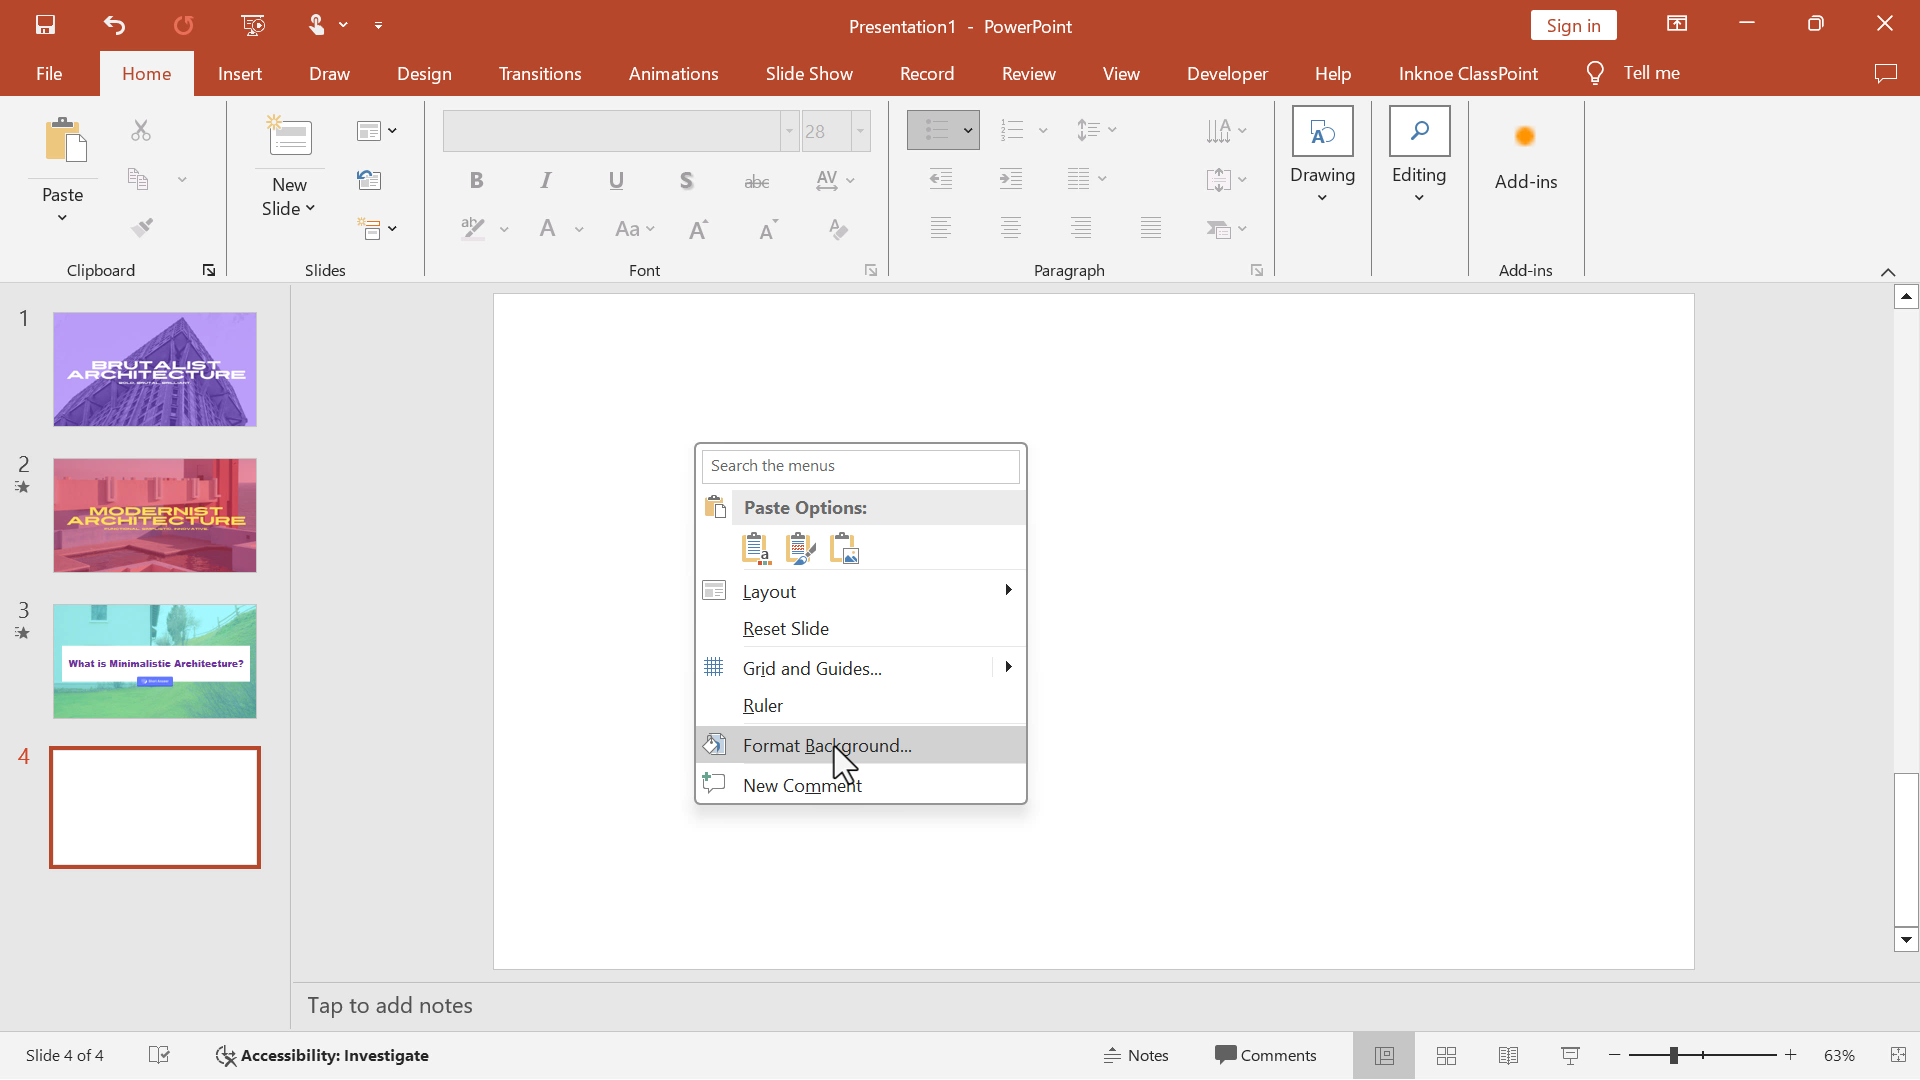
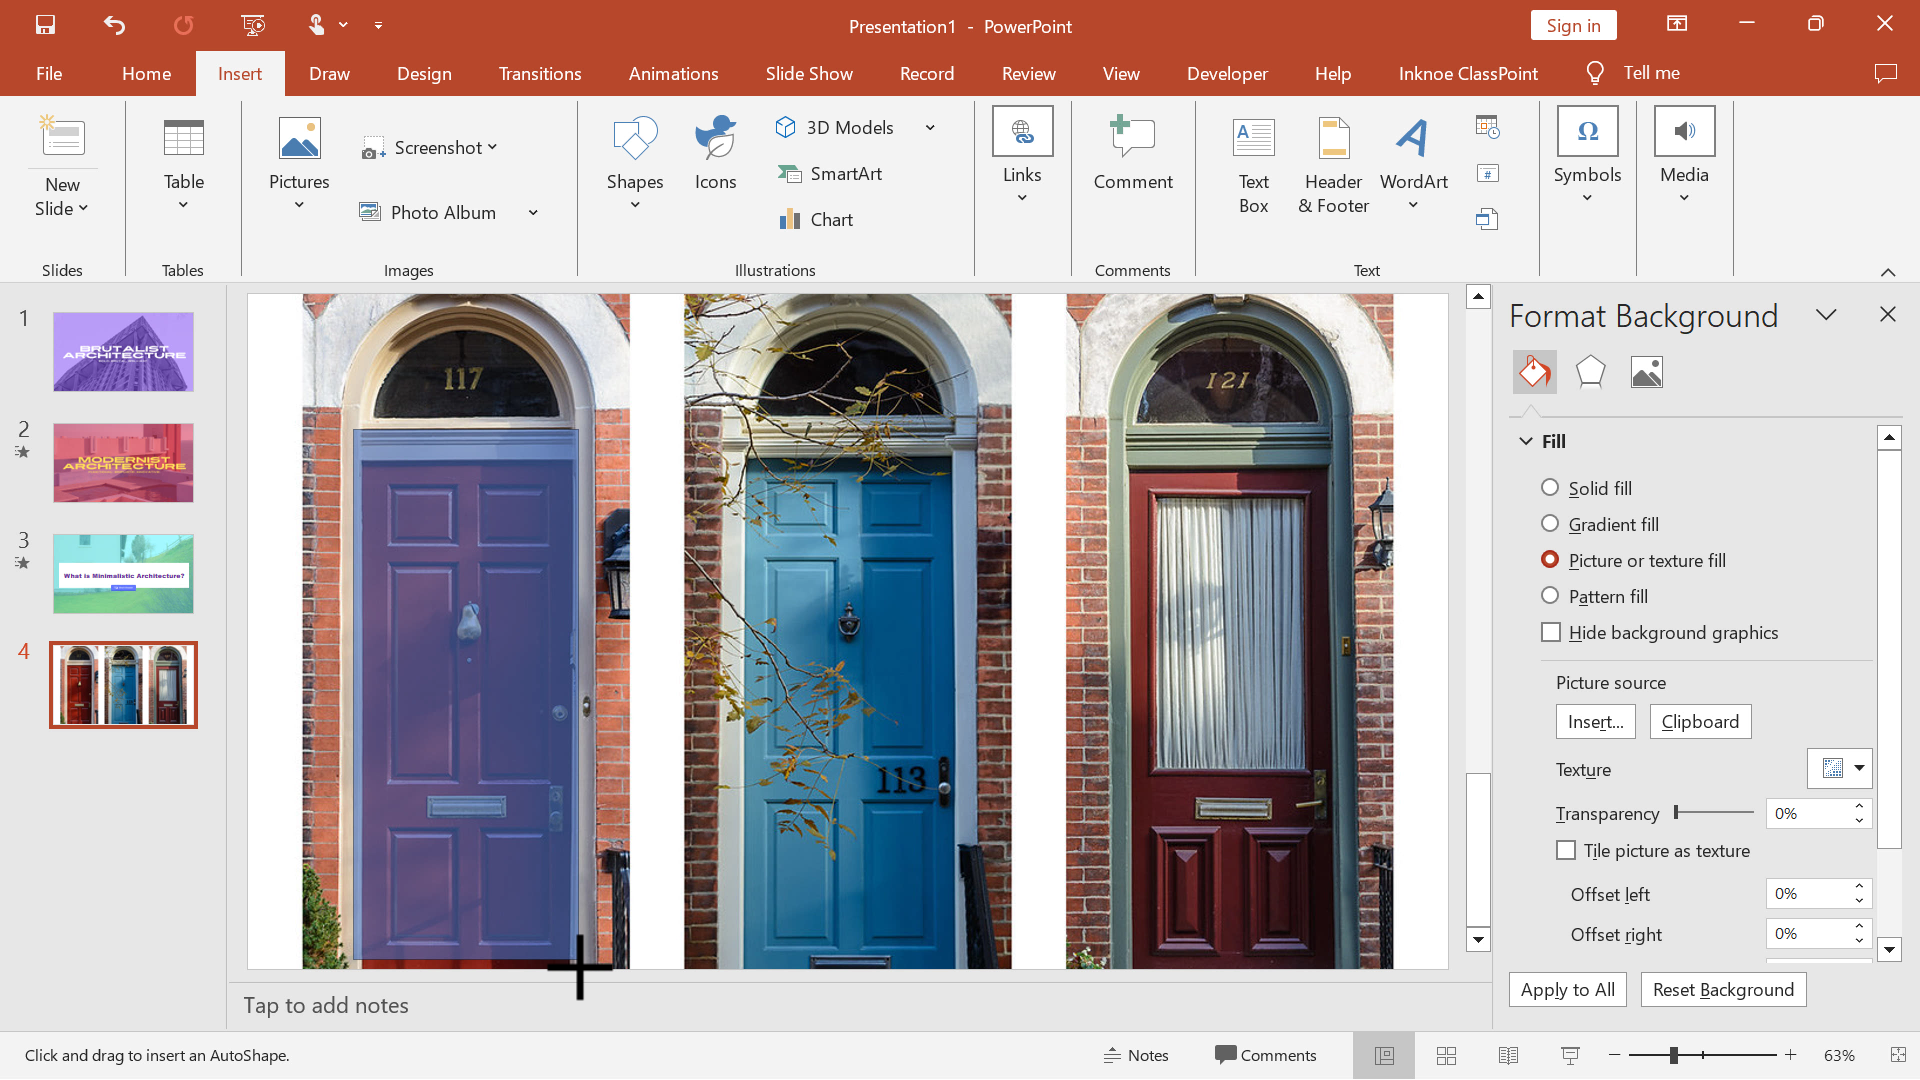
Step 1: Format Background
On an empty slide, right-click and select Format Background, then insert a picture that features doors. Feel free to search online to find one fitting for your needs.
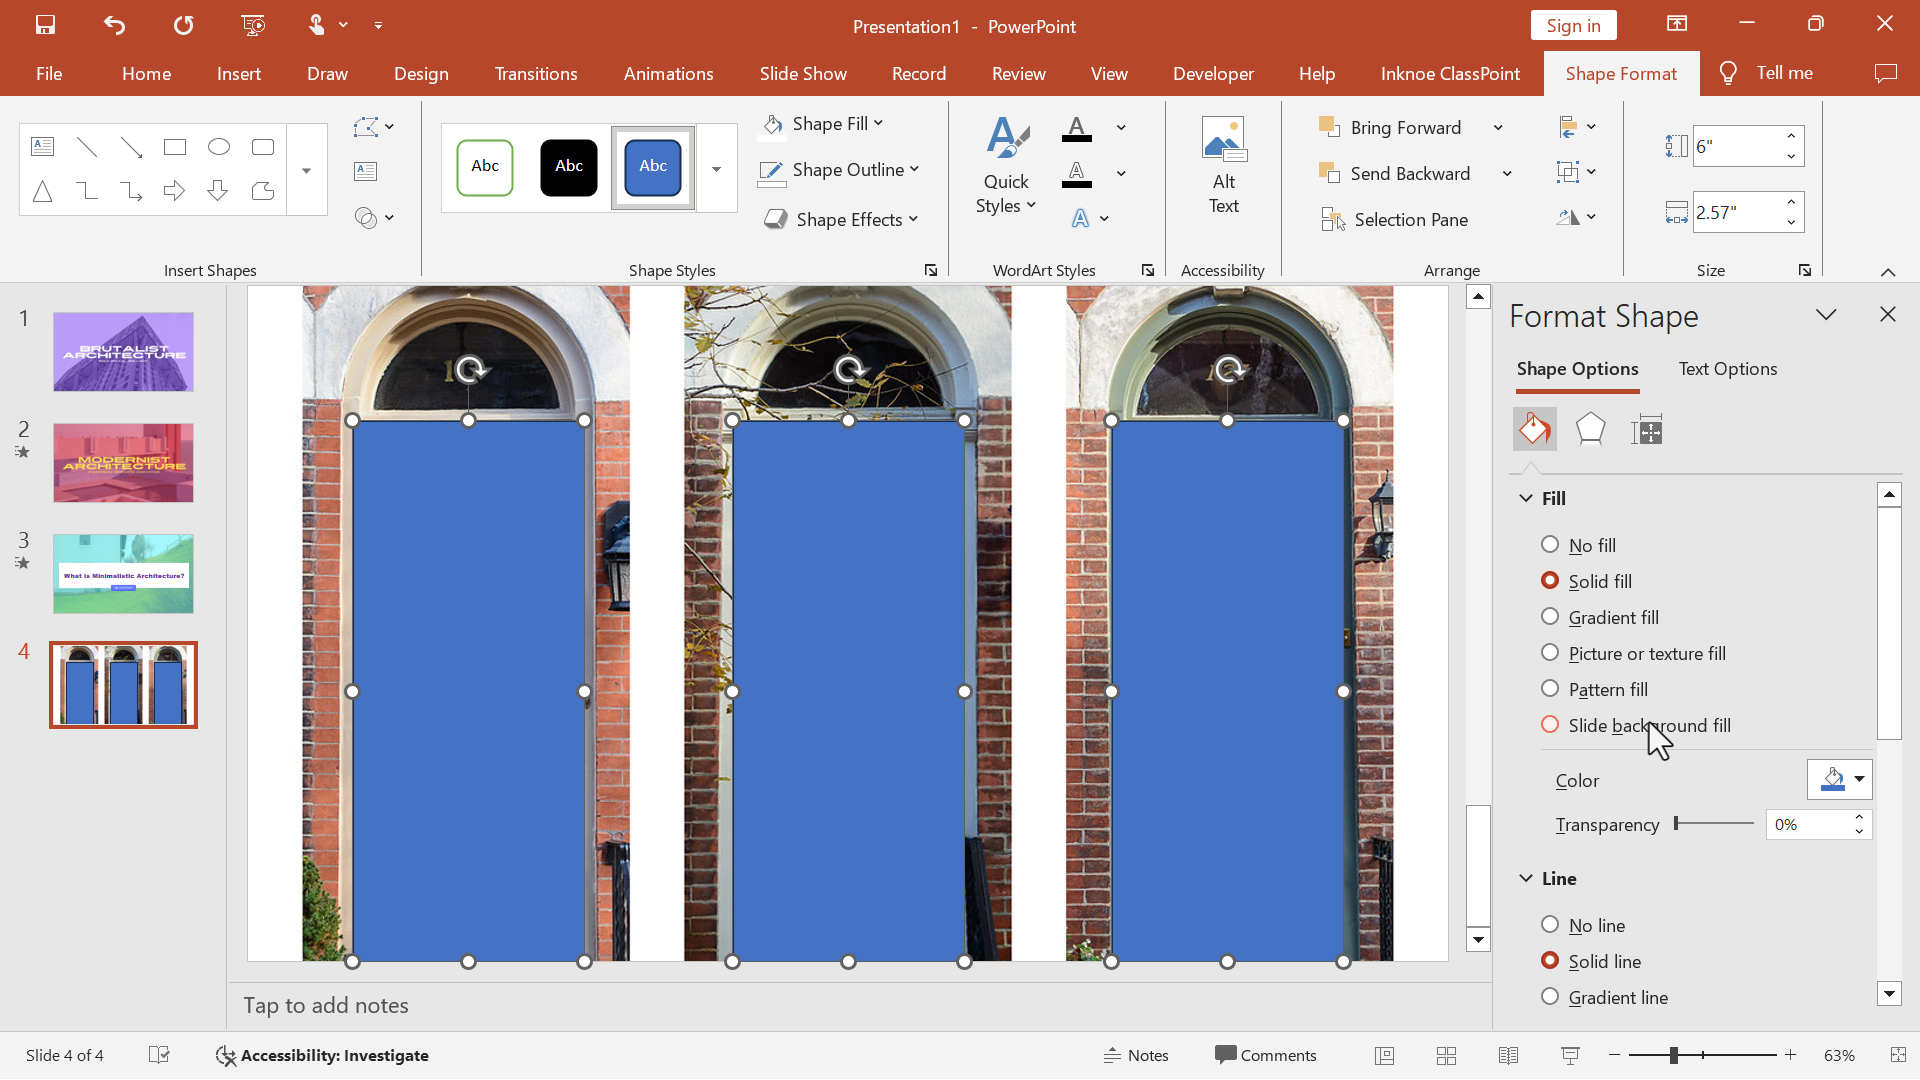
Step 2: Insert and Format Shape
Place rectangles over the doors.
Then format them with:
- A transparent background fill
- And no line
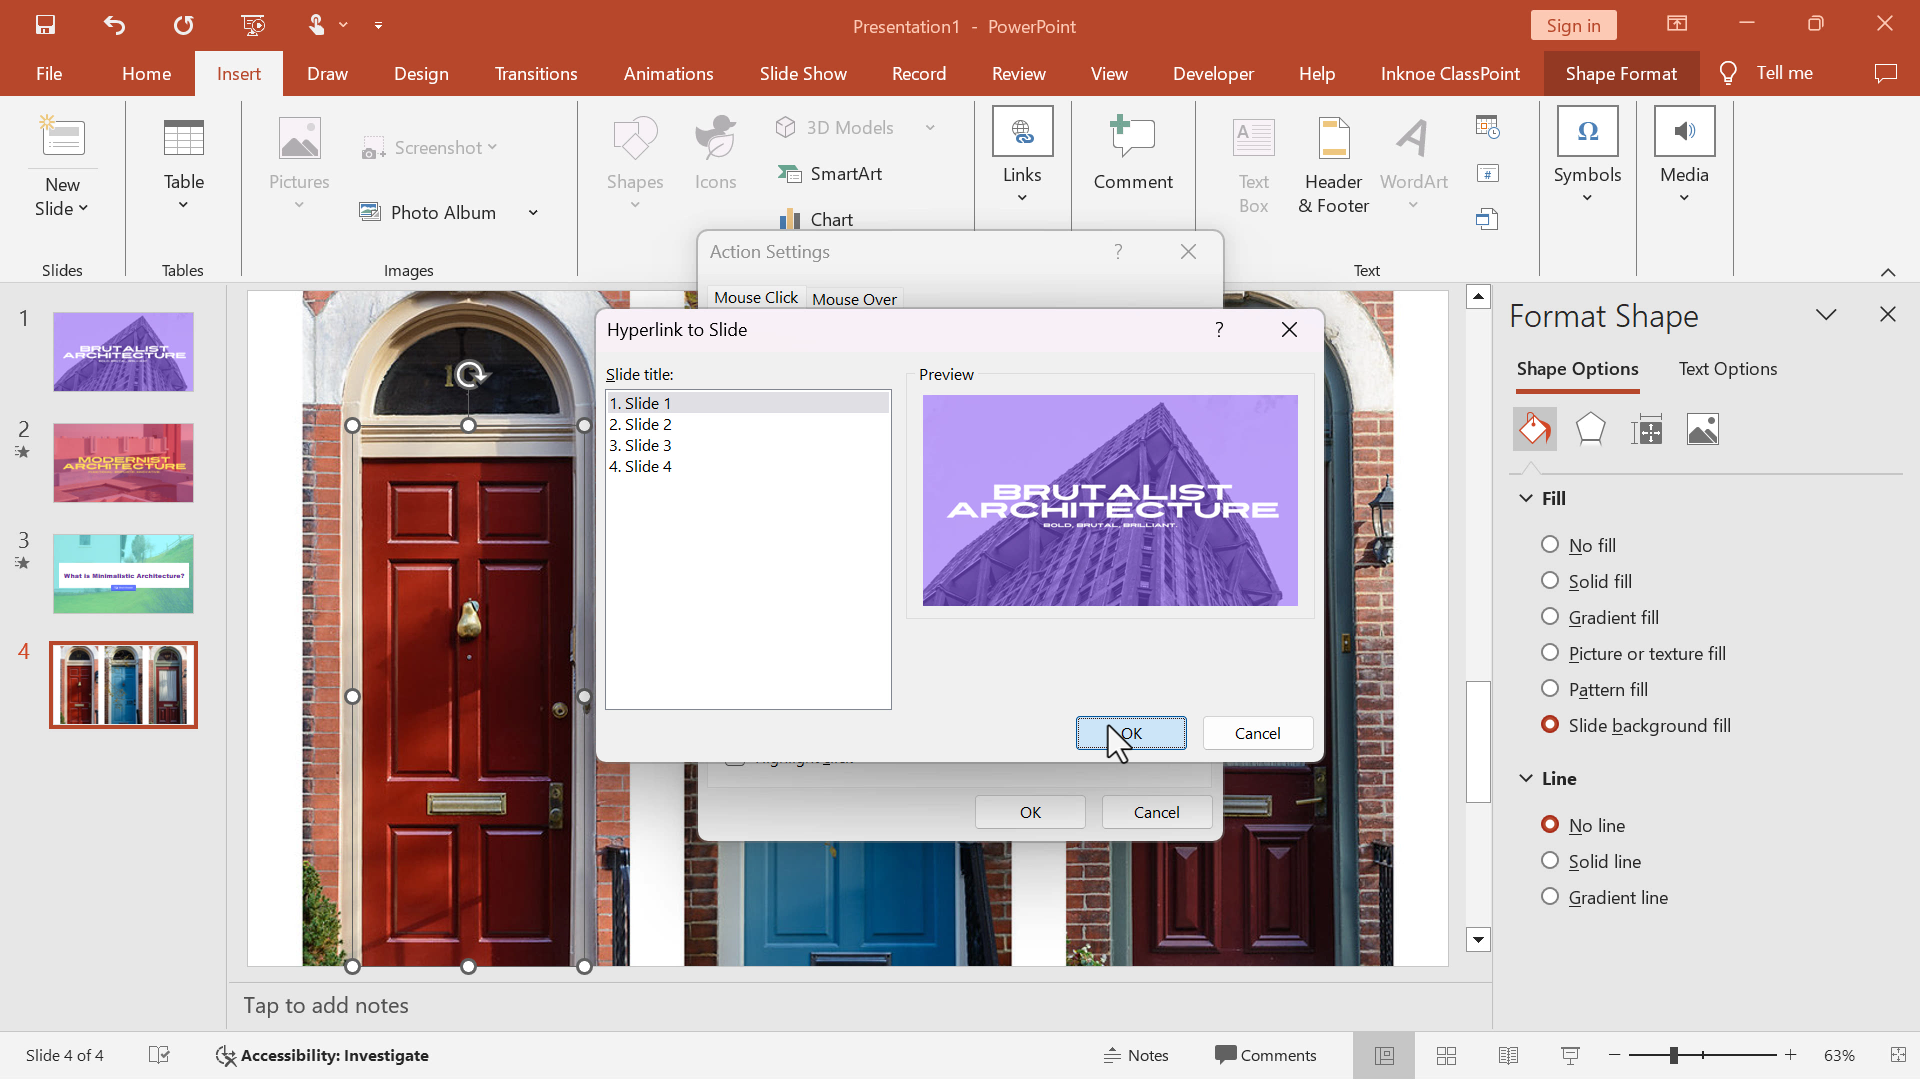
Step 3: Add Hyperlinks
Select each shape, go to Action, and hyperlink the shape to a different slide.
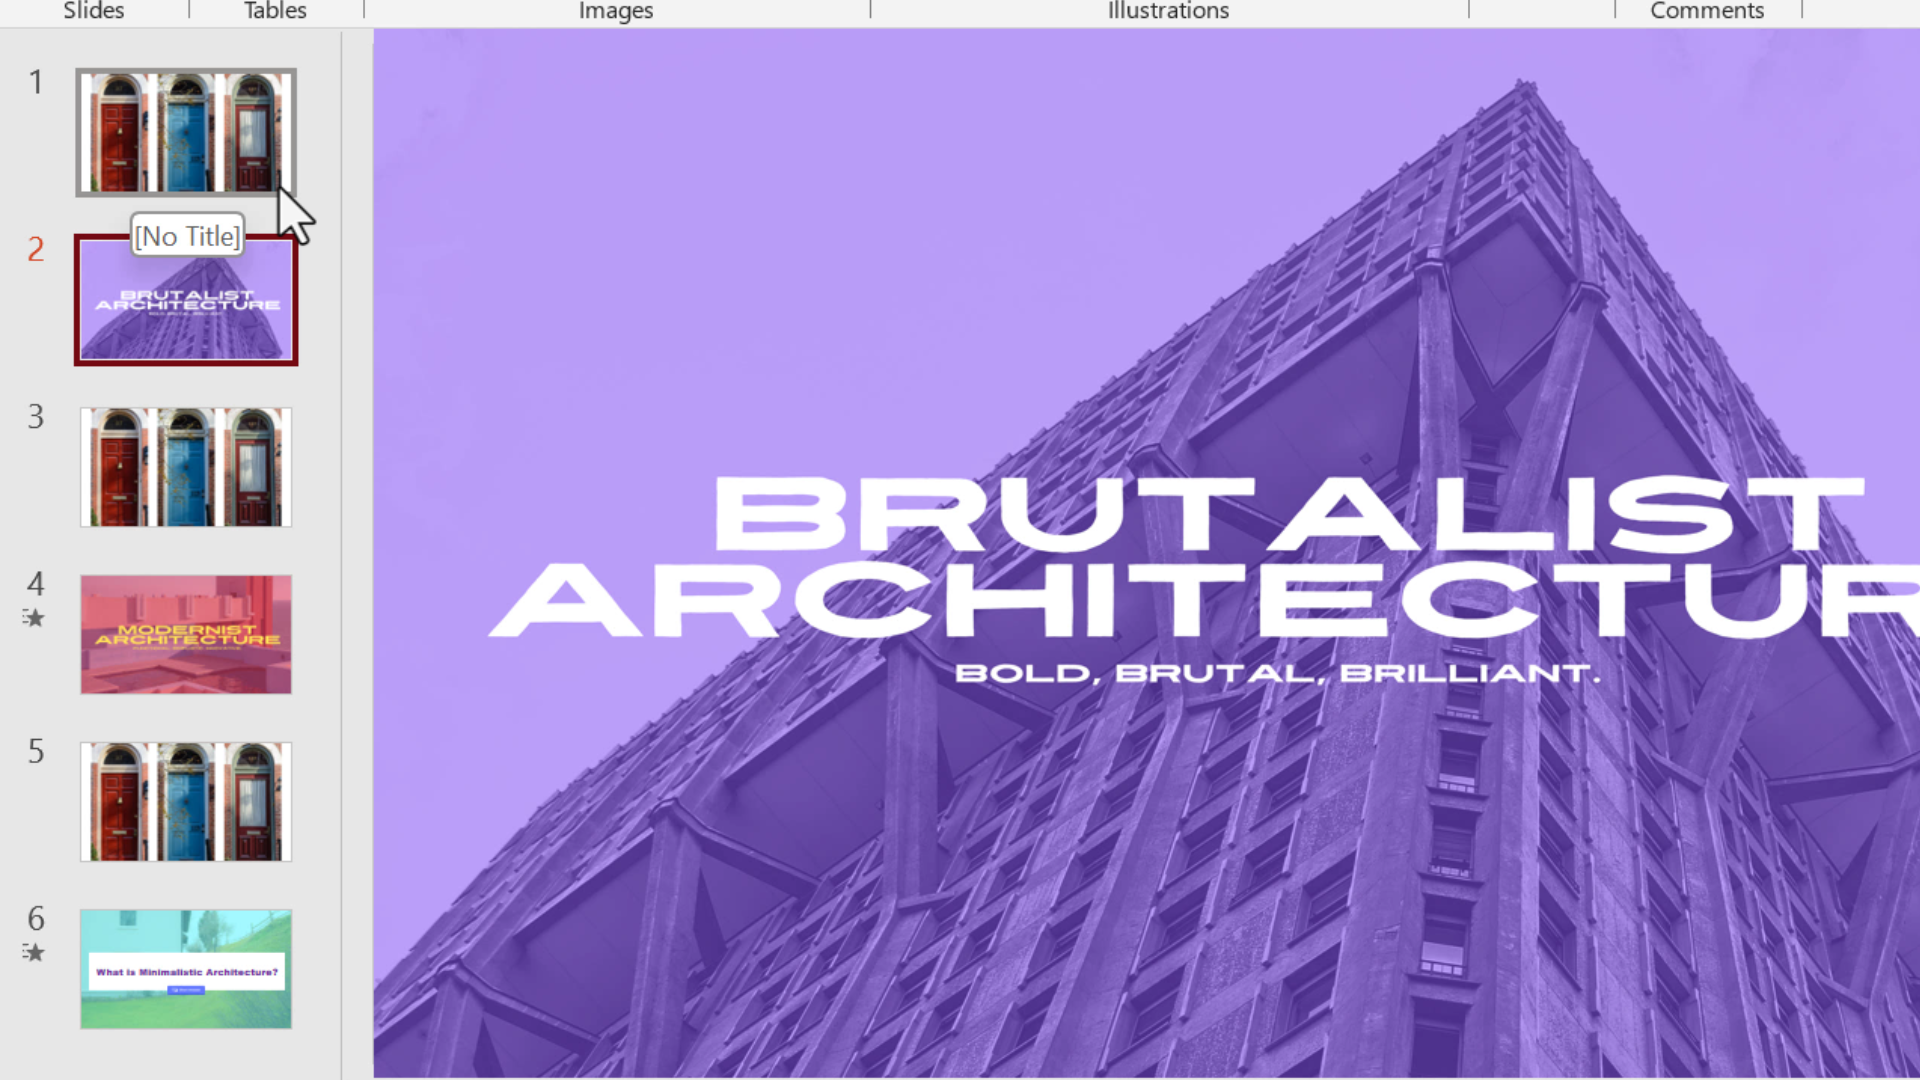
Step 4: Duplicate the Slide
Think of the slide you just created as the ‘intro slide” and other slides in your presentation as the “informational slides.”
Duplicate the slide you just made, the “intro slide” and move it between two informational slides. This will simulate doors opening to your new content.
Step 5: Apply Transition
Select all the slides and apply the Doors transition from the PowerPoint Transitions tab.
Bonus Interactive Tip
Add interactivity by hiding questions behind the doors and using ClassPoint’s interactive questions to gather responses from your audience.
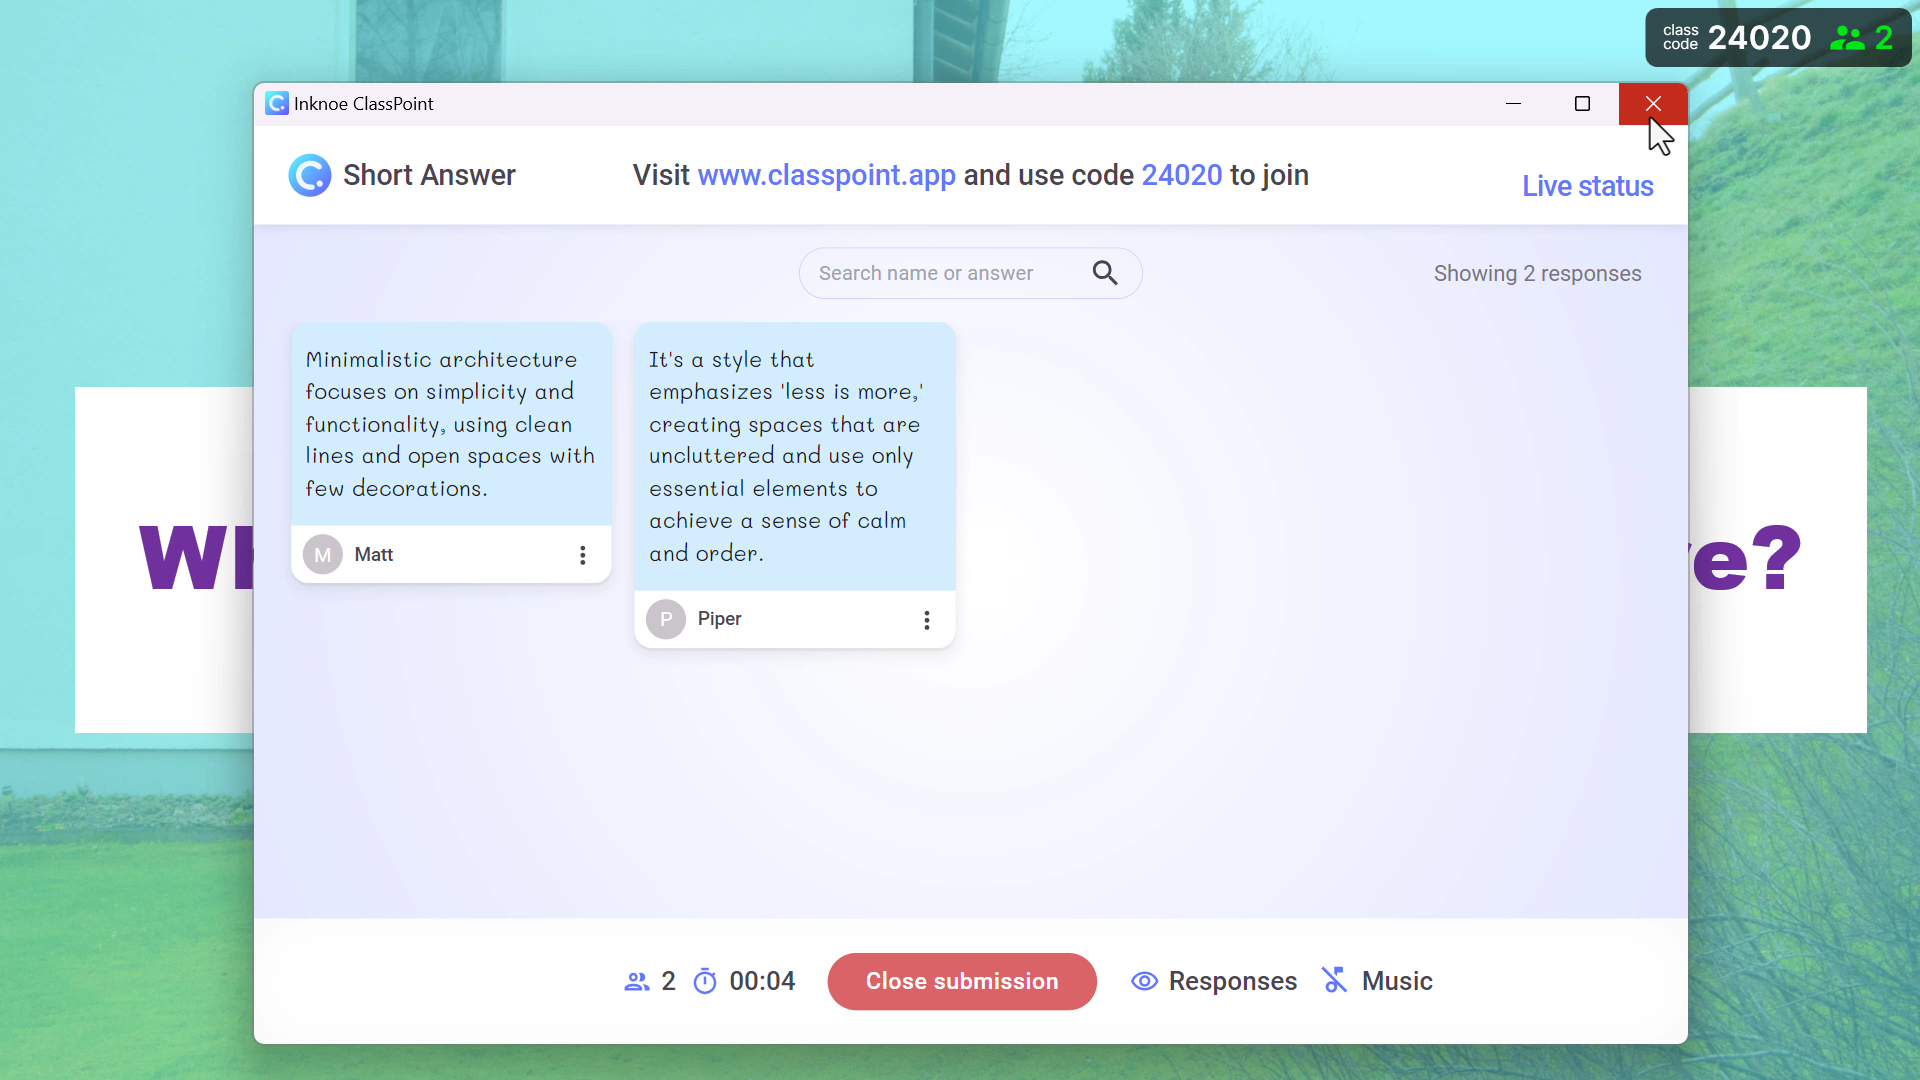
To add a question on your slide, just type out the question (and answer choices for MCQ) and add the corresponding ClassPoint button.
Once you are in presentation mode, click on the button to begin receiving responses from your audience. Enjoy the many ways to add these 8 different question types in any PowerPoint.
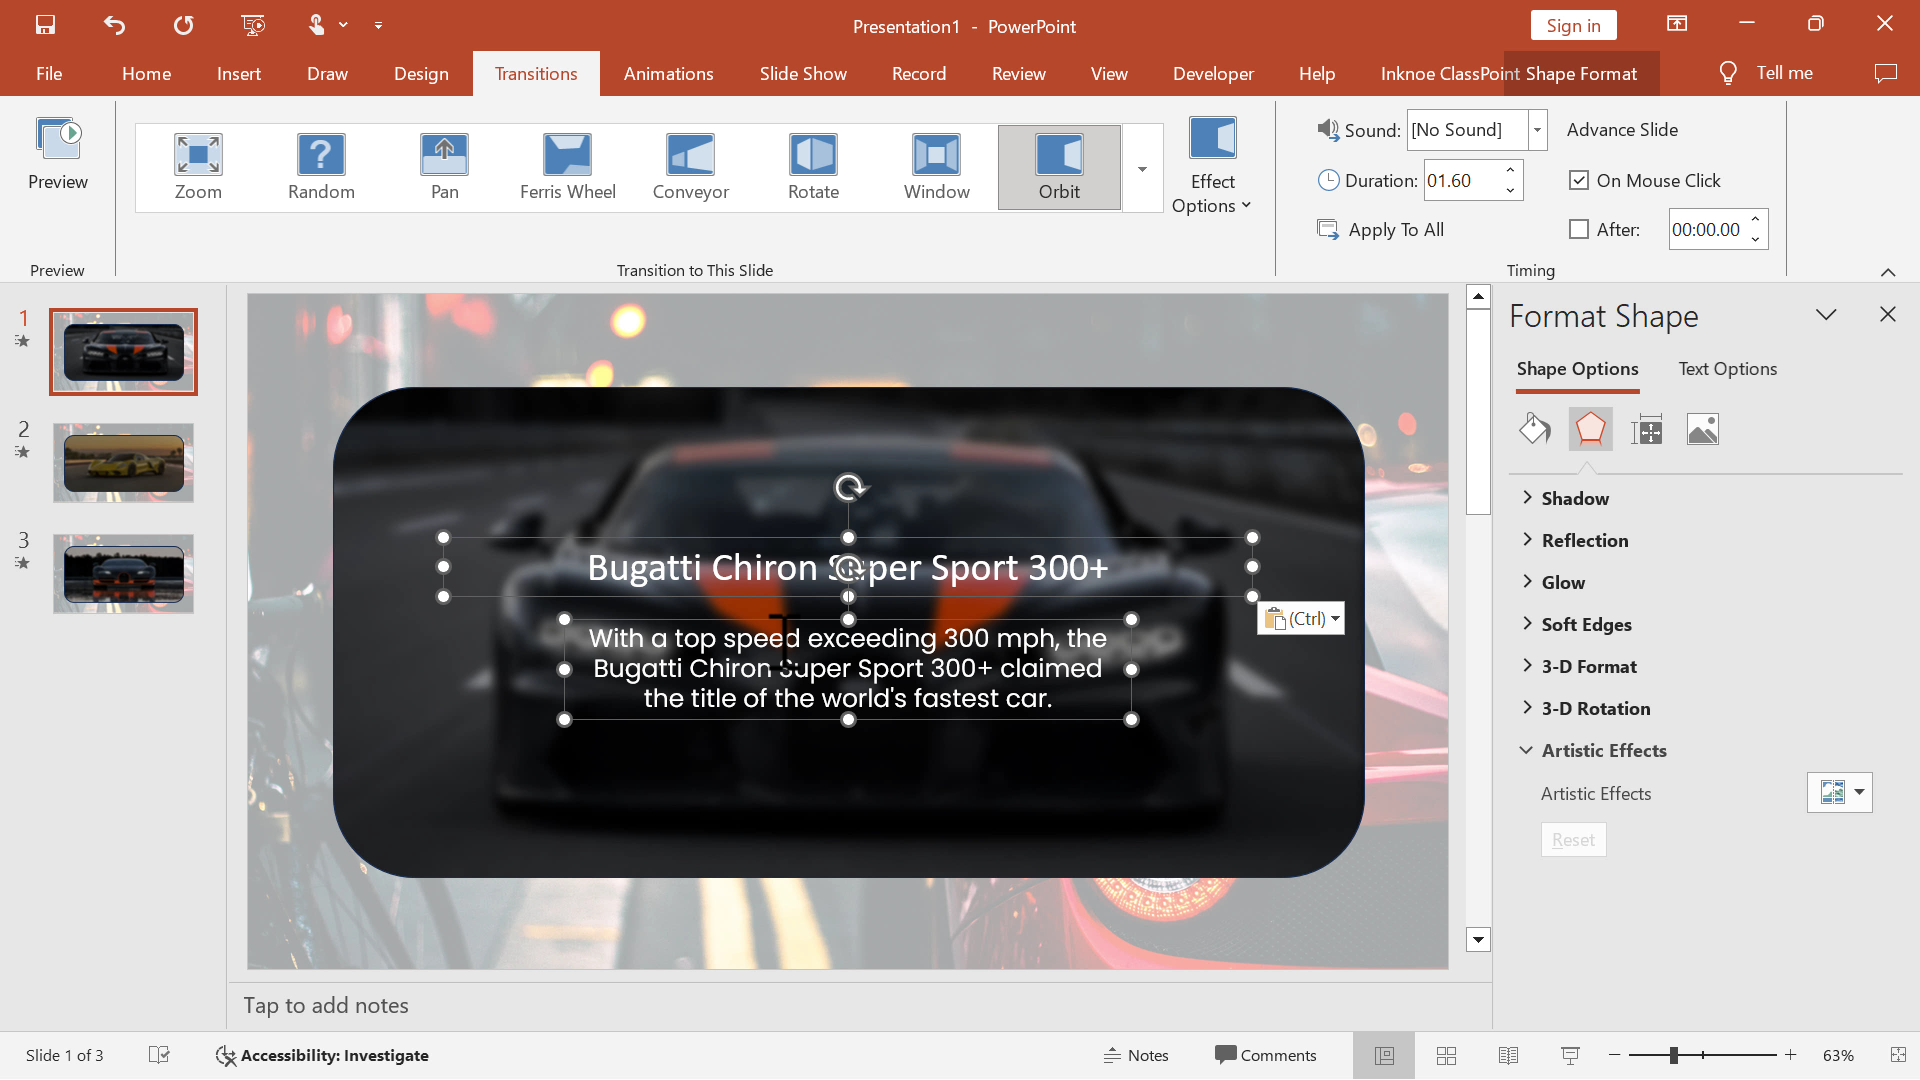
#5 Orbit Transition
The Orbit transition brings dynamic motion to your slides by creating a rotating effect that helps guide your audience’s focus.
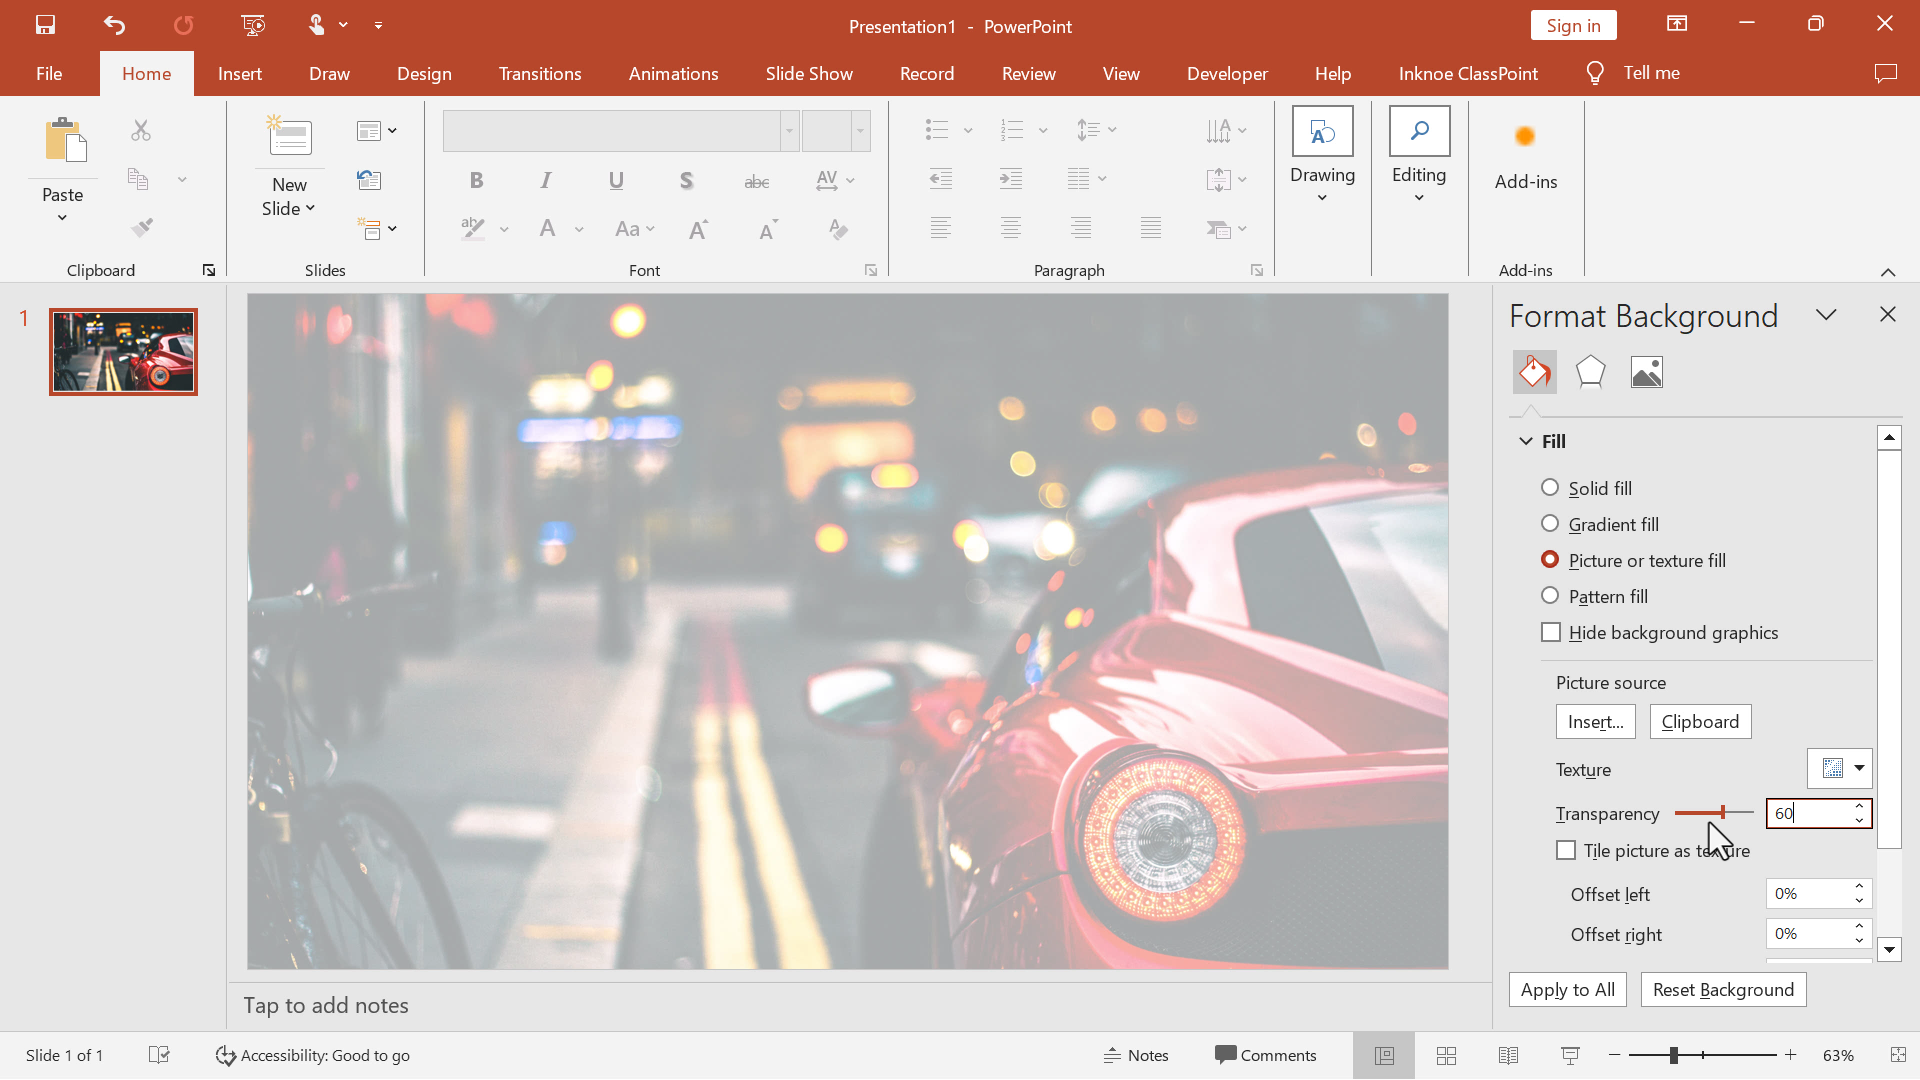
Step 1: Format Background
Start with an empty slide, select Format Background, and add an image.
Edit the setting to make the image set at 60% transparency.
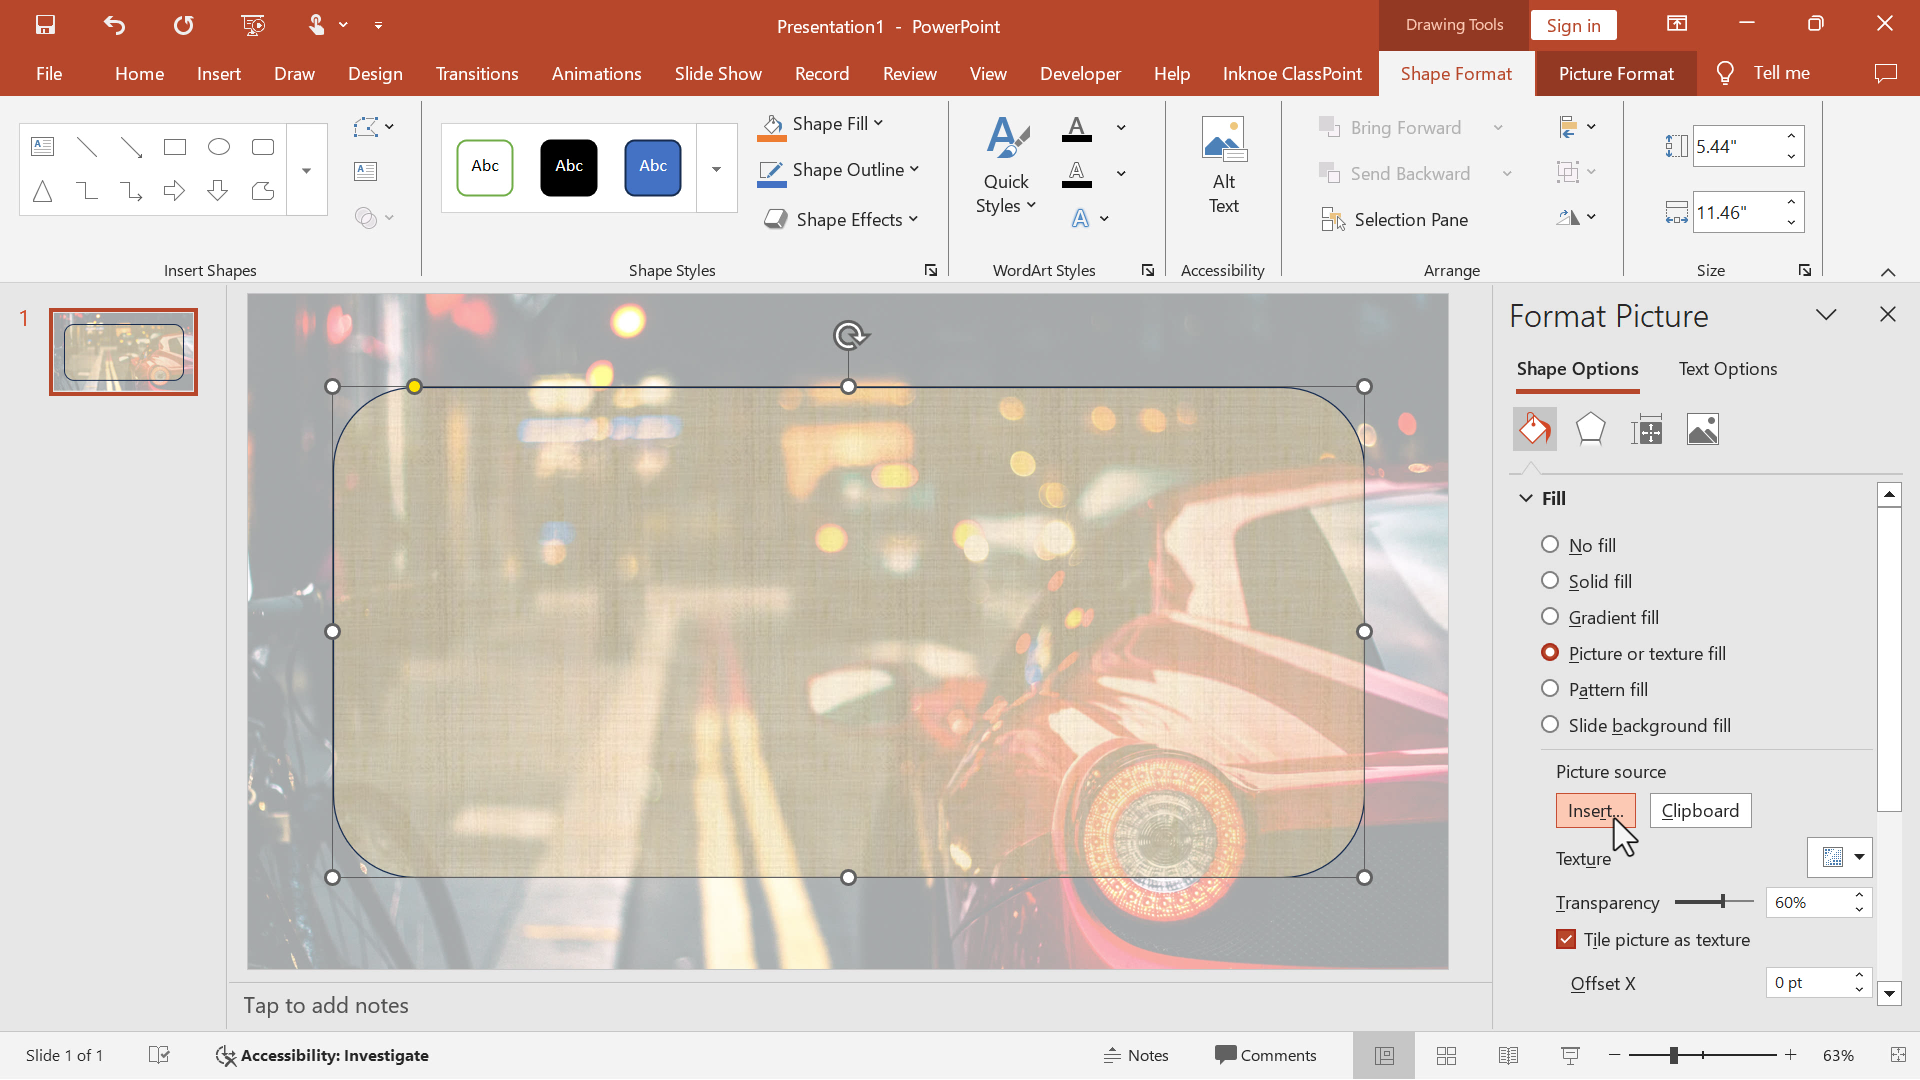
Step 2: Insert and Format Shape
Add a rounded rectangle and fill it with another image from the Format Background tab.
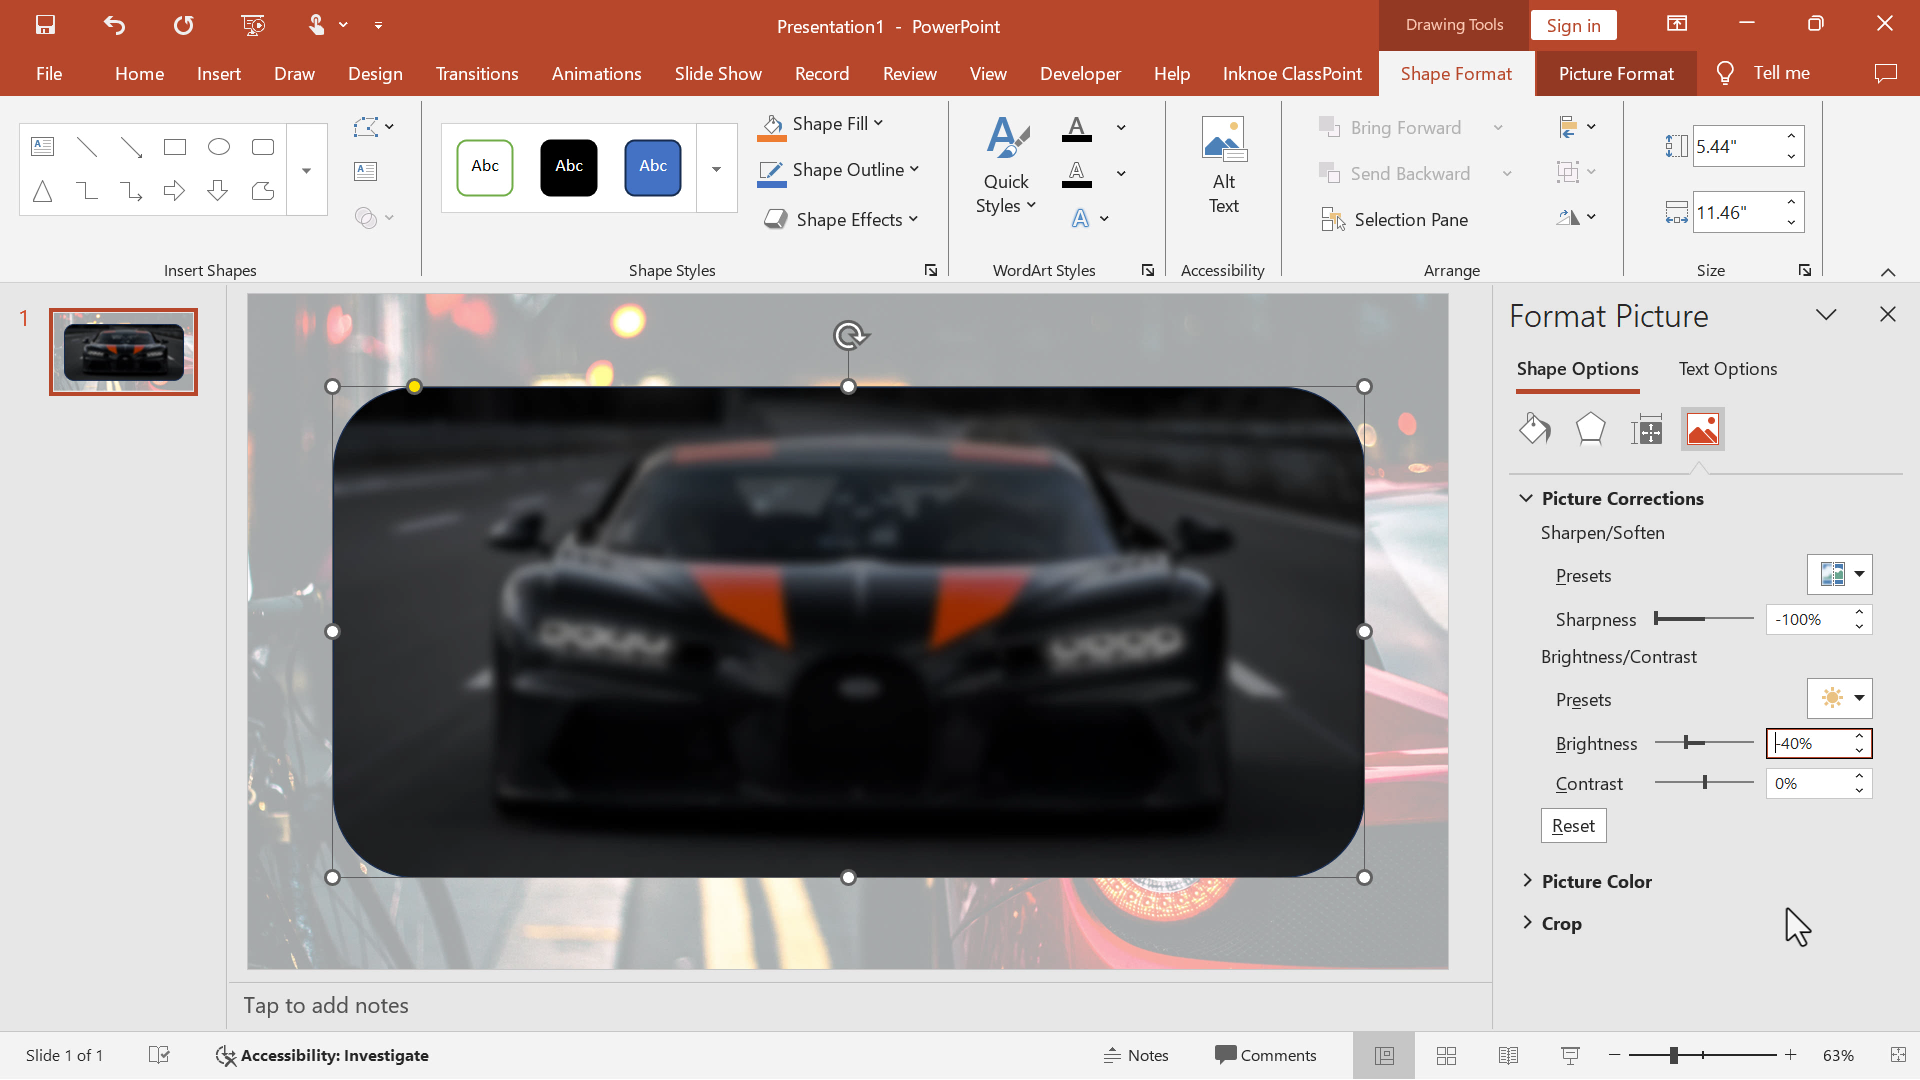
Then adjust the Picture Corrections to create a soft, muted effect with these settings:
- Set the sharpness to -100%
- and the brightness to -40%
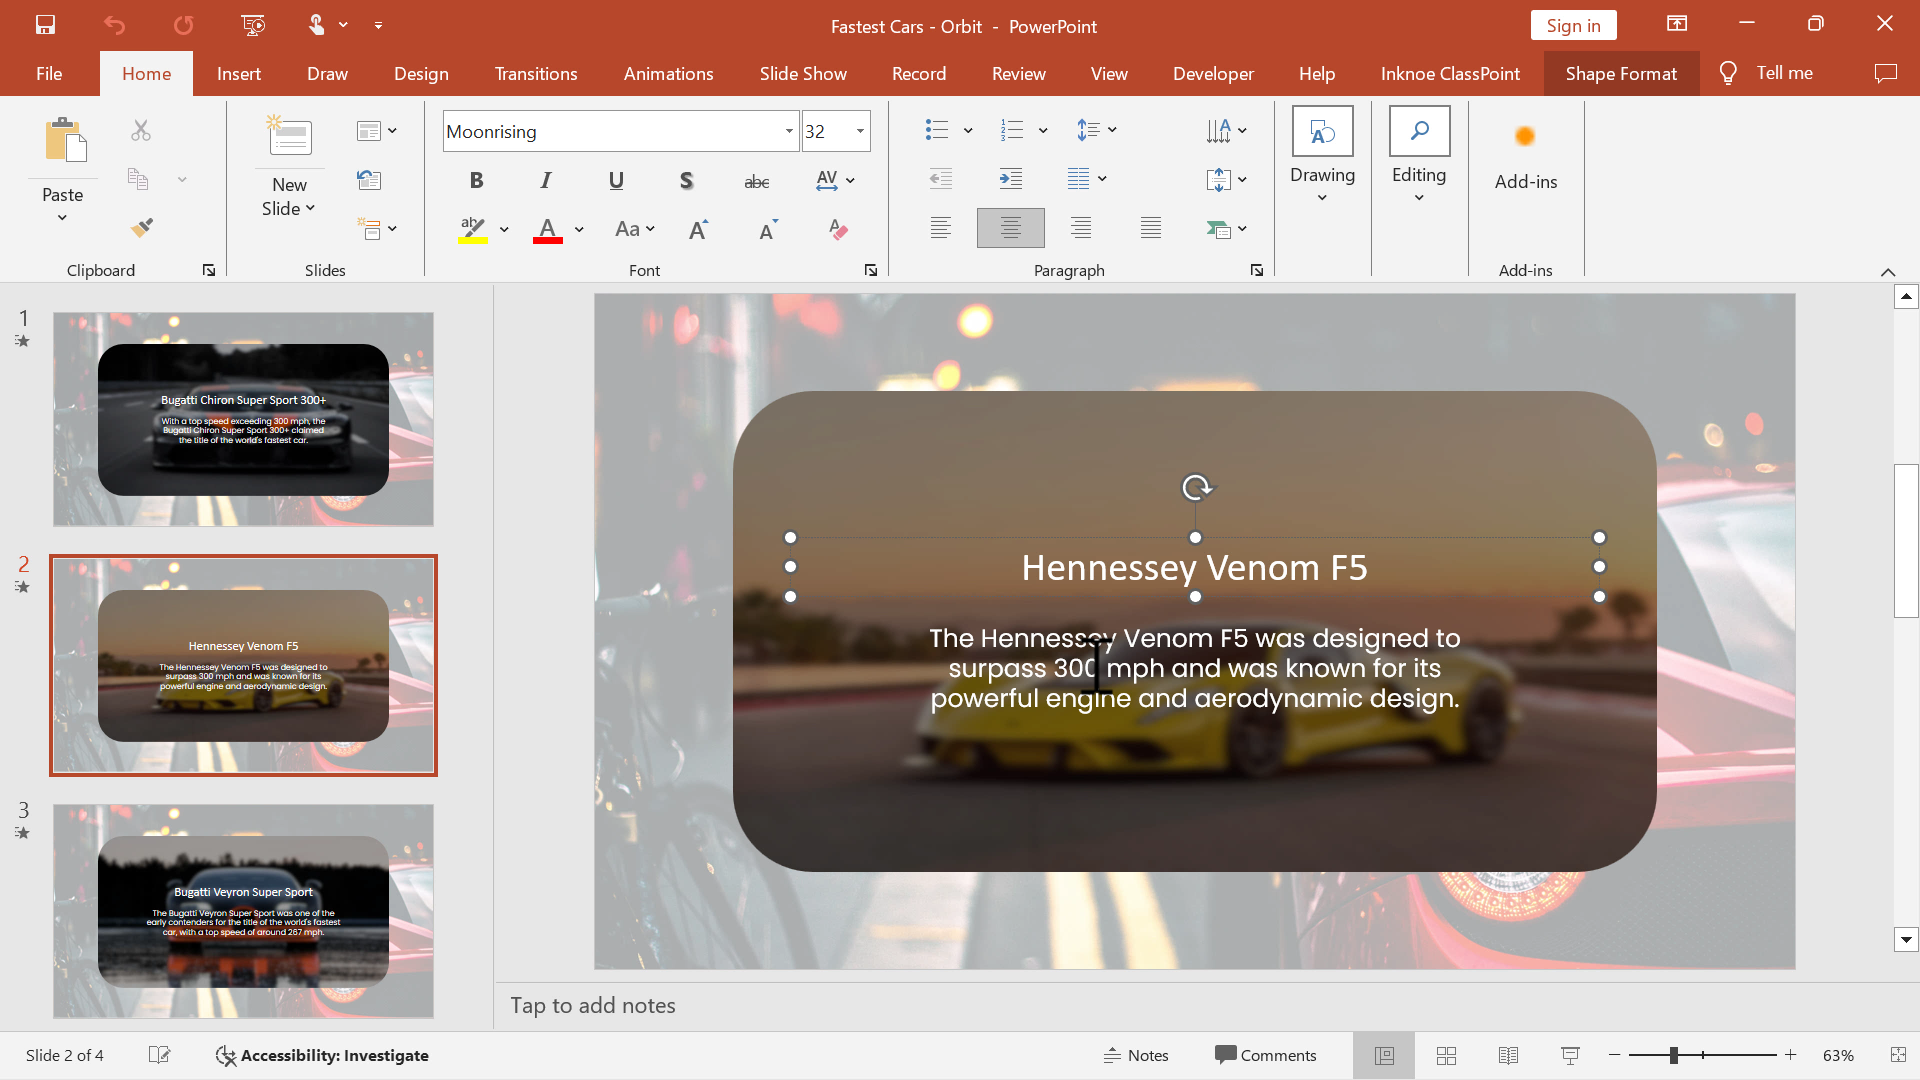
Step 4: Add Text to the Slide
Insert text on the slide to complement the visual elements.
Step 5: Repeat the Steps Across Slides
Repeat this process for all slides to maintain a consistent design. Keep the main slide background, but change the image in the rounded rectangle.
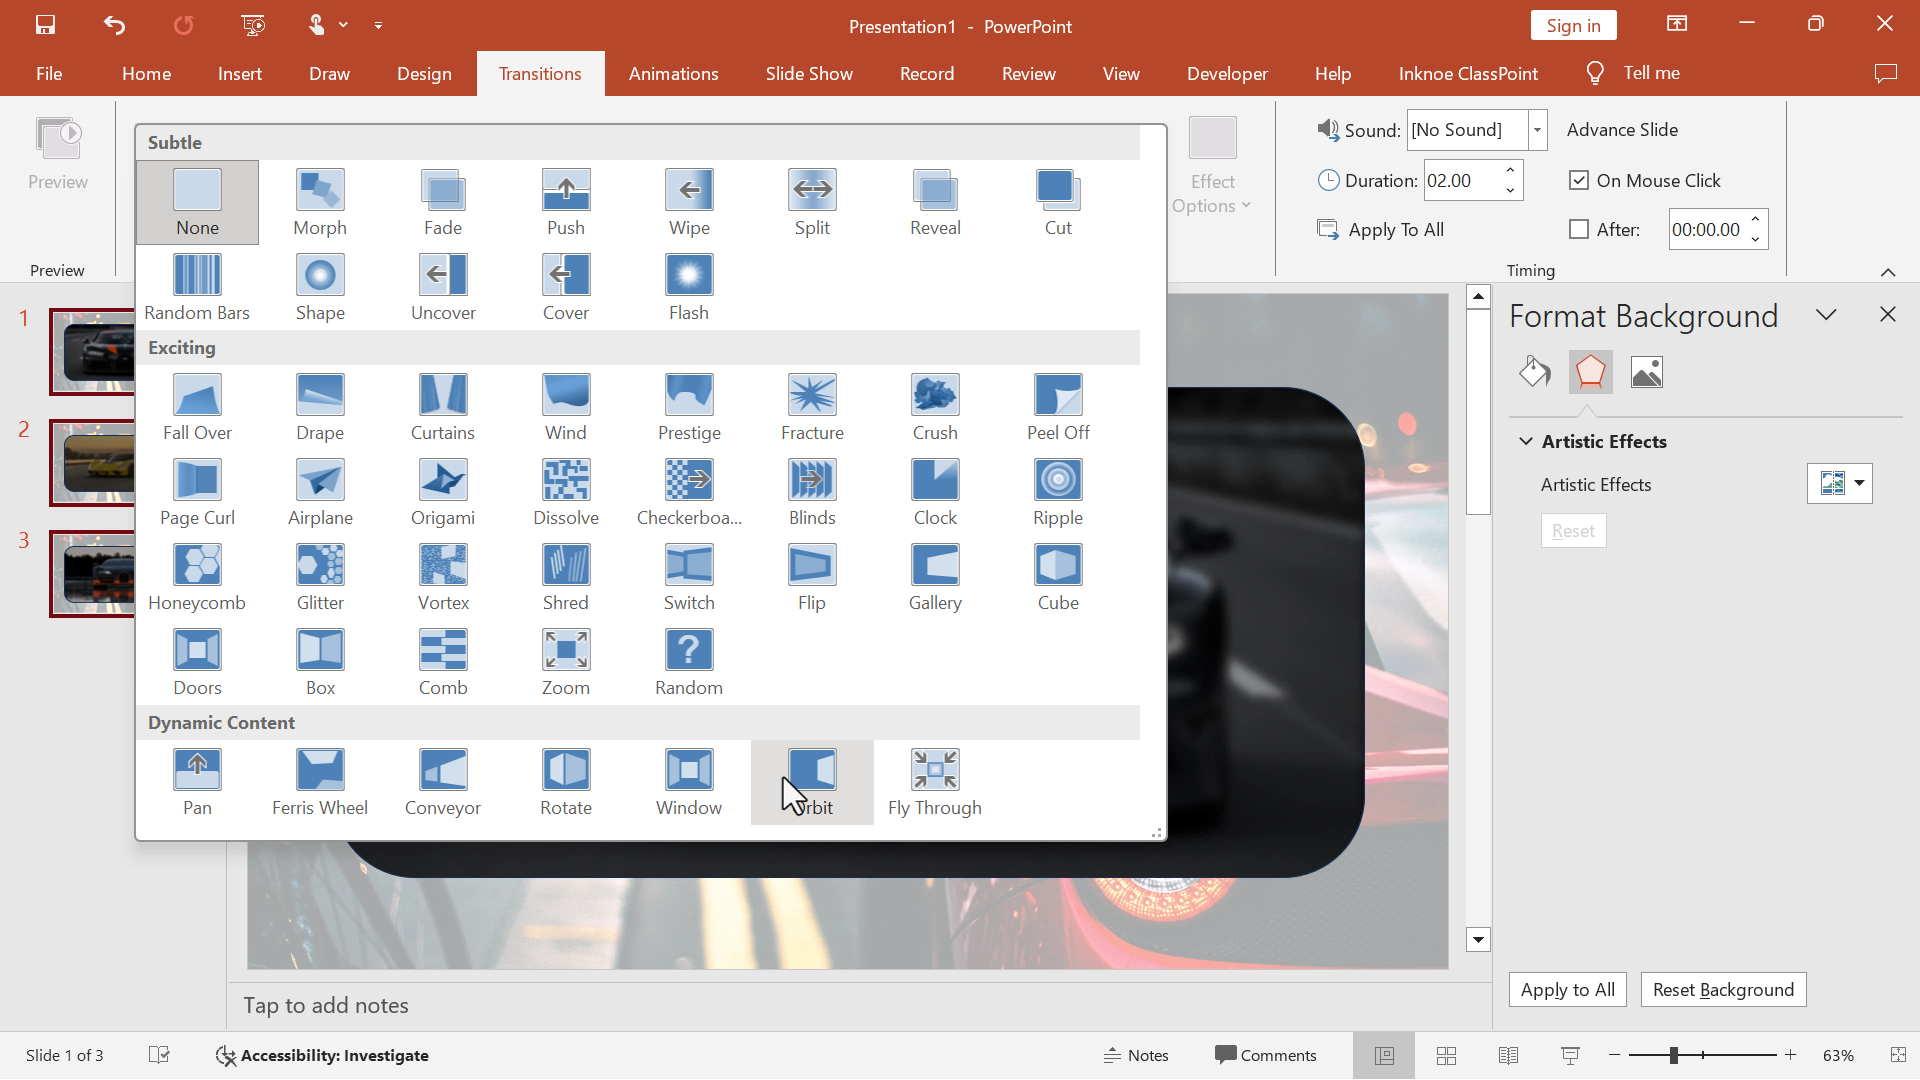
Step 6: Apply Transition
Select all slides and apply the Orbit transition from the PowerPoint Transitions tab.
Bonus Interactive Tip
Need help crafting questions? Use AI to generate questions based on your slide content, and encourage your audience to provide live feedback.

Get Your Free PowerPoint Transitions Templates
Up your presentation game with our exclusive collection of PowerPoint transition templates.
Mastering Cool PowerPoint Transitions: Best Practices
When exploring creative PowerPoint transitions, the key is to use them in ways that enhance your presentation rather than overwhelm it. Here’s how to strike that perfect balance while having fun with your transitions:
1. Leverage Bold Transitions for Impact
Creative transitions like can add flair to your presentation. Use these bold transitions strategically for key moments, such as revealing important points or shifting between major sections. This way, your audience will feel the impact without being overloaded by too many effects.
2. Create a Thematic Flow
If you’re going for a unique or unconventional style, make sure the transitions align with the overall theme of your presentation. For example, if your slides have a futuristic design, using the Morph or Fracture transition can create a cohesive visual experience. This gives your presentation a dynamic, immersive quality.
Here's our quick guide on How to Use the Morph and Enhanced Morph Transition in PowerPoint.
3. Adjust Speed
The speed of your PowerPoint transitions matters. A transition that is too fast can leave your audience feeling rushed, while a slow one can seem tedious. A moderate speed of around 1-2 seconds is ideal—it’s long enough to be noticeable but quick enough to keep the pace moving.
4. Avoid Sound Effects
While PowerPoint offers sound effects for PowerPoint transitions, these should be used sparingly, if at all. Unless you’re presenting in a very informal or creative setting, sound effects can come across as gimmicky and may distract from your message.
Frequently Asked Questions About PowerPoint Transitions
What are PowerPoint transitions used for?
PowerPoint transitions are used to create smooth, visually appealing effects when switching from one slide to the next. They help guide your audience’s focus and add a professional touch to your presentations, making them more engaging and memorable.
What is the difference between transitions and animations in PowerPoint?
Transitions are effects that happen when moving from one slide to another, while animations are effects applied to individual objects within a slide, such as text or images. Both can enhance the visual appeal of a presentation but serve different purposes.
Can I apply the same transition to all slides in my presentation?
Yes! To apply the same transition to all slides, select all the slides by pressing CTRL + A, then choose the desired transition from the Transitions tab. This ensures consistency throughout your presentation.
How do I adjust the duration of a PowerPoint transition?
You can adjust the duration of a transition by selecting a slide, going to the Transitions tab, and adjusting the Duration box.
Are PowerPoint transitions compatible with all versions of PowerPoint?
Most transitions, including popular ones like Checkerboard and Comb, are available in all modern versions of PowerPoint. However, the range of transitions may vary slightly between older and newer versions of the software.
Can I use PowerPoint transitions in online presentations?
Yes, PowerPoint transitions work well in online presentations, including those delivered via platforms like Zoom or Microsoft Teams.
Ensure that you have a stable connection and test the transitions beforehand to ensure they display smoothly during your presentation.
And there you have it—five quick, easy, and cool PowerPoint transitions that will elevate your presentations and keep your audience engaged. These creative effects are perfect for adding flair without overwhelming your content. Try them out, and don’t be surprised if you start using them in every presentation!
More PowerPoint Tips & Free Templates
