You might think you’ve explored everything ClassPoint has to offer, but there are features tucked away that you may not even know exist. We’re going through a rundown of hidden, and sometimes underrated, ClassPoint features to help you make the most of your ClassPoint experience.
If you’re already a ClassPoint user, this blog will help you uncover some hidden gems. If you’re just starting out or thinking about it, that’s even better! You get the upper hand in knowing all the tricks right from the start. Plus, keep an eye out towards the end—we’ll be sharing a webinar replay that covers everything in detail, so you won’t miss a thing.
All the ClassPoint Features You Probably Didn’t Know About
1. Three-in-One Laser Pointer
Laser pointers in PowerPoint presentations are typically basic tools. But in a PowerPoint presentation powered by ClassPoint, it’s a whole new experience—offering three functionalities in one!
How to access: ClassPoint’s Laser Pointer is conveniently located on the special slide show toolbar that pops up when you enter presentation mode. You’ll spot the classic laser pointer icon right beside the cursor, but here’s the twist: it’s a versatile 3-in-1 tool.
- Traditional laser pointer: Effortlessly direct your audience’s attention to critical information on your slides.
- Disappearing ink pen: Annotate directly onto your slides in pen mode, with the added bonus that your marks can fade out after a few seconds to keep your content clean and uncluttered.
- Spotlight: Press ‘S’ on your keyboard or click your mouse wheel to create a spotlight effect, putting the focus on specific areas of your slide with precision.
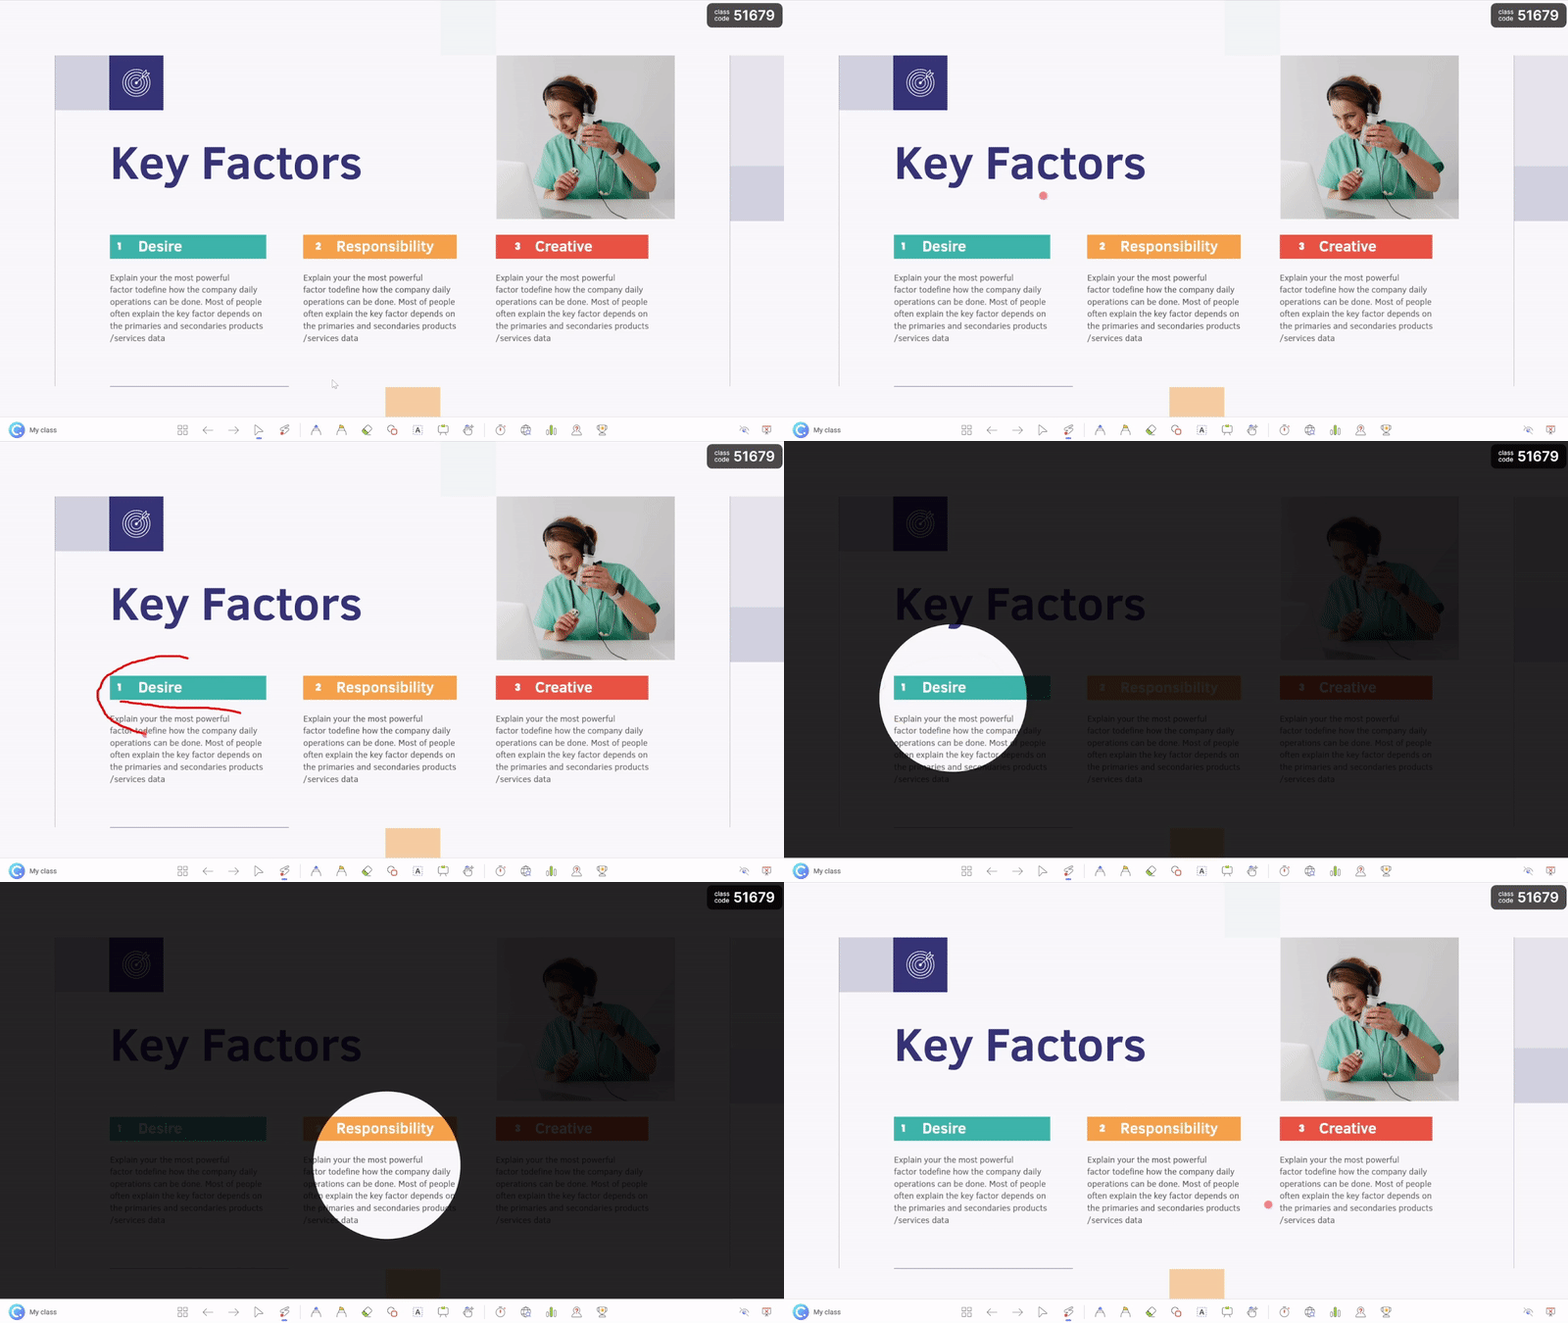
Best for: Presenters who want to guide attention dynamically during lectures or meetings, especially those who prefer an all-in-one tool for different annotation needs.
2. Delete student responses
In assessments, second chances are up to the teacher’s discretion. With ClassPoint, you’re in control of how students can revise and resubmit their work.
How to access: While running a ClassPoint quiz, you’ll see a live feed of student responses. For activities like Short Answer, Slide Drawing, Audio Record, Image Upload, and Video Upload, simply hover over any submission and click on the three-dotted dropdown menu. Here, you’ll find the option to delete responses.
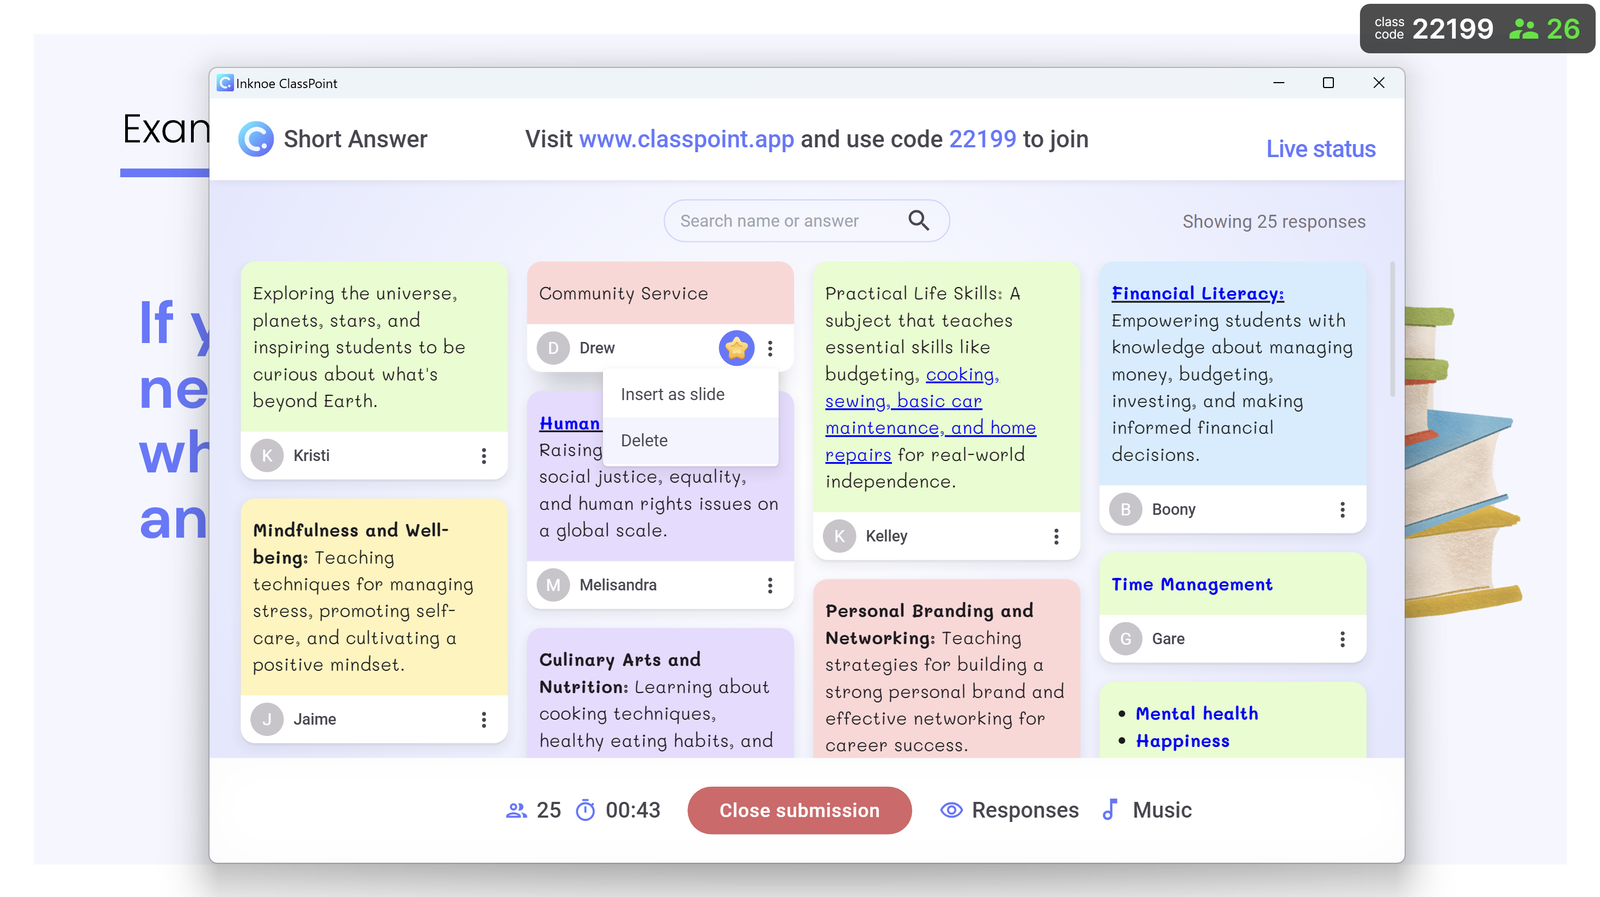
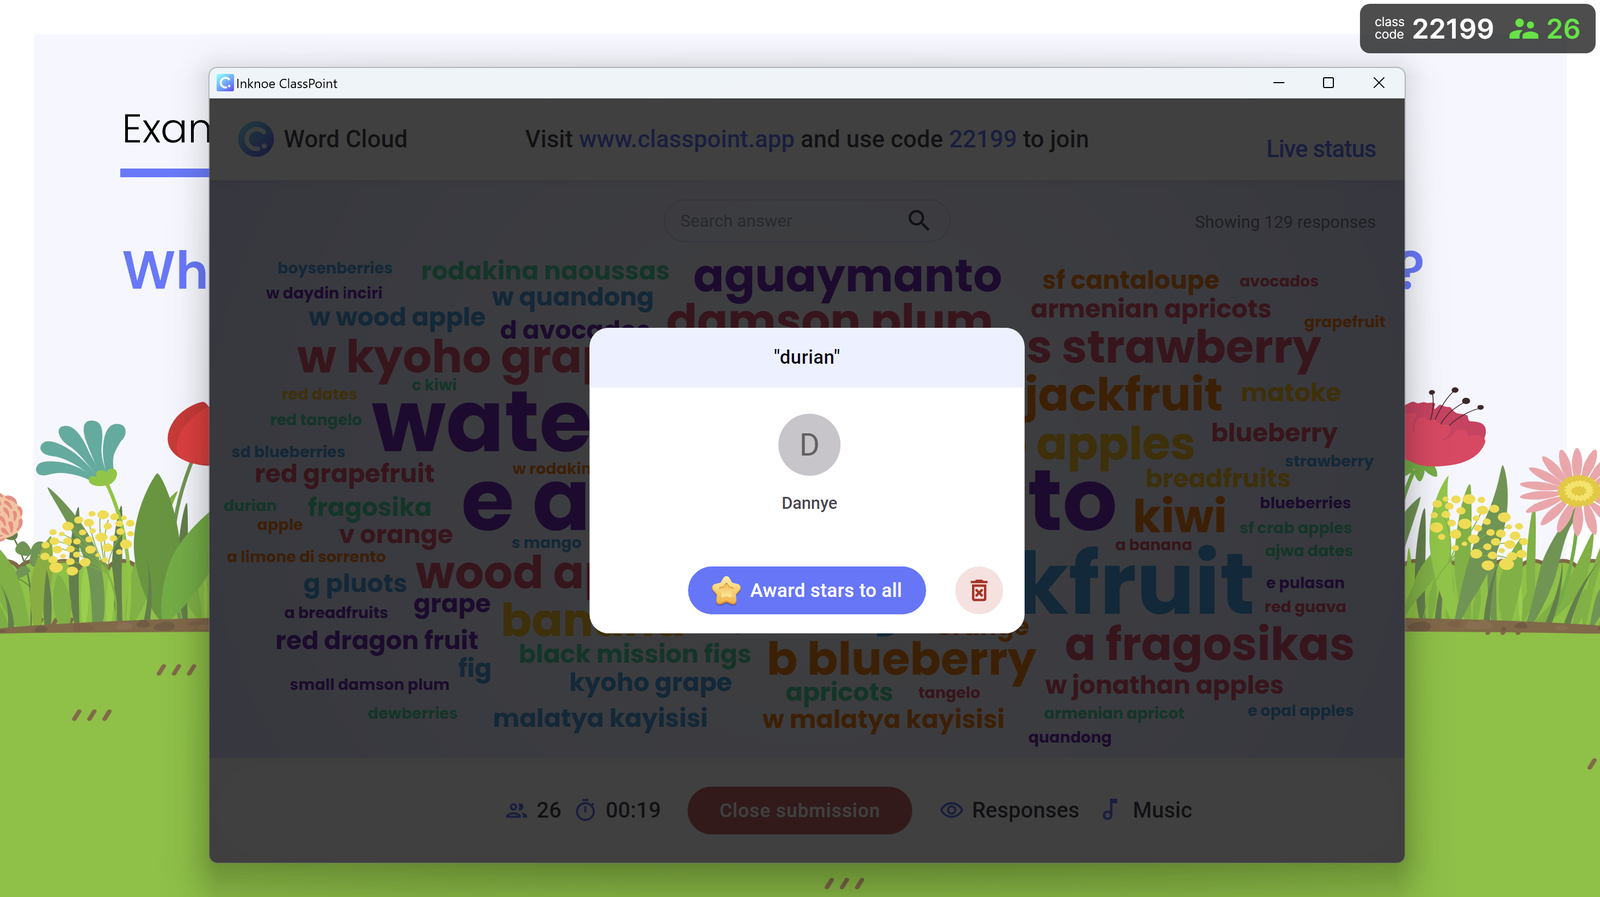
For Word Cloud activities, just click on the word you want to remove and select the trash icon. Similarly, in Fill in the Blanks activities, hover over any row of responses to find the trash icon and remove entries.
Alternatively, you can delete all student responses across your PowerPoint deck if you wish to restart all activities at once. To do this, go to PowerPoint Edit Mode, navigate to the Inknoe ClassPoint Tab, click on the Reset dropdown, and select Delete all responses.

Why delete student responses?
- When a student needs to resubmit: Typos happen, and sometimes students ask for another chance to clarify their thoughts.
- For inappropriate answers: Quickly remove any response that doesn’t meet your classroom guidelines.
- For accidental submissions: If a student mistakenly uses one of their allowed attempts, you can free up a slot for them to try again.
3. Share Activity
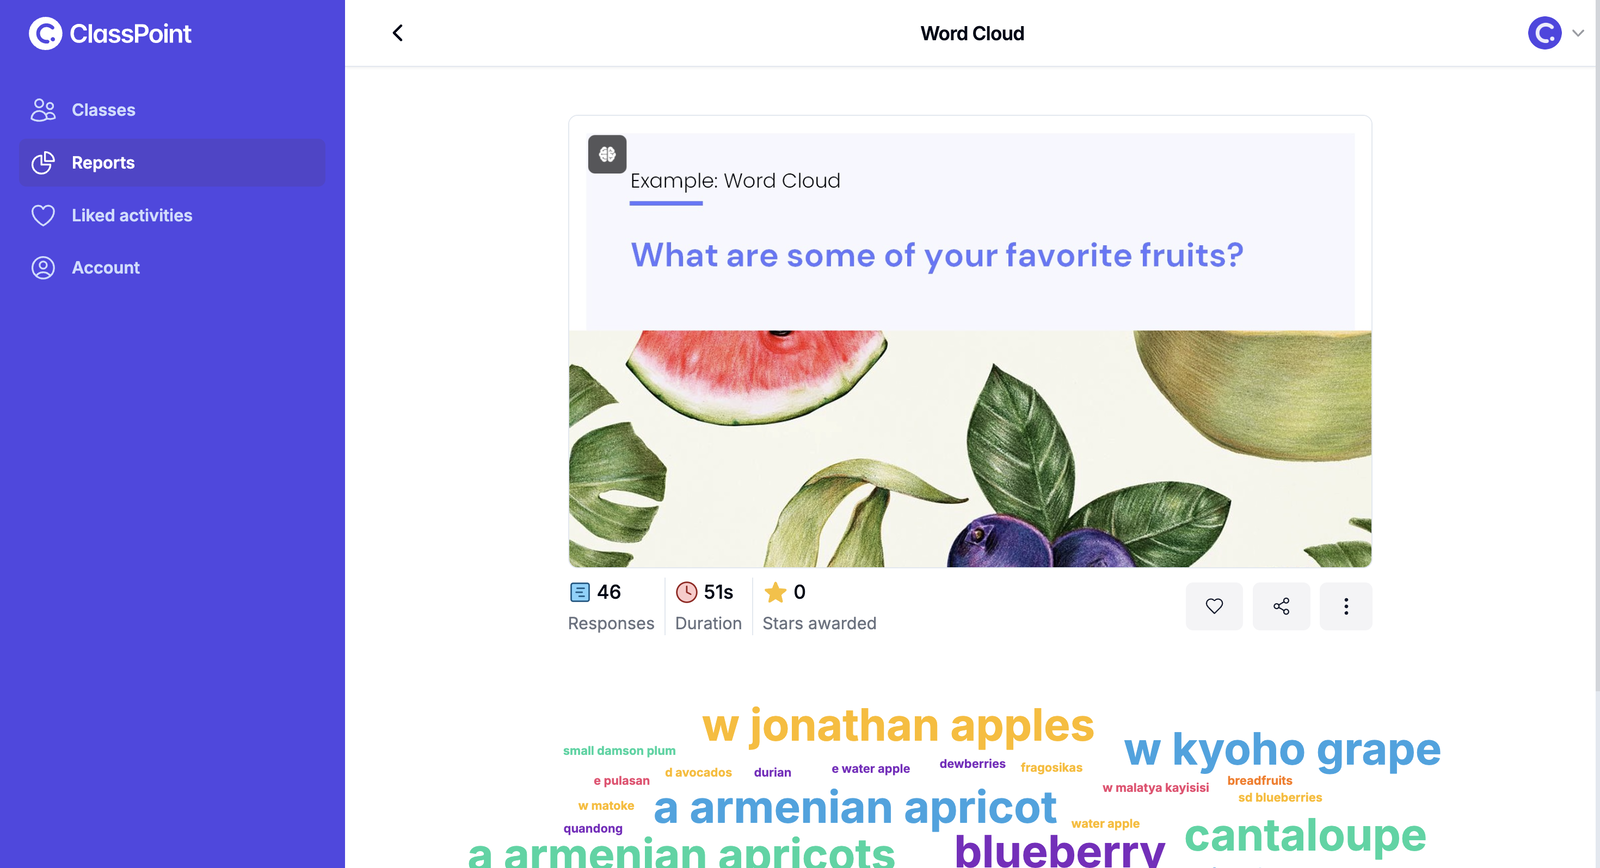
Just as you share highlights on your favorite social media platforms, you can share memorable student responses from any ClassPoint quiz type—perfect for celebrating learning moments.
How to access: Once you close submissions after a quiz, a Share button will appear at the lower-right corner of the response window. Click on this, and you’ll see a range of sharing options available.
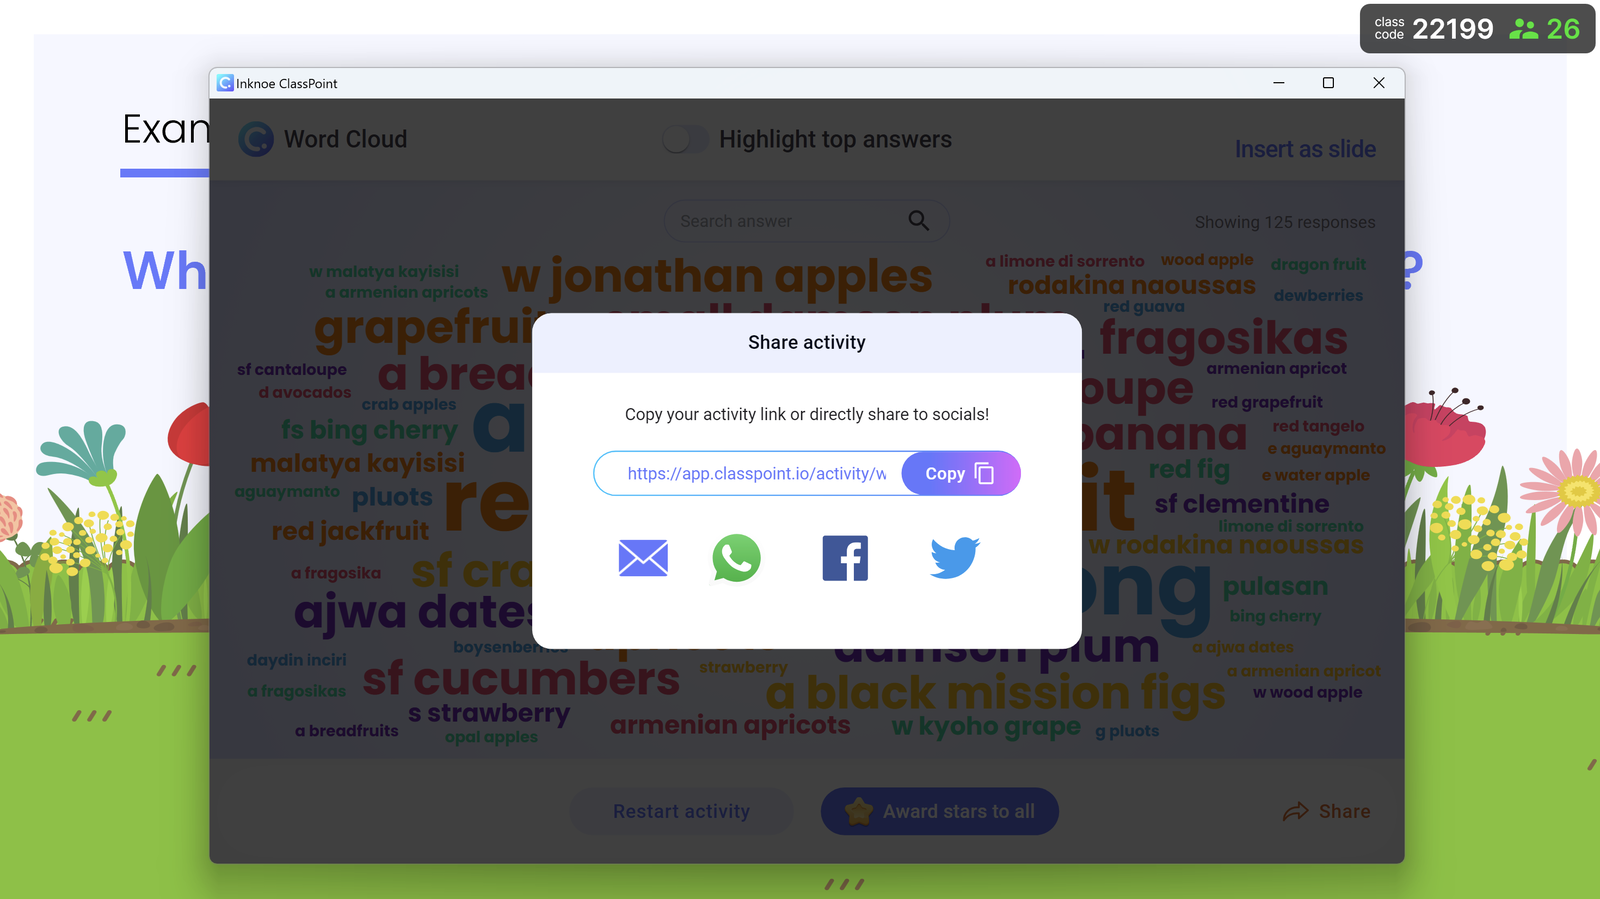
Alternatively, you can also share completed ClassPoint activities from the ClassPoint web app. Navigate to your class reports, which includes a rundown on all the activities conducted during a session. Select an activity and click on the Share icon to broadcast it across various platforms or save it for future reference.
4. Live Q&A
Moving on to the 4th item in our list of hidden ClassPoint features—Live Q&A. Not only is this feature lesser-known, but it’s also a premium offering that elevates engagement during your presentations.
Get ClassPoint Premium for you and your school / group today to access ClassPoint's Live Q&A feature.
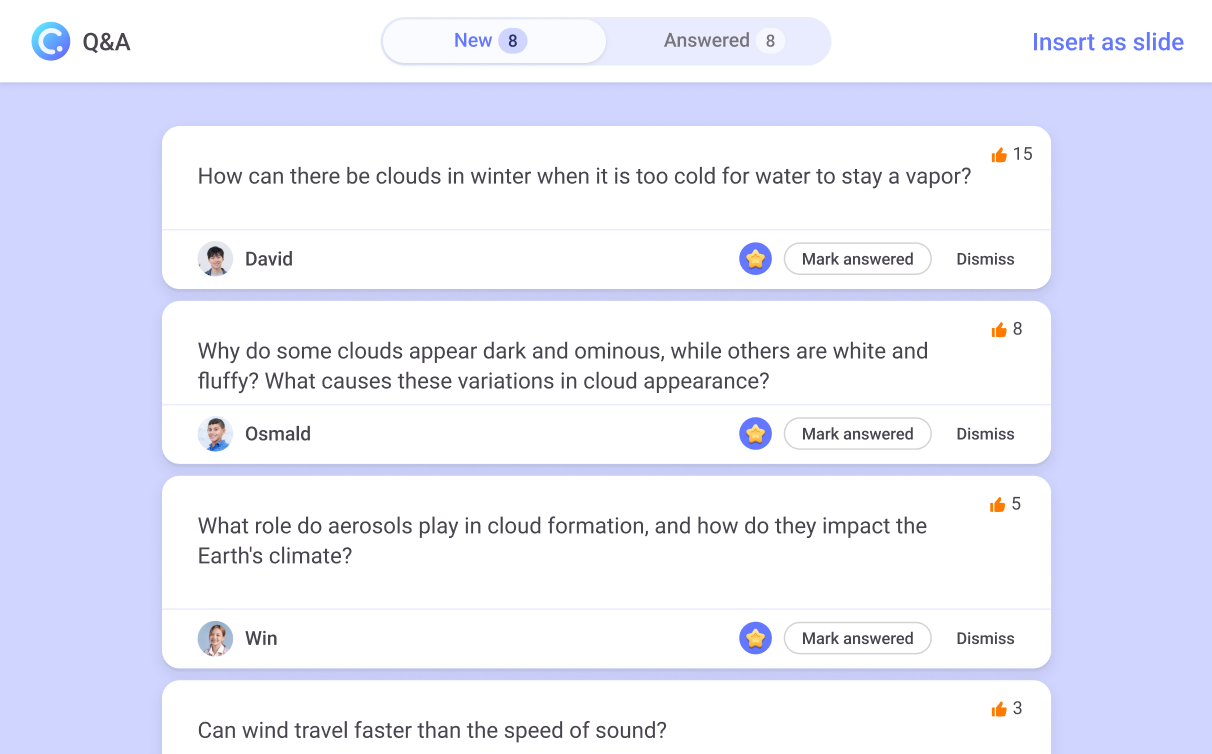
How to access: On the presentation toolbar in slideshow mode, you’ll find the Q&A icon toward the end of the toolbar options. Clicking on it opens the Q&A presenter window, with several navigation features:
- New and unanswered questions tab: Manage incoming questions by awarding points, marking them as answered, or dismissing irrelevant ones.
- Answered questions tab: Store questions you’ve already addressed for future reference.
- Enable/Disable toggle: Control whether the Q&A session is live.
- Insert as slide: Add the questions directly into your PowerPoint presentation.
How can my students raise questions?
Students connected to your ClassPoint session can see a Q&A icon on the lower-right of their device browsers. With one click, they can:
- Submit questions that appear in real-time on your PowerPoint slides.
- Upvote questions from their classmates, bringing the most popular queries to the top of the queue for prioritized discussion.
5. Customize Levels & Reset Stars
With gamified ClassPoint features, you can very much expect that it doesn’t just stop with stars—customizing levels, badges, and resetting stars gives you full control over how the game plays out in your classroom.
Customize Levels
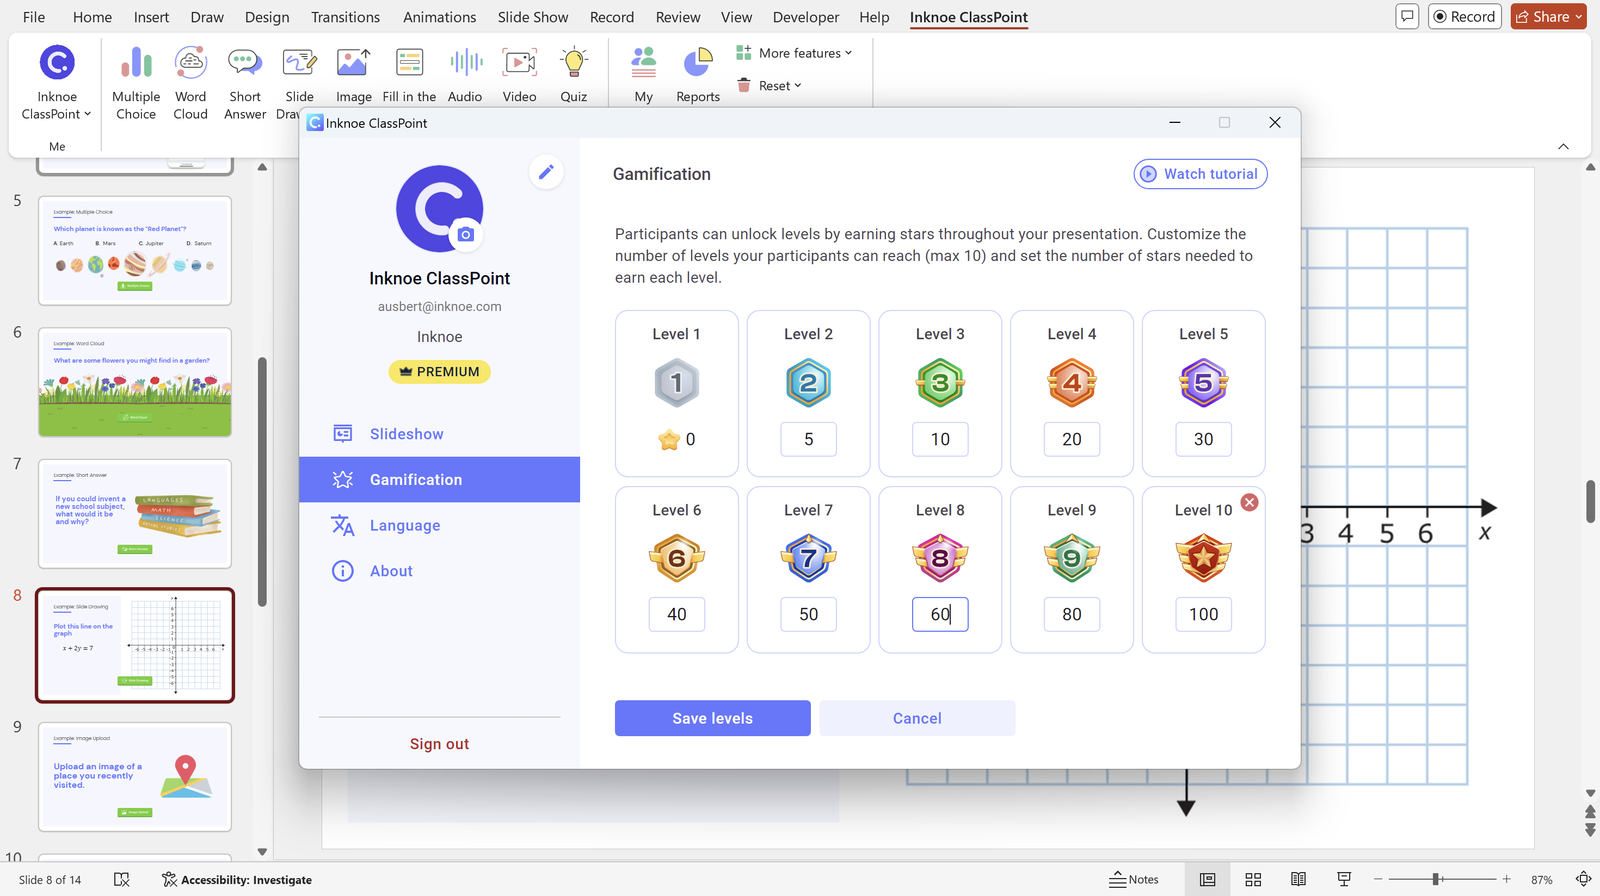
How to access: While in PowerPoint Edit Mode, click on your User Profile in the upper-left corner. From the dropdown menu, select Settings. In the Settings window, navigate to the Gamification tab. Here, you can begin editing the levels by assigning the number of stars students must earn to move to the next level.
When and why should I customize levels?
Customizing levels lets you adjust how challenging or easy it is for students to progress, making each session more tailored to your objectives. For example:
- Differentiate by difficulty: Some topics might warrant more stars for leveling up, while others may need less, depending on how you want to structure the learning process.
- Change up the game: You can reset levels or adjust the number of stars needed between sessions, keeping things fresh and motivating for students.
Reset Stars
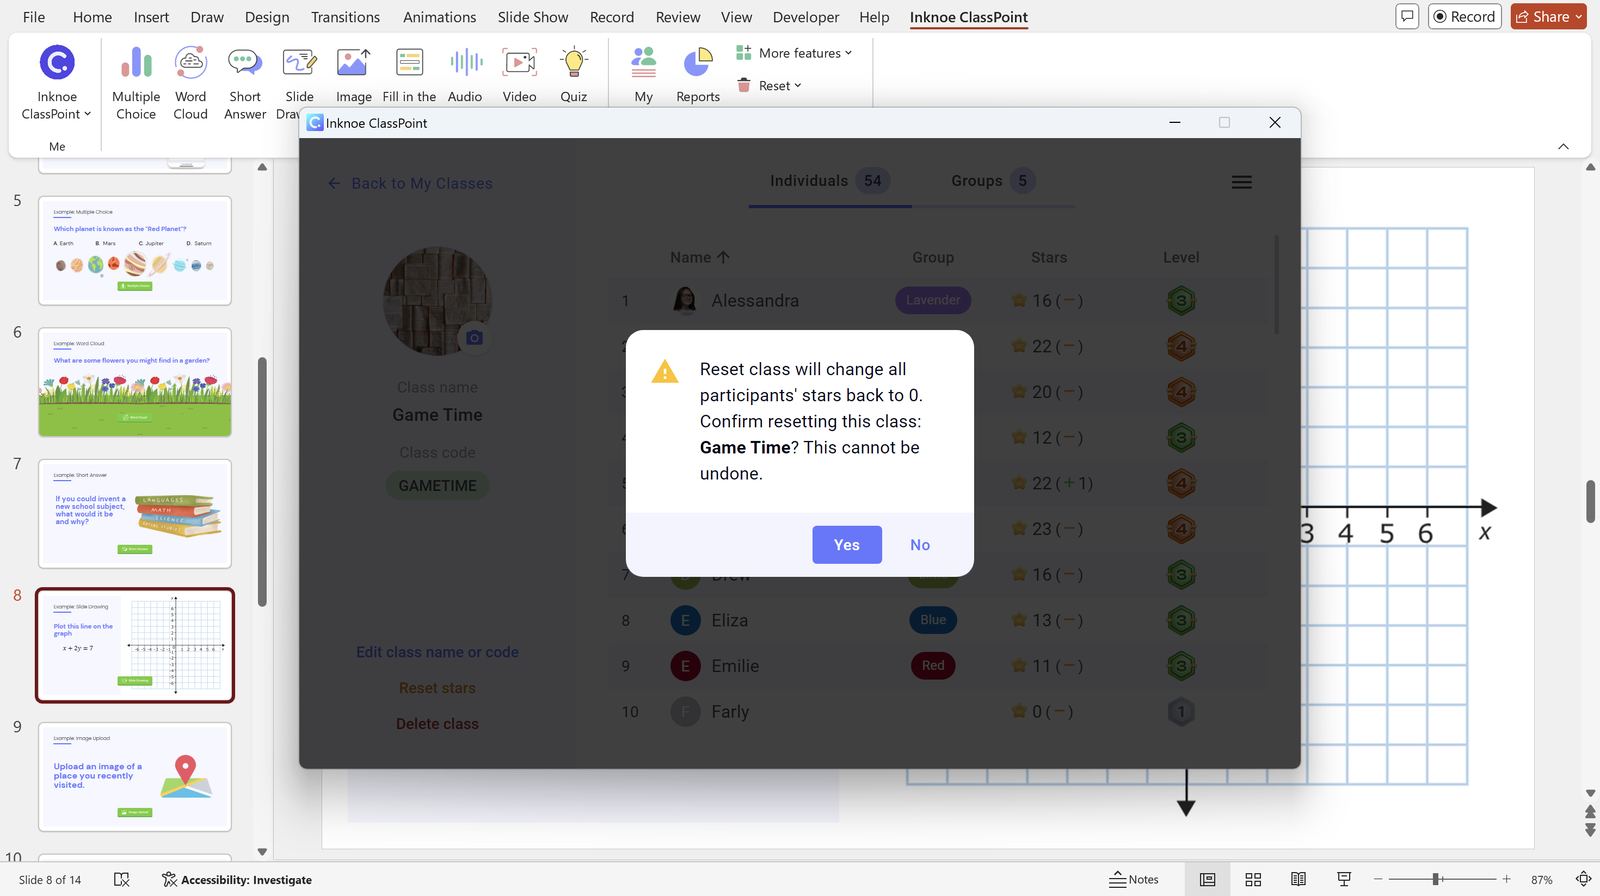
How to access: From the Inknoe ClassPoint tab, navigate to My Classes, where you can view all your saved classes. Click on the class for which you want to reset the stars. In the window that appears, you’ll find the Reset Stars option on the lower-left side. This will clear all stars accumulated by students in that particular class.
Why reset stars?
- Fresh Start for New Sessions: Resetting stars between lessons or terms gives every student a clean slate to work from, motivating them to start participating actively again without past scores weighing them down.
- Level the Playing Field: If some students have racked up too many stars in previous lessons, resetting levels the competition for new challenges, ensuring all students feel encouraged to engage.
- Changing Goals: When introducing new objectives or activities, resetting stars lets you align the rewards system with new learning outcomes, ensuring that the progress toward stars matches your current goals.
Here's a quick guide on Creating a Lesson with ClassPoint from Start to Finish.
6. Quiz Ideas
Some of the most exciting ClassPoint features aren’t exactly hiddenthey’re just criminally underrated. One of these gems is the Quiz Ideas feature.
What does Quiz Ideas do for me?
It serves as your ultimate resource for ready-made quiz templates embedded directly into PowerPoint. If you’ve ever felt stuck while creating quizzes or just needed some inspiration for question types, this feature comes to the rescue with the following:
- Ease of Access: Conveniently located within your PowerPoint ribbon, you can find Quiz Ideas in the Inknoe ClassPoint tab.
- Question-Embedded: All templates come with ClassPoint question buttons pre-embedded, saving you time and simplifying slide preparation even further.
- Direct Insert to Deck: With just a click, you can add any template from Quiz Ideas directly to your PowerPoint presentation. No extra steps needed!
It includes a wide variety of interactive quiz types from the ClassPoint Quiz Ideas Templates Library, covering all 8 ClassPoint quiz question types.
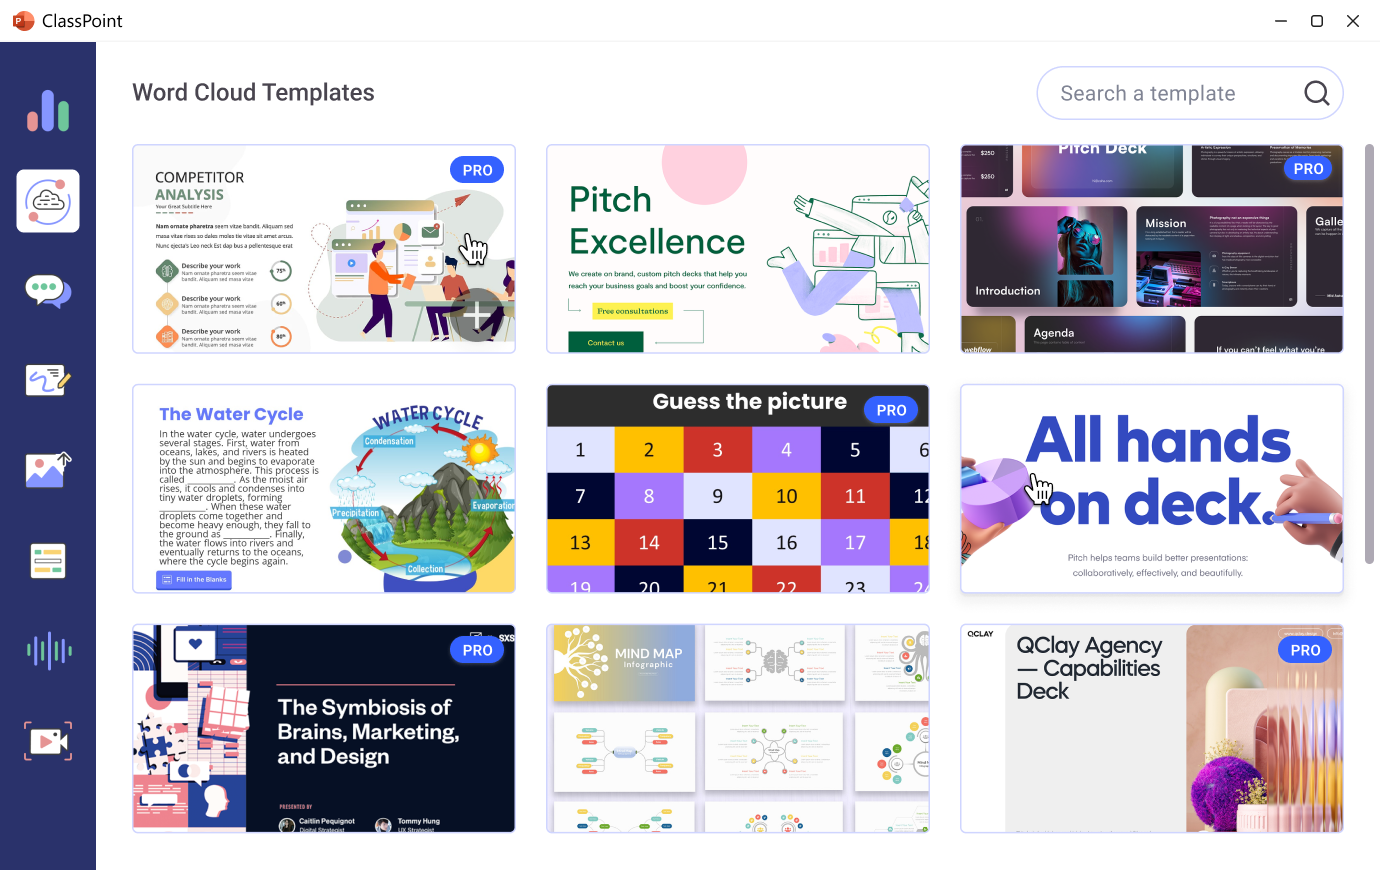
How to access: It’s simple—no frills. Just click on the Quiz Ideas button in the Inknoe ClassPoint tab, then browse through the templates sorted by question type. Once you find the one you like, insert it directly into your slide, and voilà—you have a quiz ready to go!
7. Quiz Mode Difficulty Levels
With just a simple toggle, you can turn any Multiple Choice question (MCQ) into Quiz Mode. And what’s even better? With Quiz Mode, you get the flexibility to set up difficulty levels, which pair perfectly with ClassPoint’s star system.
What’s the difference between ClassPoint MCQ and Quiz Mode?
Multiple choice questions are great for checking knowledge, but when you convert them to Quiz Mode, things get more exciting. Difficulty levels are set, and stars are automatically awarded based on students’ correct answers—saving you from having to manually give points.
Quiz Mode also gives you access to a quiz summary, which provides an overview of how students performed on each question. Plus, you can export this data as an Excel file for future review, giving you valuable insights into your students’ progress.
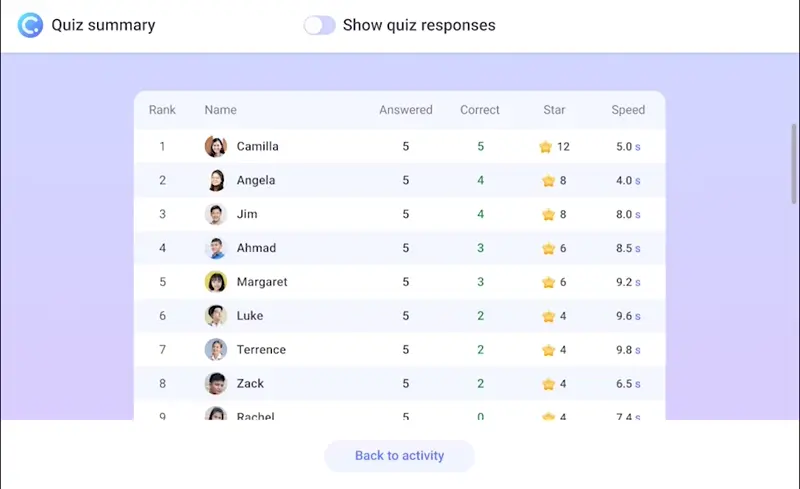
How do I adjust difficulty levels in ClassPoint Quiz Mode?
Once you’ve inserted a Multiple Choice button onto your slide, a side panel with options will appear. Toggle on Quiz Mode and you’ll see stars that represent different difficulty levels:
- 1 star for easy
- 2 stars for intermediate
- 3 stars for difficult
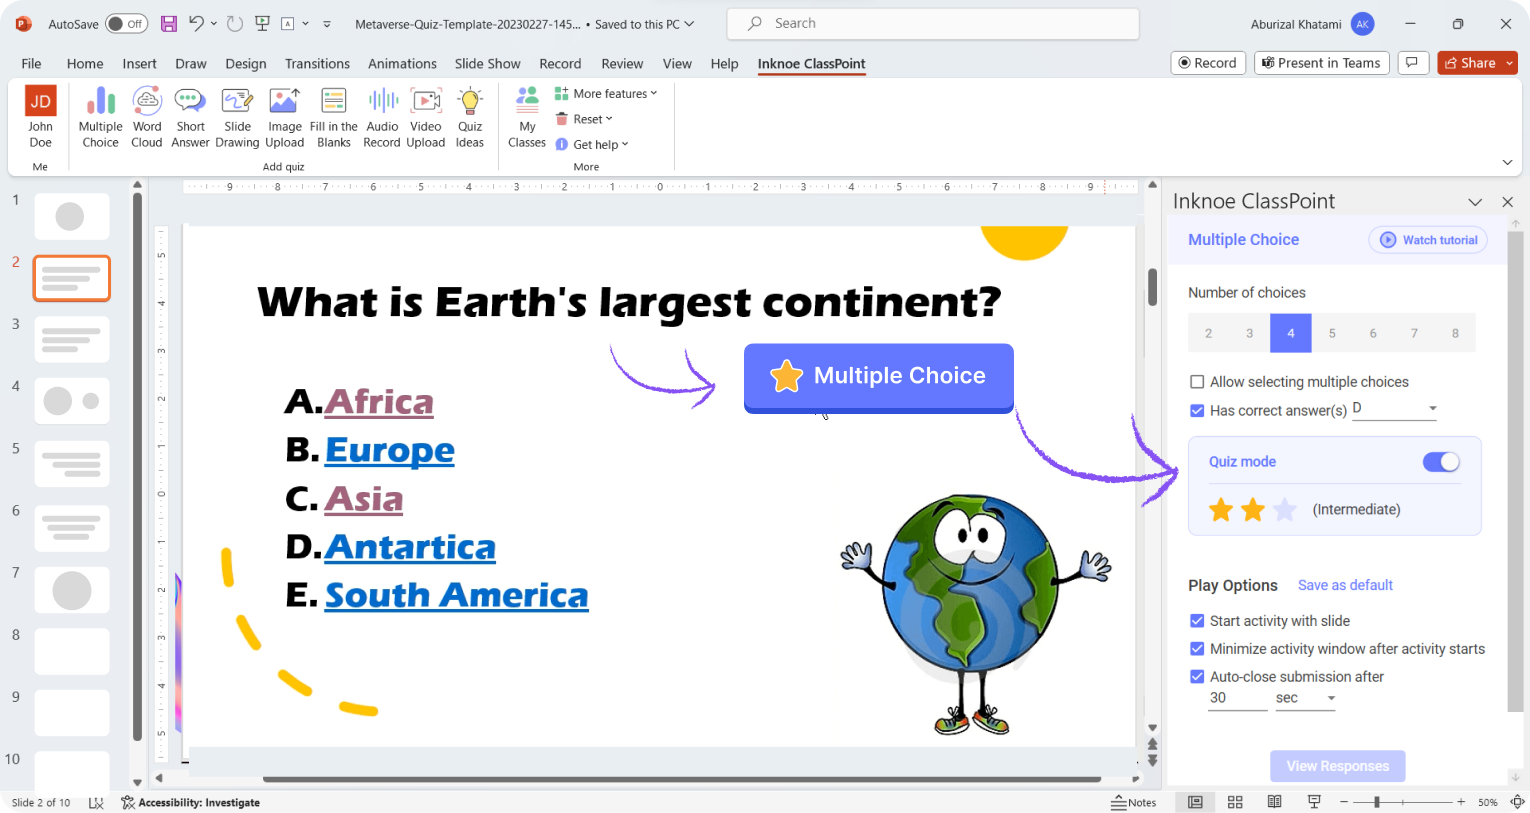
Set a correct answer, and you’re all set to run the quiz in slideshow mode!
More on How to Make a Quiz Game in PowerPoint using ClassPoint's Quiz Mode.
8. Play Options
Since we’ve already covered setting up Quiz Mode, let’s take a closer look at how ClassPoint’s quiz questions allow for personal customization with flexible Play Options for every question.
How to access: After inserting any type of ClassPoint quiz question (from the 8 available), a side panel with Play Options will automatically appear. This panel lets you adjust the settings for your quiz depending on the requirements of your activity or instructions.
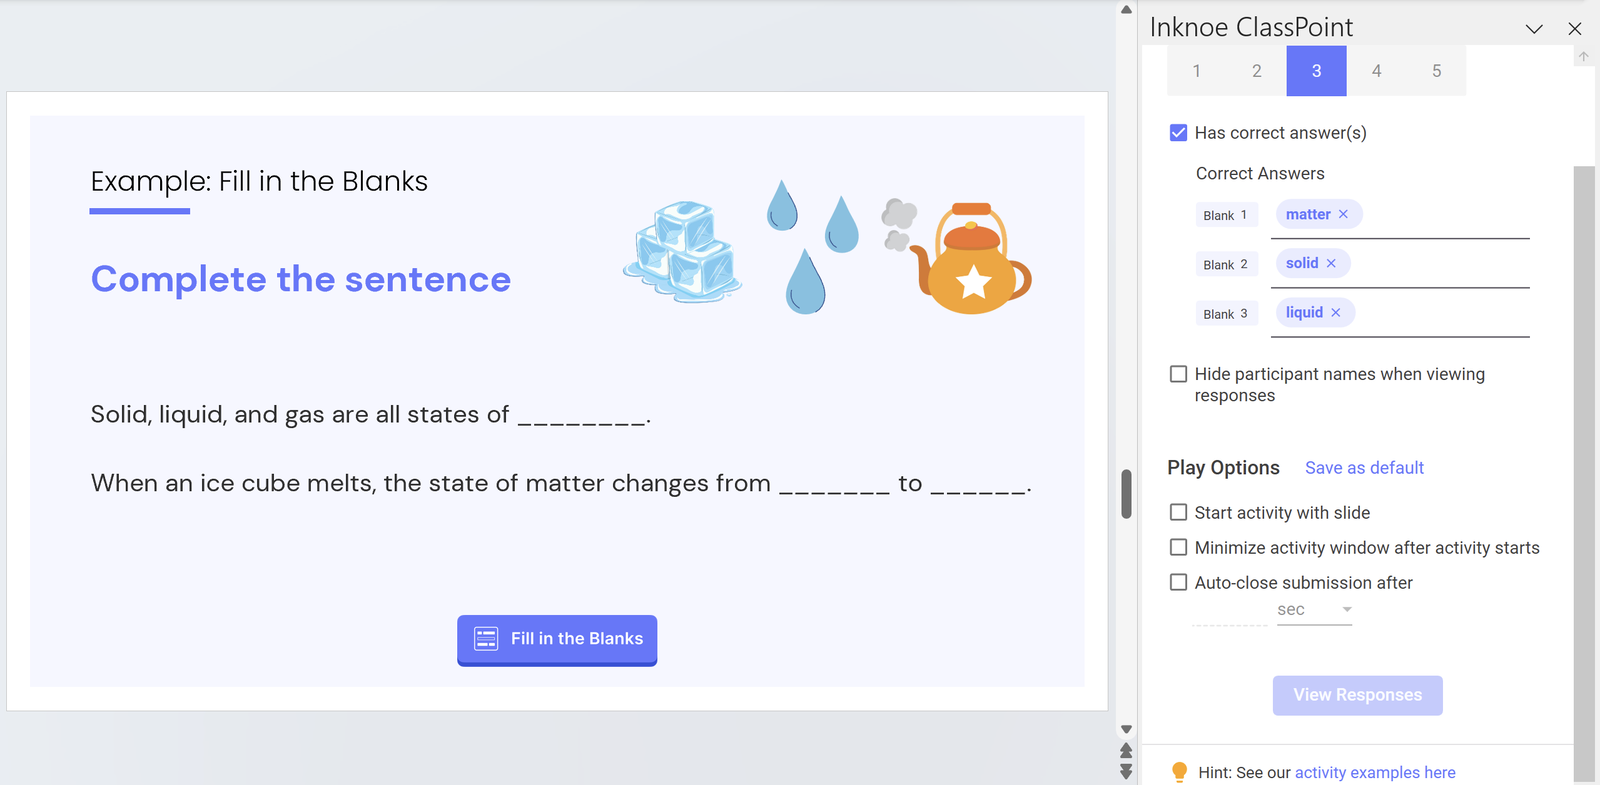
This is where you can control things like:
- The number of submissions allowed per student.
- Time limits for your quiz.
- Anonymizing student names (where applicable).
- And other settings to tailor each question perfectly for your session.
9. Share PDF
ClassPoint it takes things further by allowing you to instantly transform your slides into a teaching resource. With the Share PDF feature, you can turn your deck into a shareable, viewable file that participants can access directly from their devices.
How does ClassPoint’s Share PDF work?
ClassPoint’s Share PDF feature converts your PowerPoint file into a PDF and generates a scannable QR code for participants. This lets them open the PDF right on their devices without needing any additional downloads or links. You have full control over what to include:
- Select all slides or only a few.
- Decide whether to include annotations.
- Choose whether to include whiteboards from your session.
The QR codes are valid for 5 minutes, ensuring that your shared materials remain secure and accessible only during your intended window.
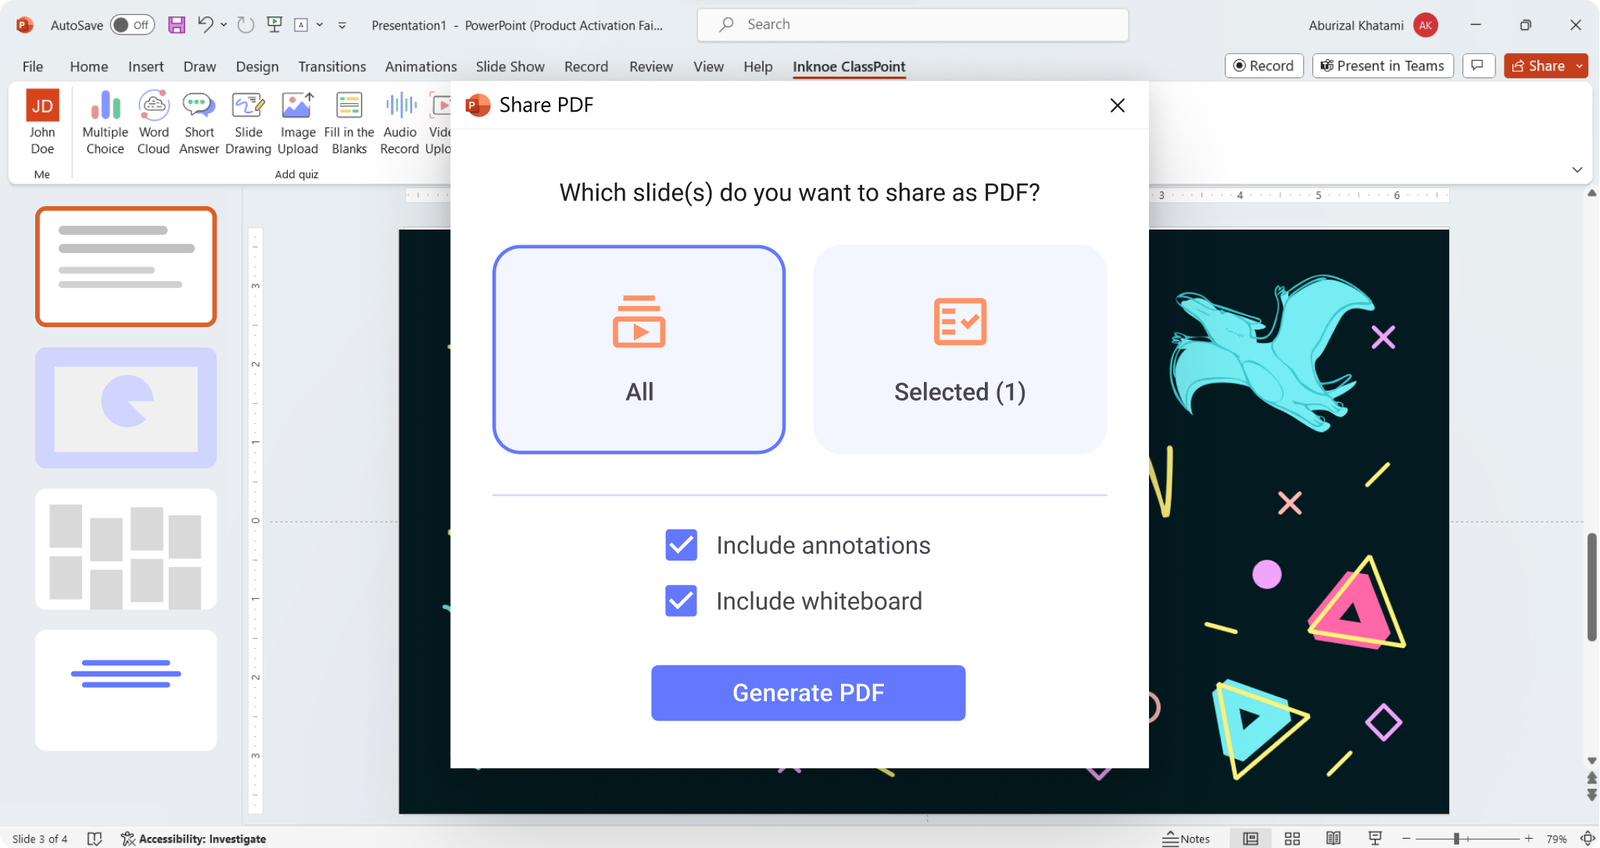
How to access: In PowerPoint Edit Mode, click on the More Features dropdown from the Inknoe ClassPoint tab and select Share PDF. Set your preferences, generate a QR code, and share it with your audience on the spot!
10. Class Reports
After an engaging session packed with interactive ClassPoint features, it’s helpful to take a step back and analyze the results. ClassPoint makes it easy for you to access insightful data to evaluate student performance and participation.
How to access: In PowerPoint Edit Mode, click on Reports from the Inknoe ClassPoint tab. This will take you to the ClassPoint web app, where all essential classroom data is stored, including reports.
Alternatively, you can directly visit app.classpoint.io to retrieve reports anytime, using any browser.
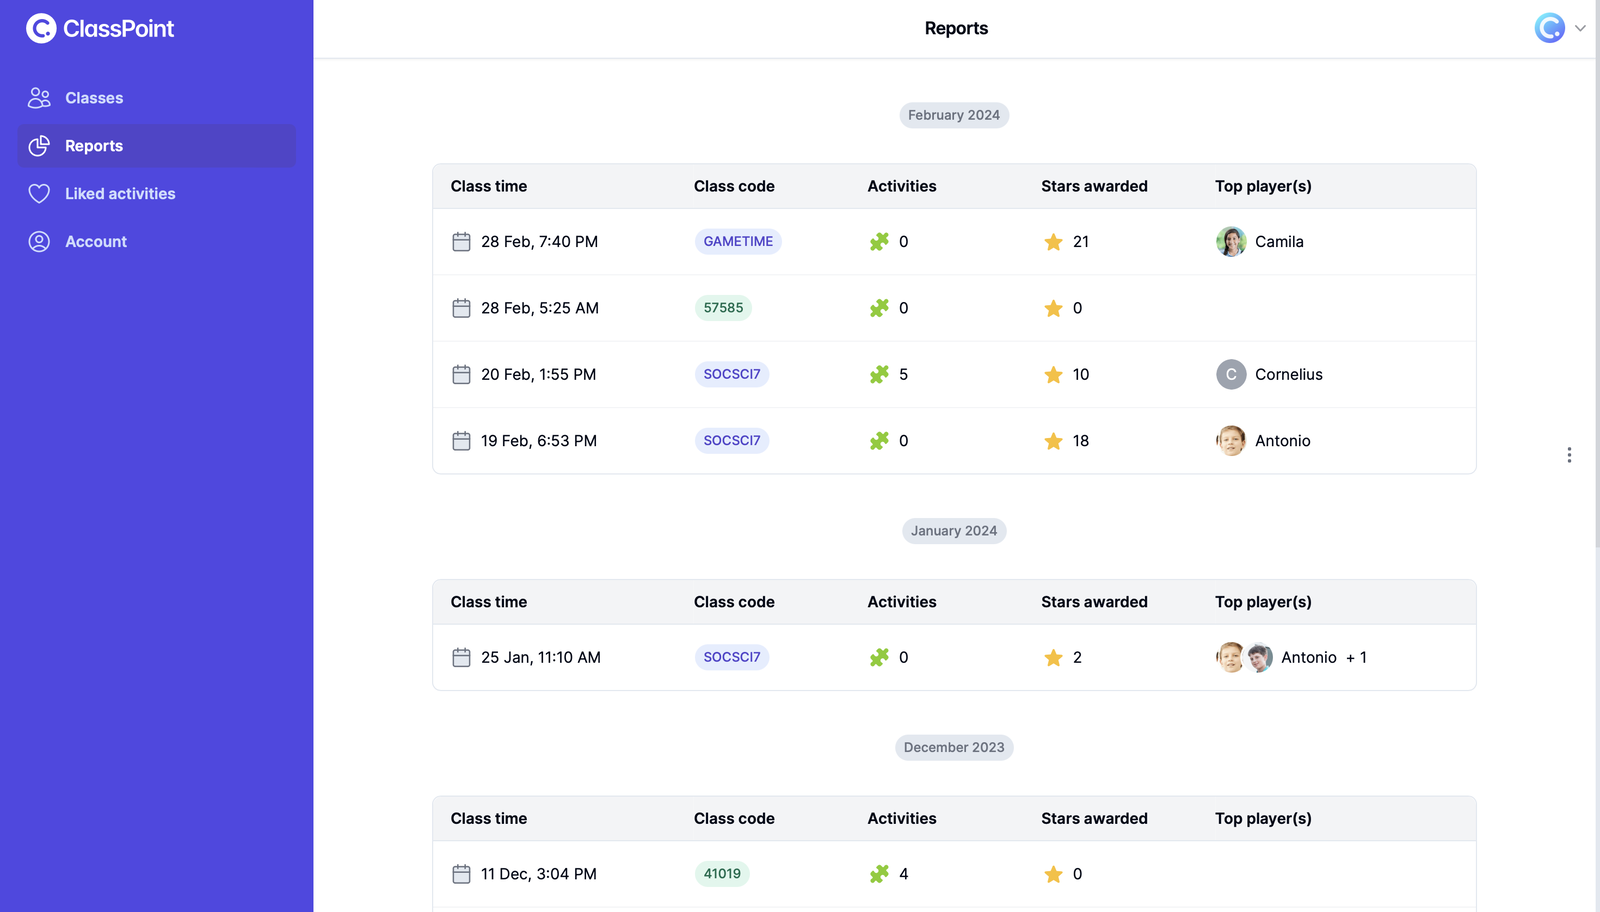
Here’s what you can do with Class Reports:
- Get a monthly overview of all your ClassPoint sessions.
- Check the leaderboards of individual classes.
- Dive into each activity to review student responses and analyze results.
- Utilize AI-powered insights to further understand your data and pinpoint trends or areas for improvement.
Before You Go
Don’t settle for the basics when it comes to ClassPoint! You’ve just uncovered some game-changing ClassPoint features that can elevate your teaching and engage your students in ways you never thought possible, so be sure to turn these hacks into action.
Be sure to check out our webinar replay, where we delve deeper into these functionalities and provide tips on how to use them effectively.
Webinar Replay on 10 Hidden ClassPoint Features
More of Our Webinar-to-Blog Pieces

