When creating a PowerPoint presentation, you may need to share or save your PowerPoint as a PDF file. PDFs are compact, easy to share, and maintain the visual layout of your slides, ensuring that your content looks exactly as intended across various devices and platforms. In this guide, we’ll explore not just how to save PowerPoint as PDF, but also how to include notes, make interactive PDFs, and even convert PDFs back to editable PowerPoints.
Why Save PowerPoint as PDF?
- Easy Viewing on Any Device: PDFs are compatible with any device—smartphones, tablets, or desktops—so your audience doesn’t need PowerPoint software to view the presentation.
- Exact Formatting Across Platforms: Your fonts, layouts, and images stay exactly as designed, with no unexpected shifts. This guarantees that your presentation maintains its professional look on any screen, whether on Windows, Mac or even mobile devices.
- Stronger Content Security: PDFs offer more robust security options, like restricting copying, editing, or adding password protection. If your content contains sensitive or proprietary information, this ensures your content stays intact and secure.
- Smaller File Size for Easy Sharing: PDFs are typically smaller than PowerPoint files, which makes them easier to share via email or upload to cloud storage without sacrificing quality.
- Professional Presentation for Printing: PDFs are print-ready and can be easily formatted for multiple slides per page. This makes them perfect for creating handouts, study guides, or printed references that still look sharp and professional.
Whether you want to share your presentation with colleagues, upload it for a class, or create a reference guide for students, converting PowerPoint to PDF is a smart move. Let’s dive into the step-by-step methods to save your PowerPoint presentations as PDFs in different ways.
Table of Contents
How to Save PowerPoint as PDF on Different Operating Systems
1.) Saving PowerPoint as PDF on Windows
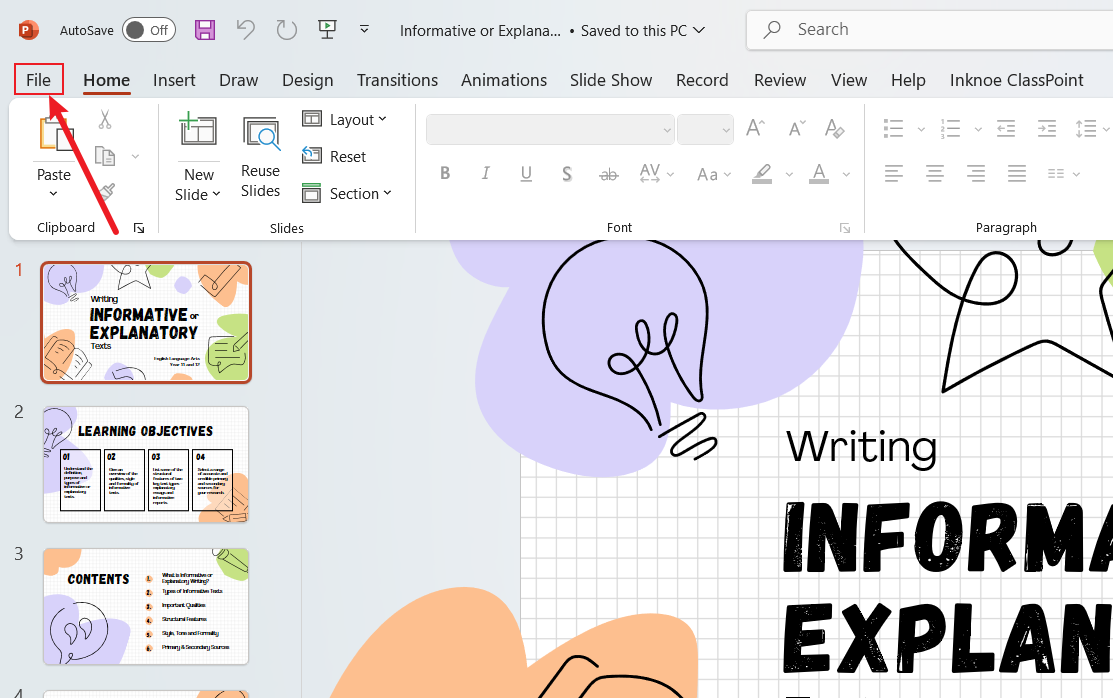
In your finalized PowerPoint file, go to the File Tab.
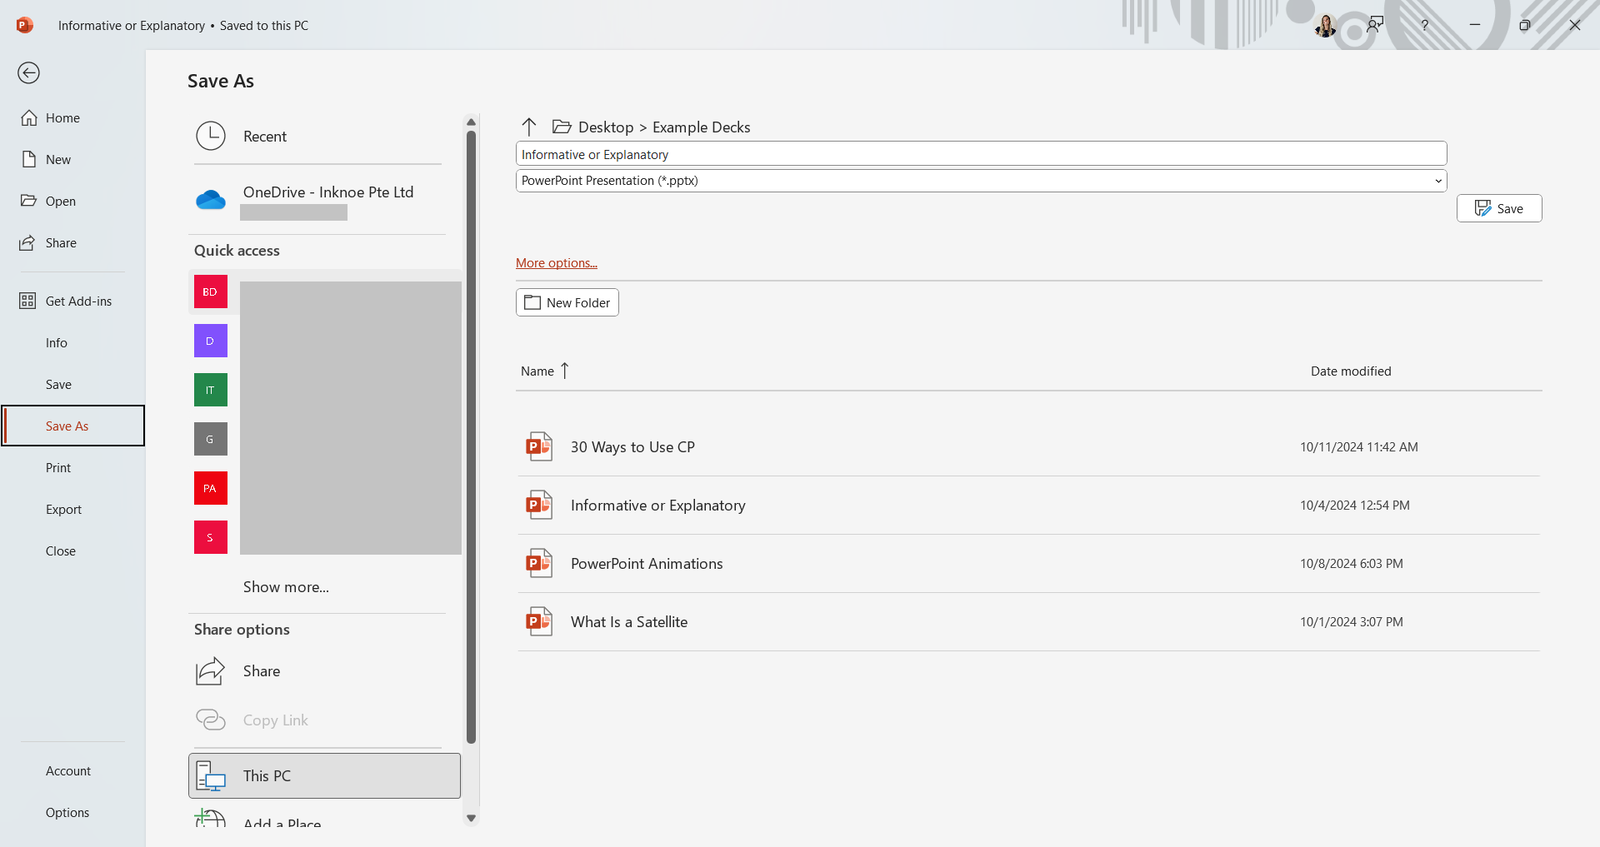
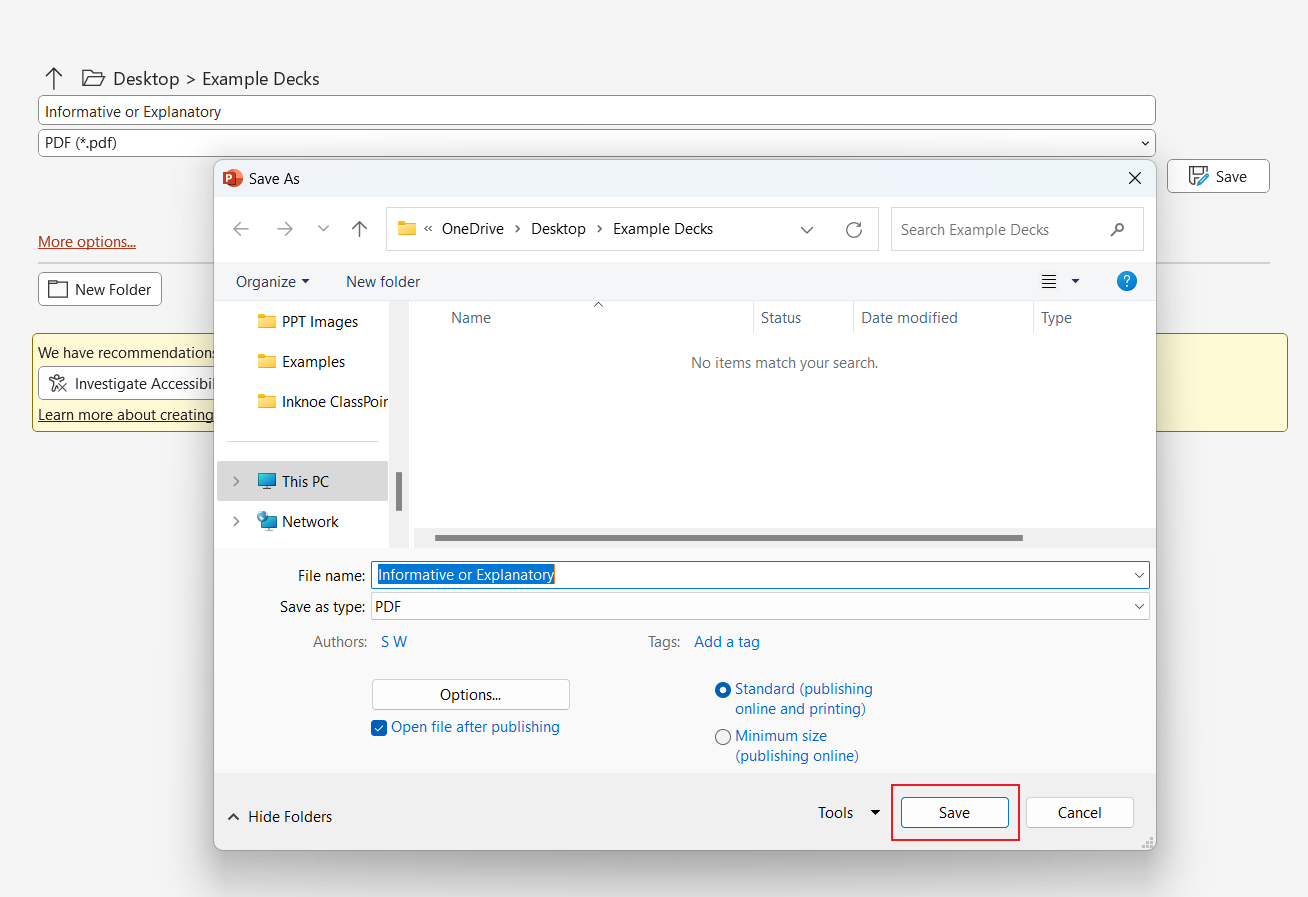
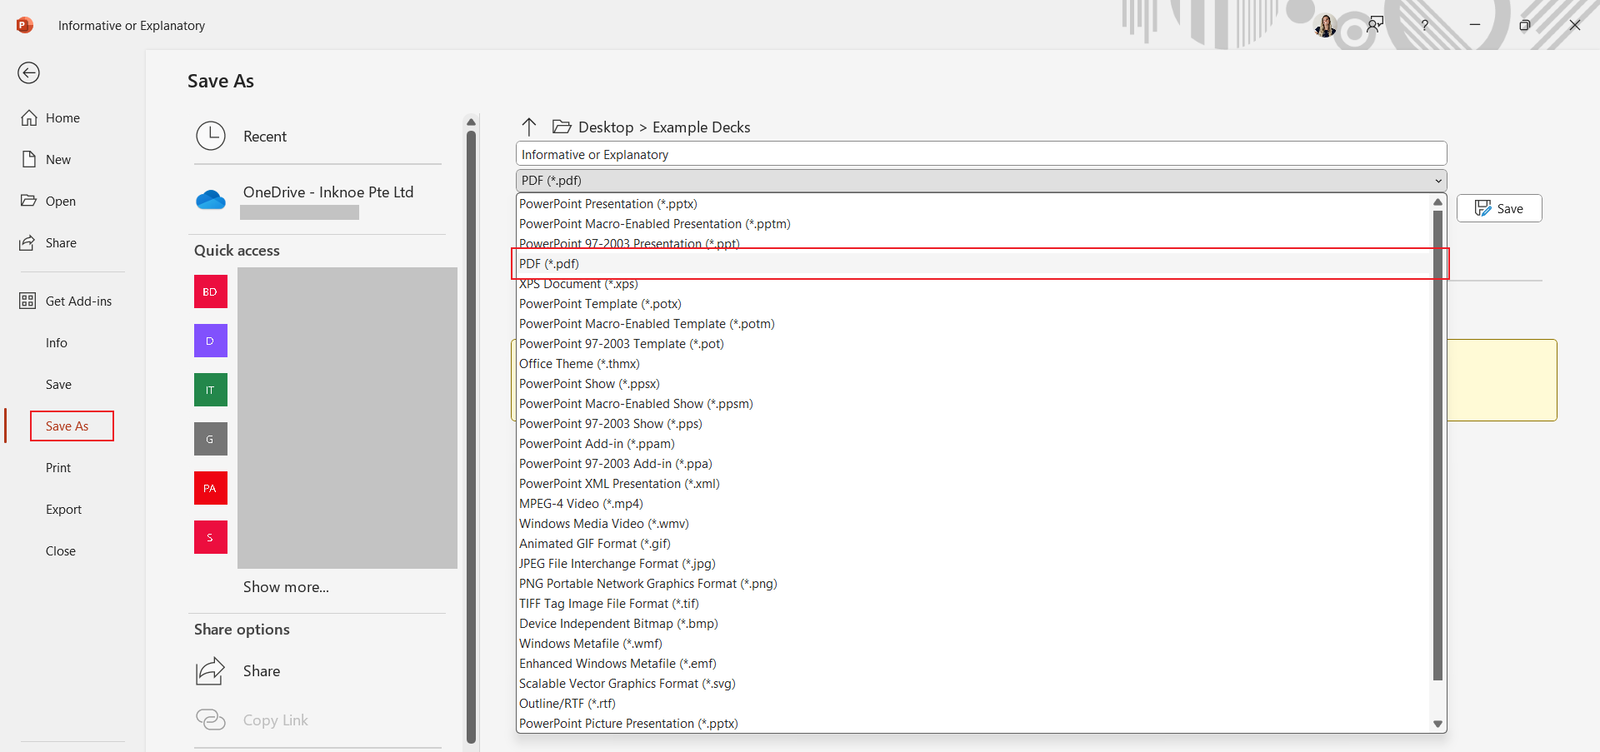
Select Save As and choose the folder where you want to save your PDF.
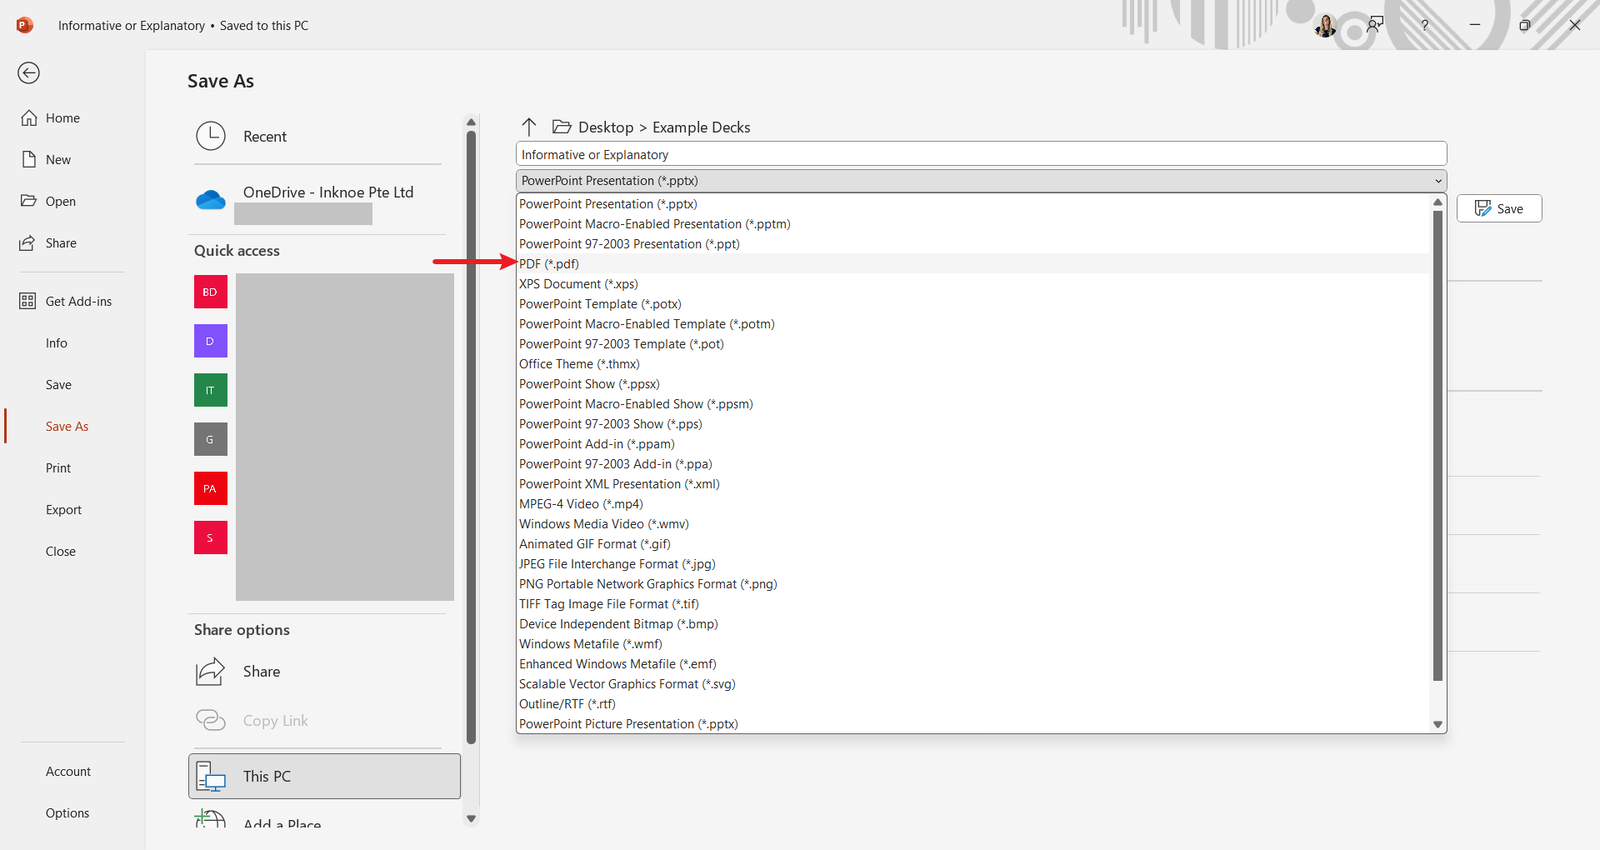
In the Save as type dropdown menu, select PDF.
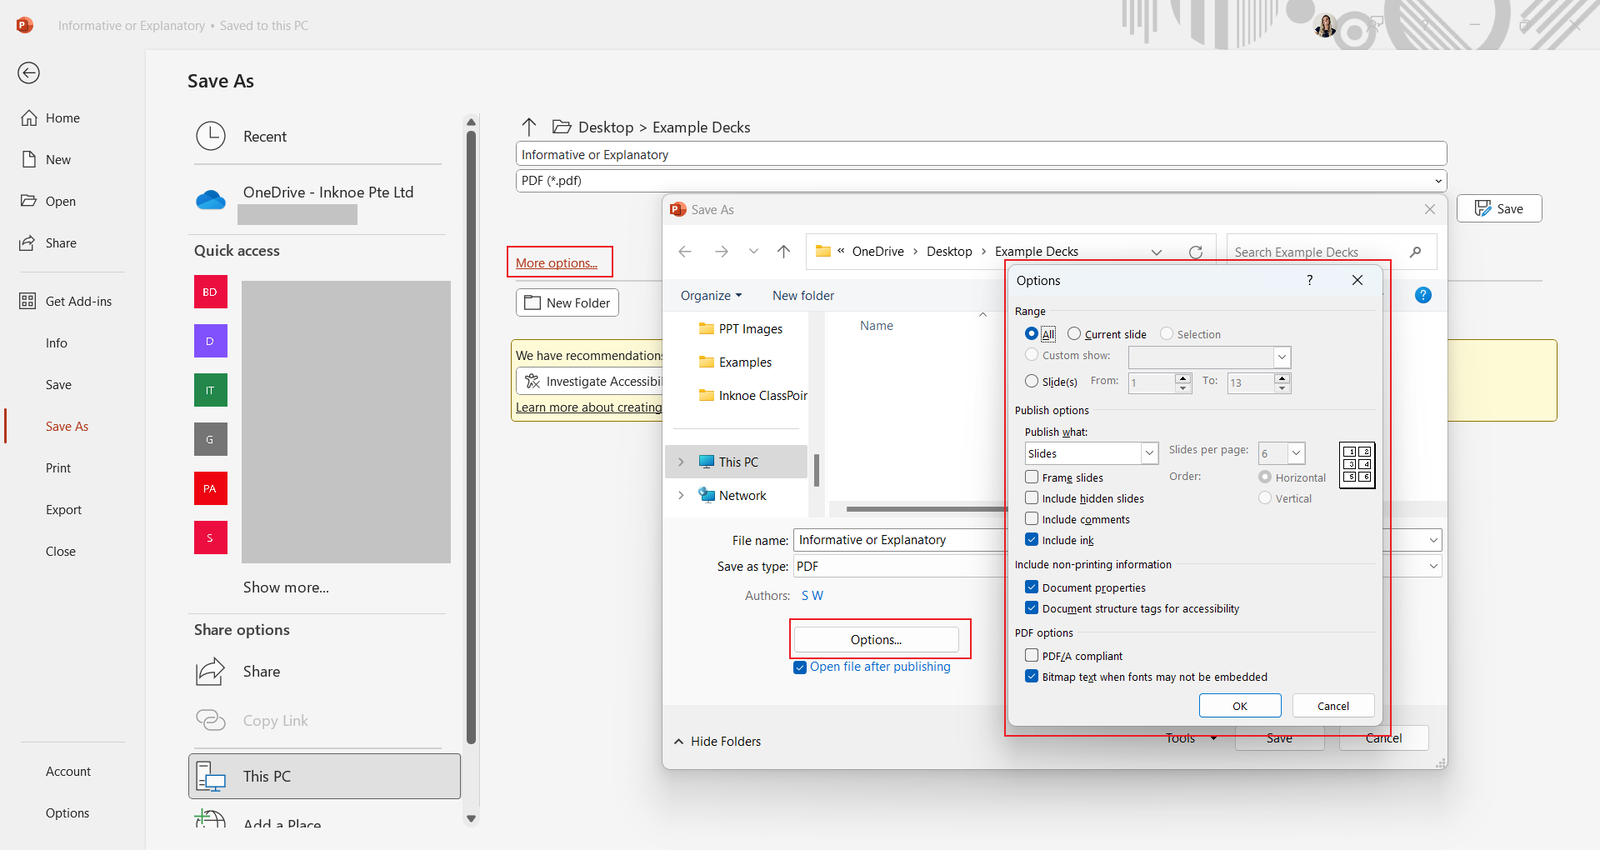
If you want to customize settings, click Options. This lets you select which slides to include and whether to add notes.
Once settings are adjusted, click Save. Your presentation is now a PDF!
2.) Saving PowerPoint as PDF on Mac
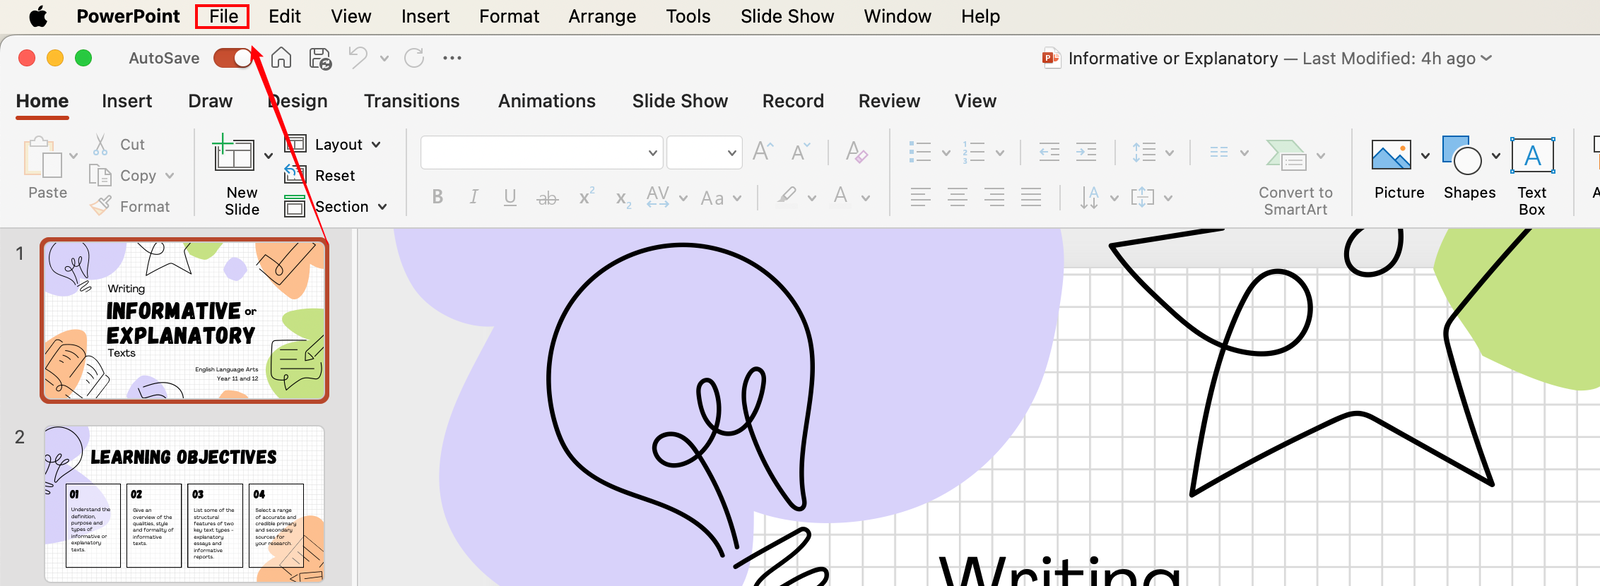
In your completed PowerPoint file, click File in the top-left corner of your screen.
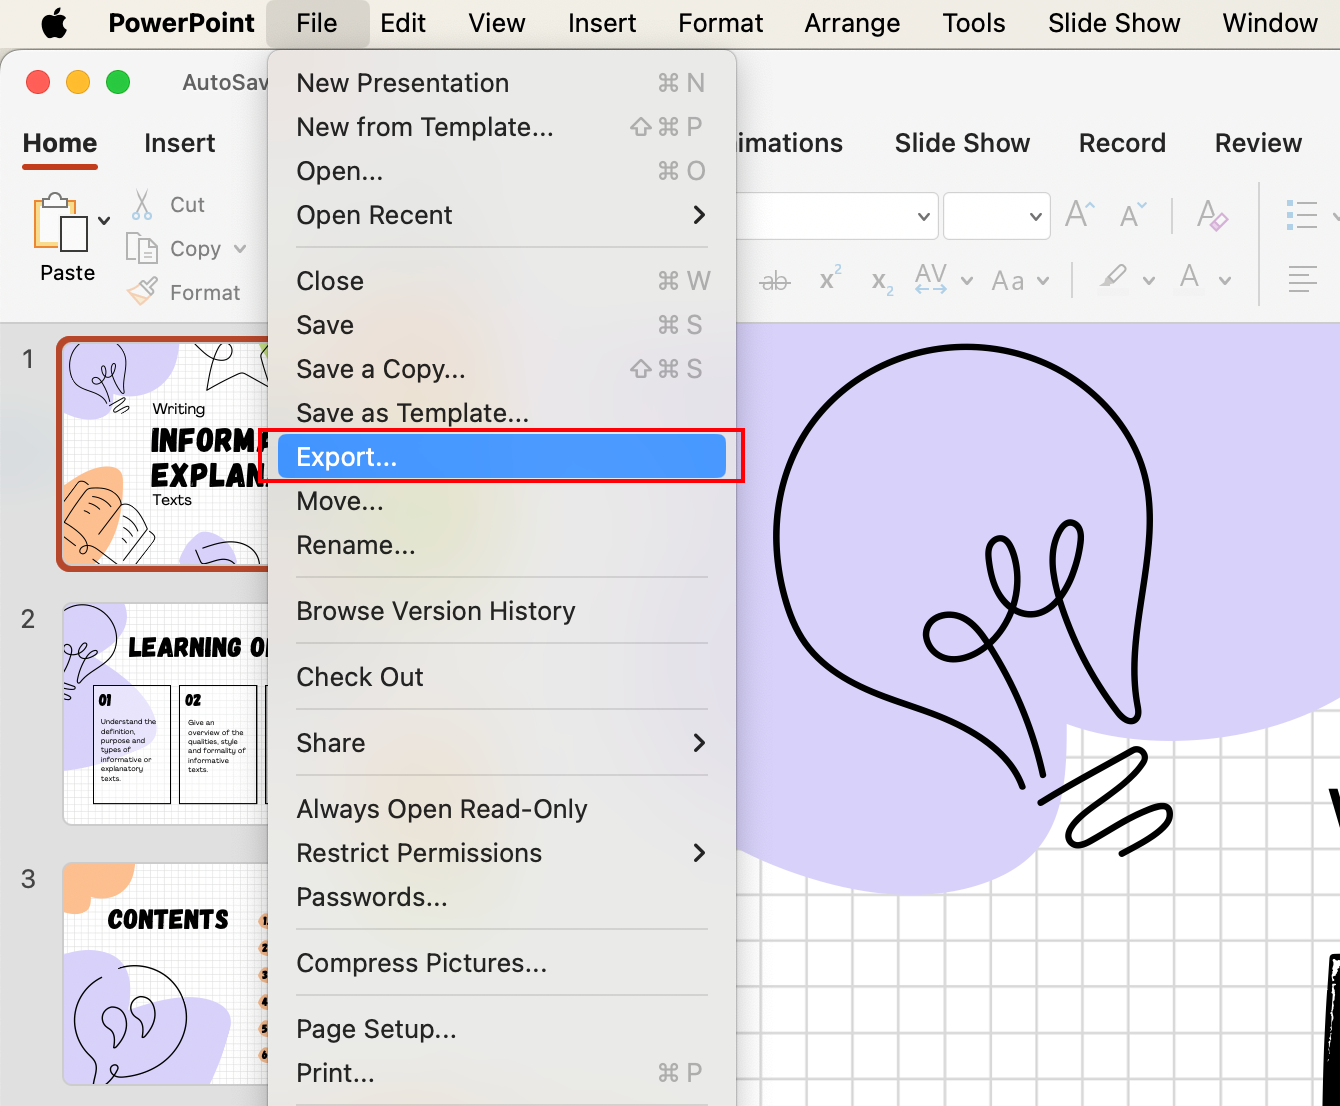
Click on Export.
In the File Format dropdown, select PDF.
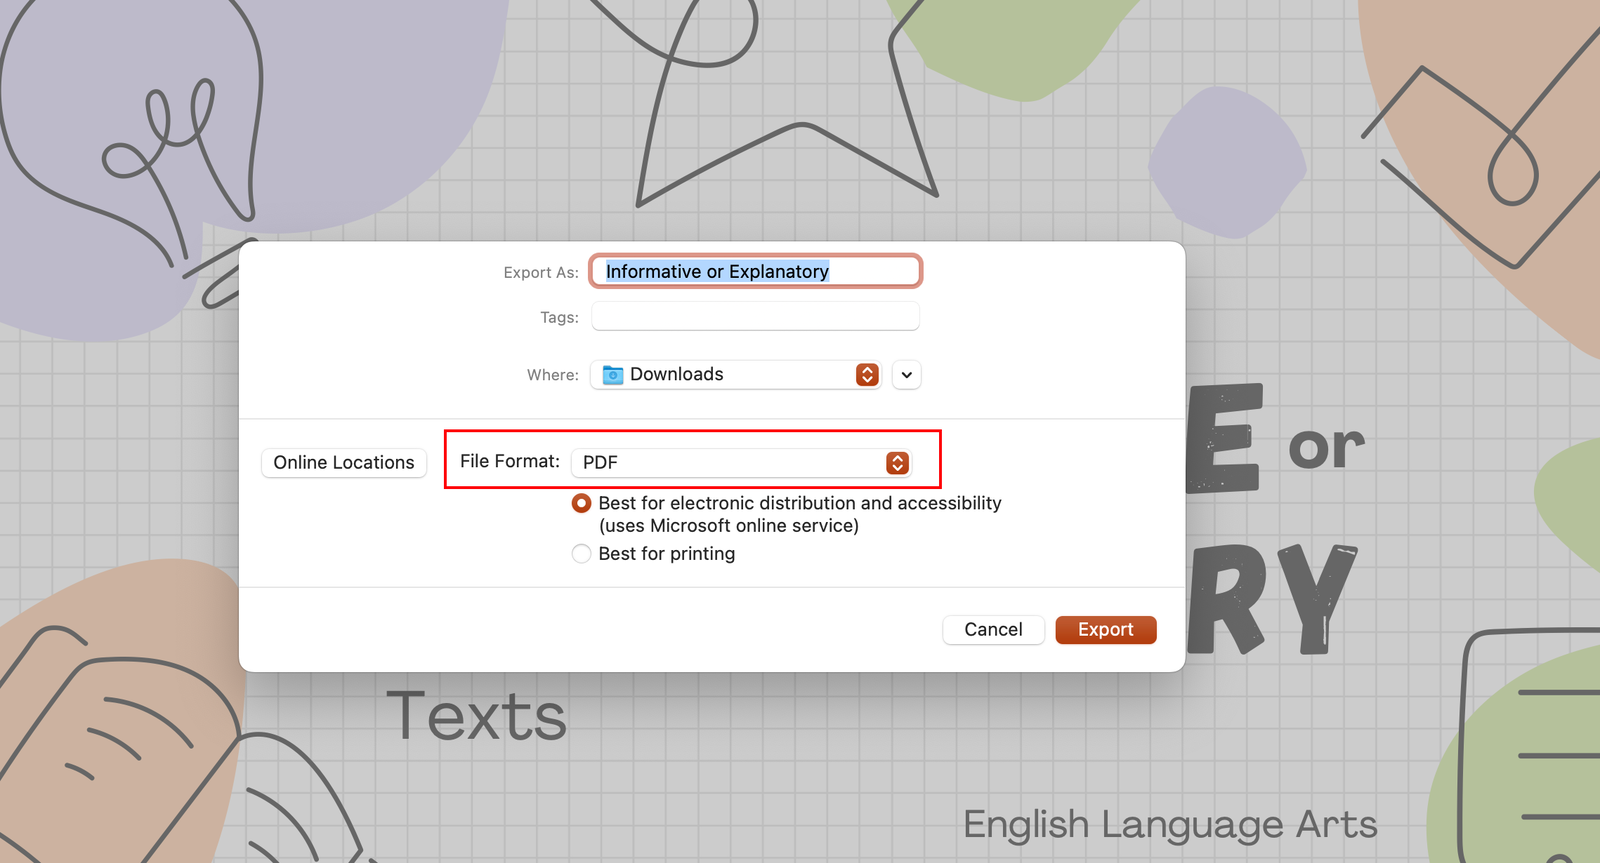
Customize which slides are saved and the quality settings. Then hit Export, and your PDF will be created.
3.) Saving PowerPoint as PDF with PowerPoint on the Web
This method is ideal if you’re working on a shared or cloud-based presentation and want to save a quick copy as a PDF without switching to desktop software.
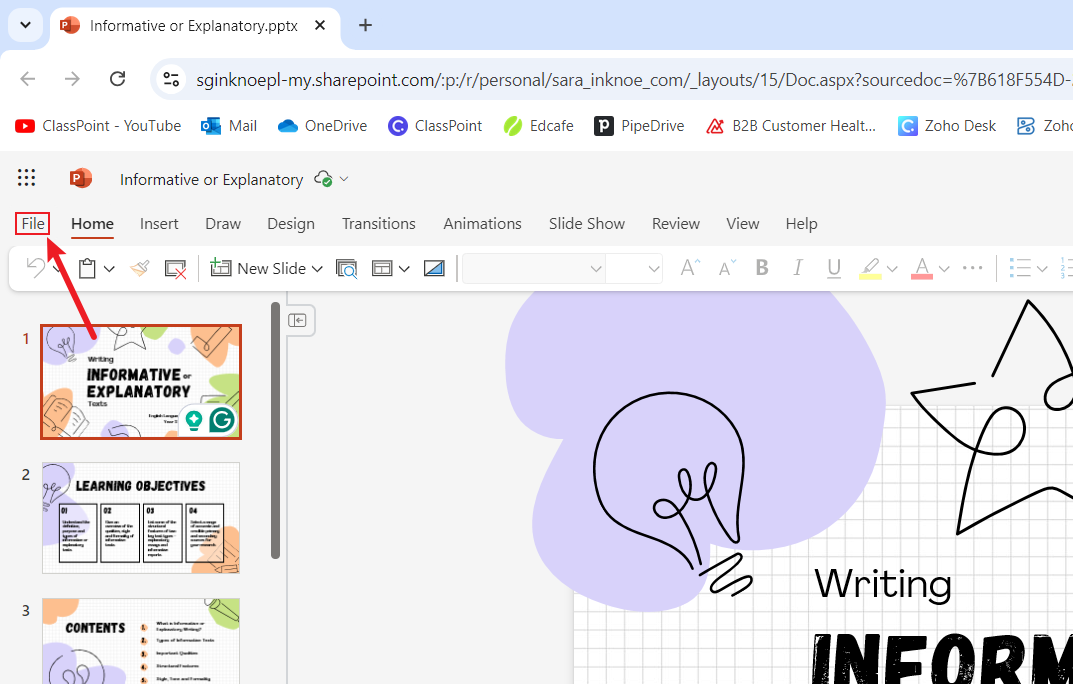
In your open Presentation in PowerPoint on the web, click the File Tab in the top-left corner.
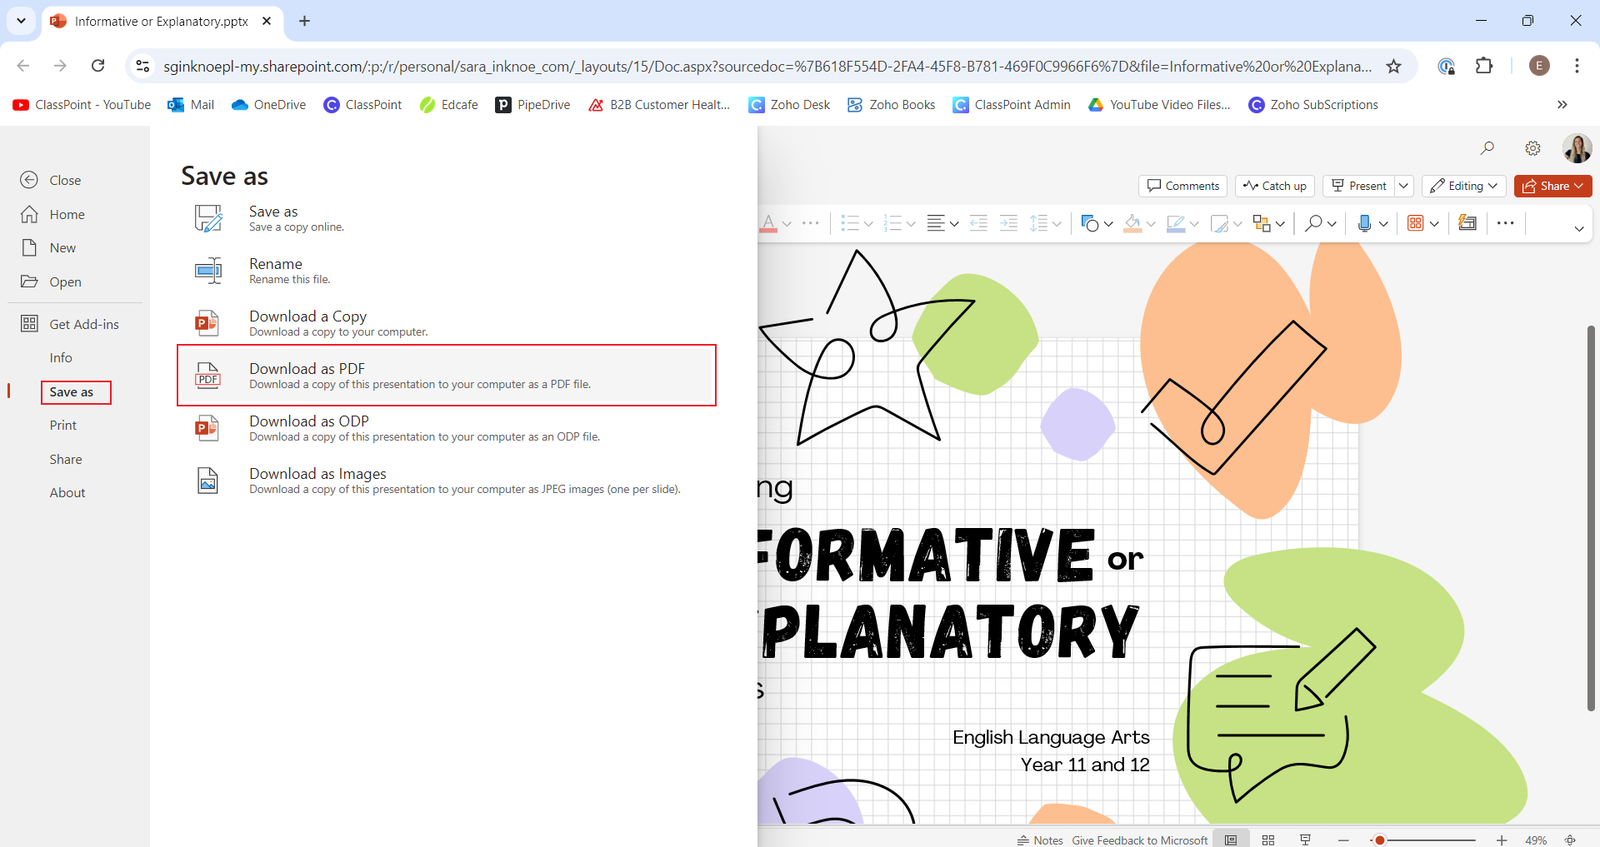
Select Save As and choose Download as PDF.
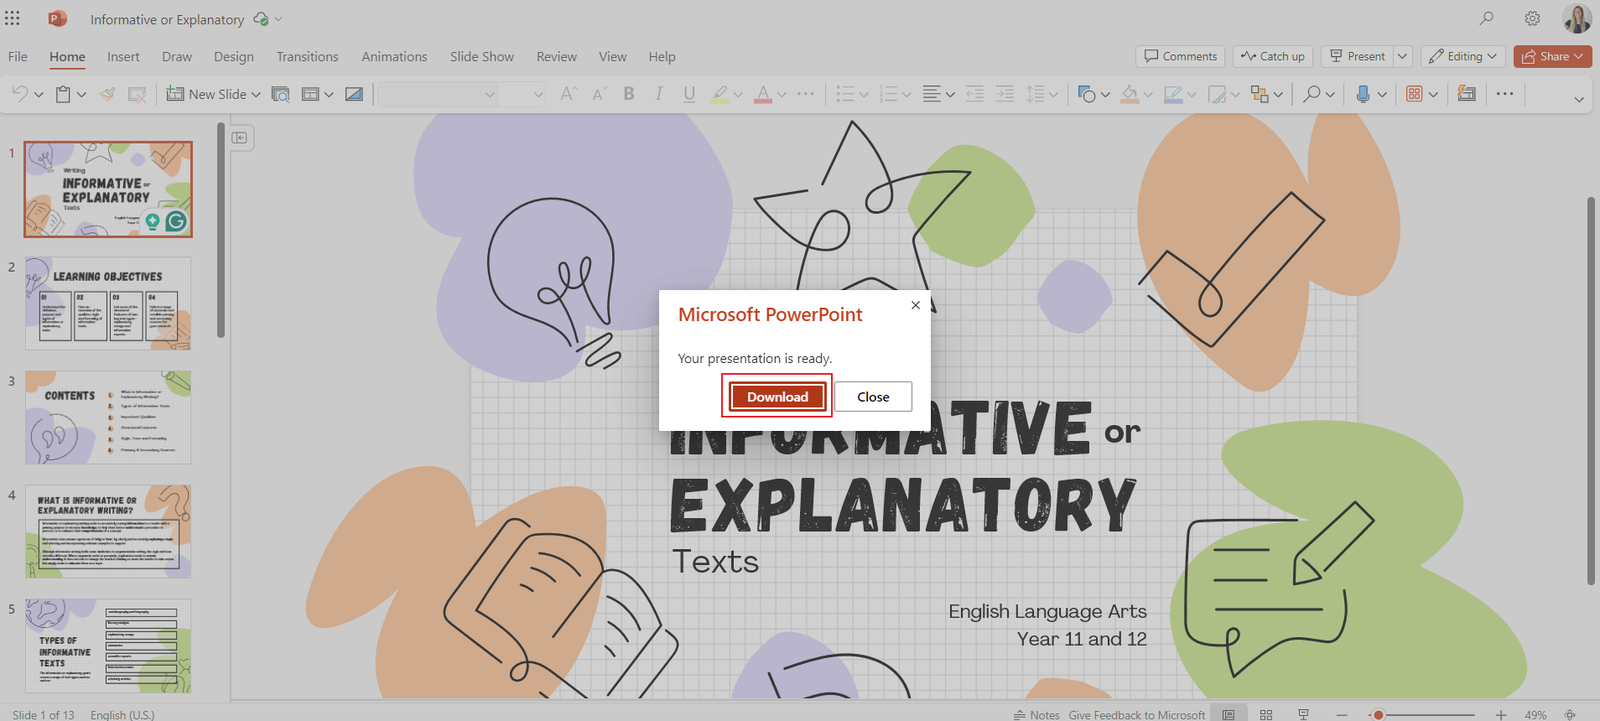
PowerPoint Online will process the file and automatically start the download once the PDF is ready.
How to Save PowerPoint as PDF with Notes
Sometimes, you want to share not just your slides but also your speaker notes. This will include all your notes along with the slides, making it ideal for handouts or presentations that need more context. Here’s how to do it:
Go to File in your PowerPoint. Then, select Save As and choose PDF as the File Format.
Click Options, then check the Include Comments box.
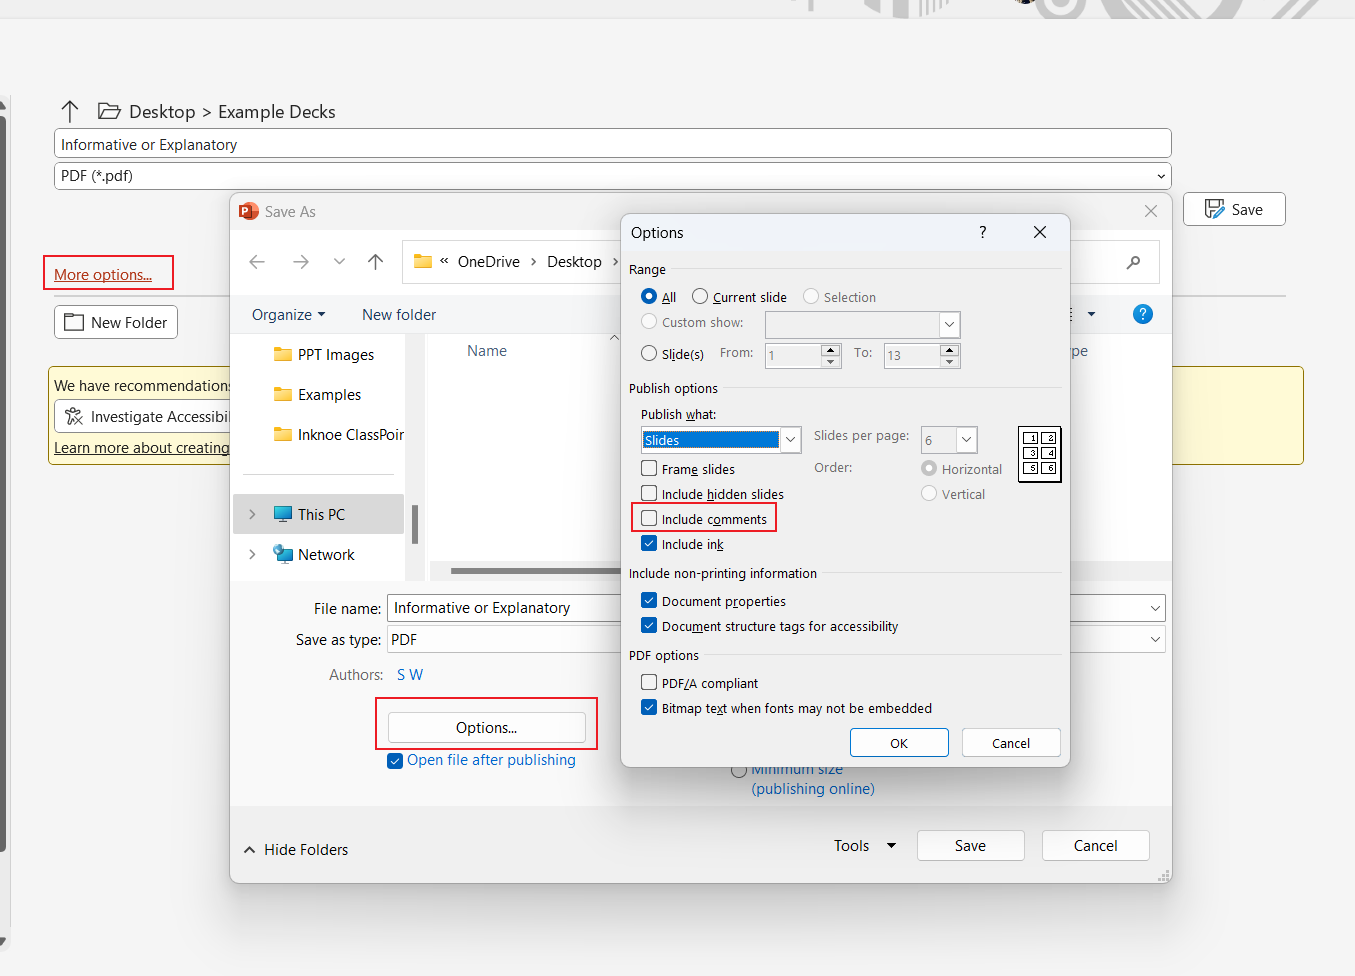
Save the PDF and you are good to go!
How to Share & Save PowerPoint as PDF via a QR Code
Saving a PowerPoint as a PDF is one of the simplest ways to share your presentation content, whether for offline viewing, easy note-taking, or keeping details intact across devices. But what if, instead of just saving and sending it out manually, you could share your PDF instantly with your audience as soon as your presentation wraps up?
With ClassPoint’s Share PDF feature, you can now end your sessions seamlessly by providing a scannable QR code, allowing participants to instantly access a PDF version of the presentation on their own devices.
Once you download ClassPoint, a new Inknoe ClassPoint tab appears on your PowerPoint ribbon. Enter this tab and click on More Features.
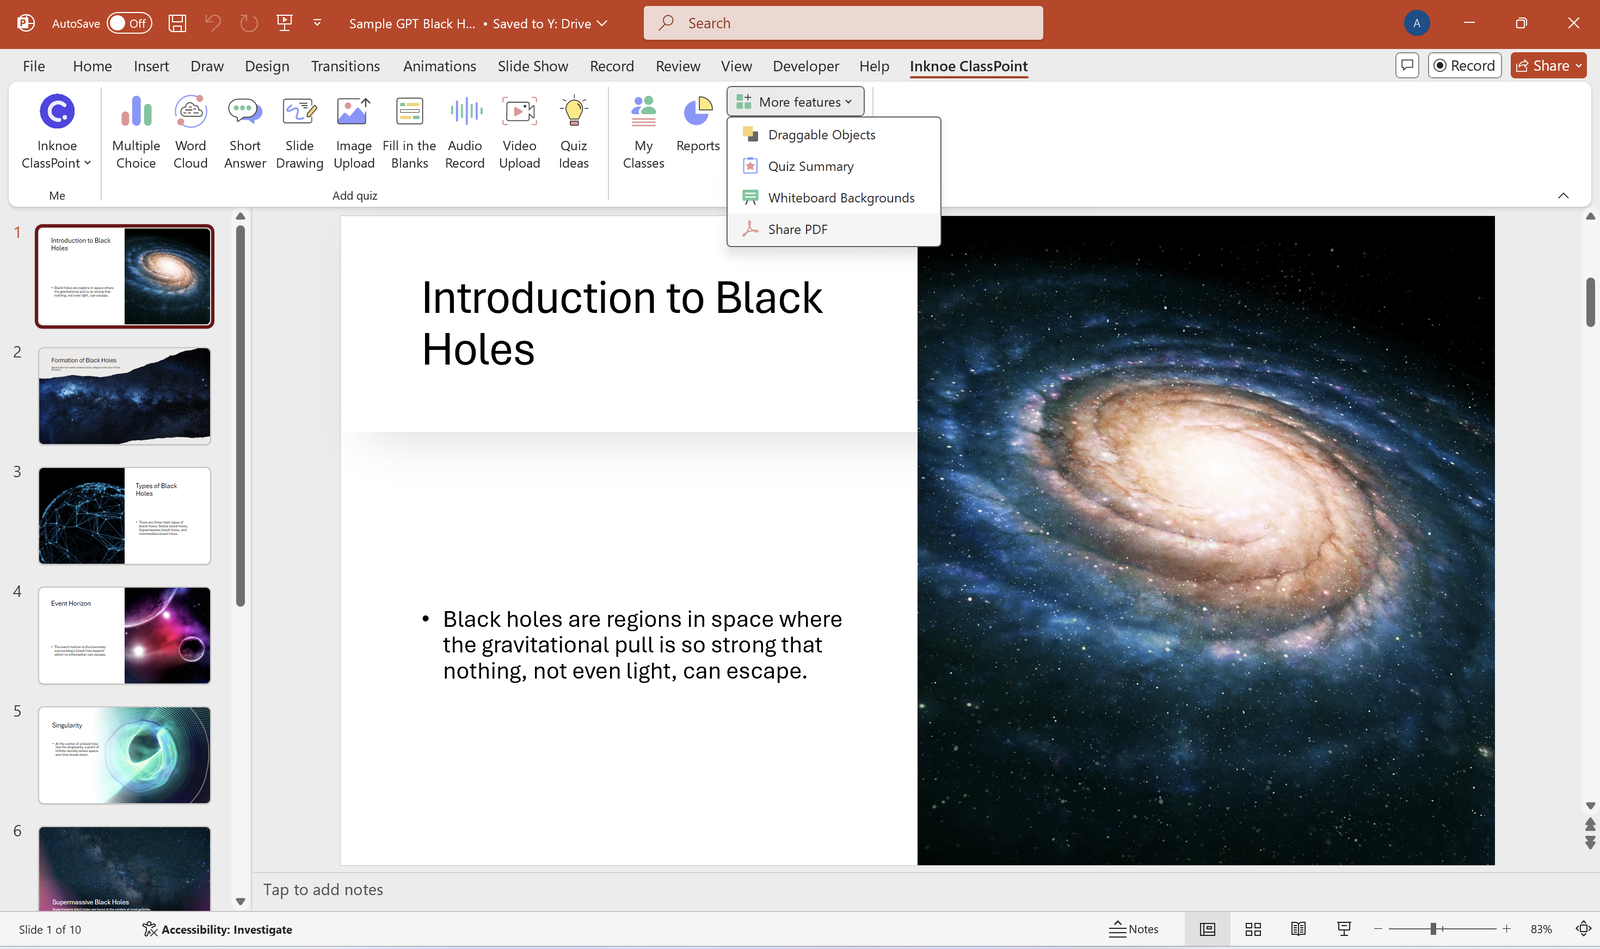
In the “More Features” dropdown, select Share PDF to choose your sharing options, including whether to convert and share the entire deck or just specific slides, with or without annotations and whiteboards.
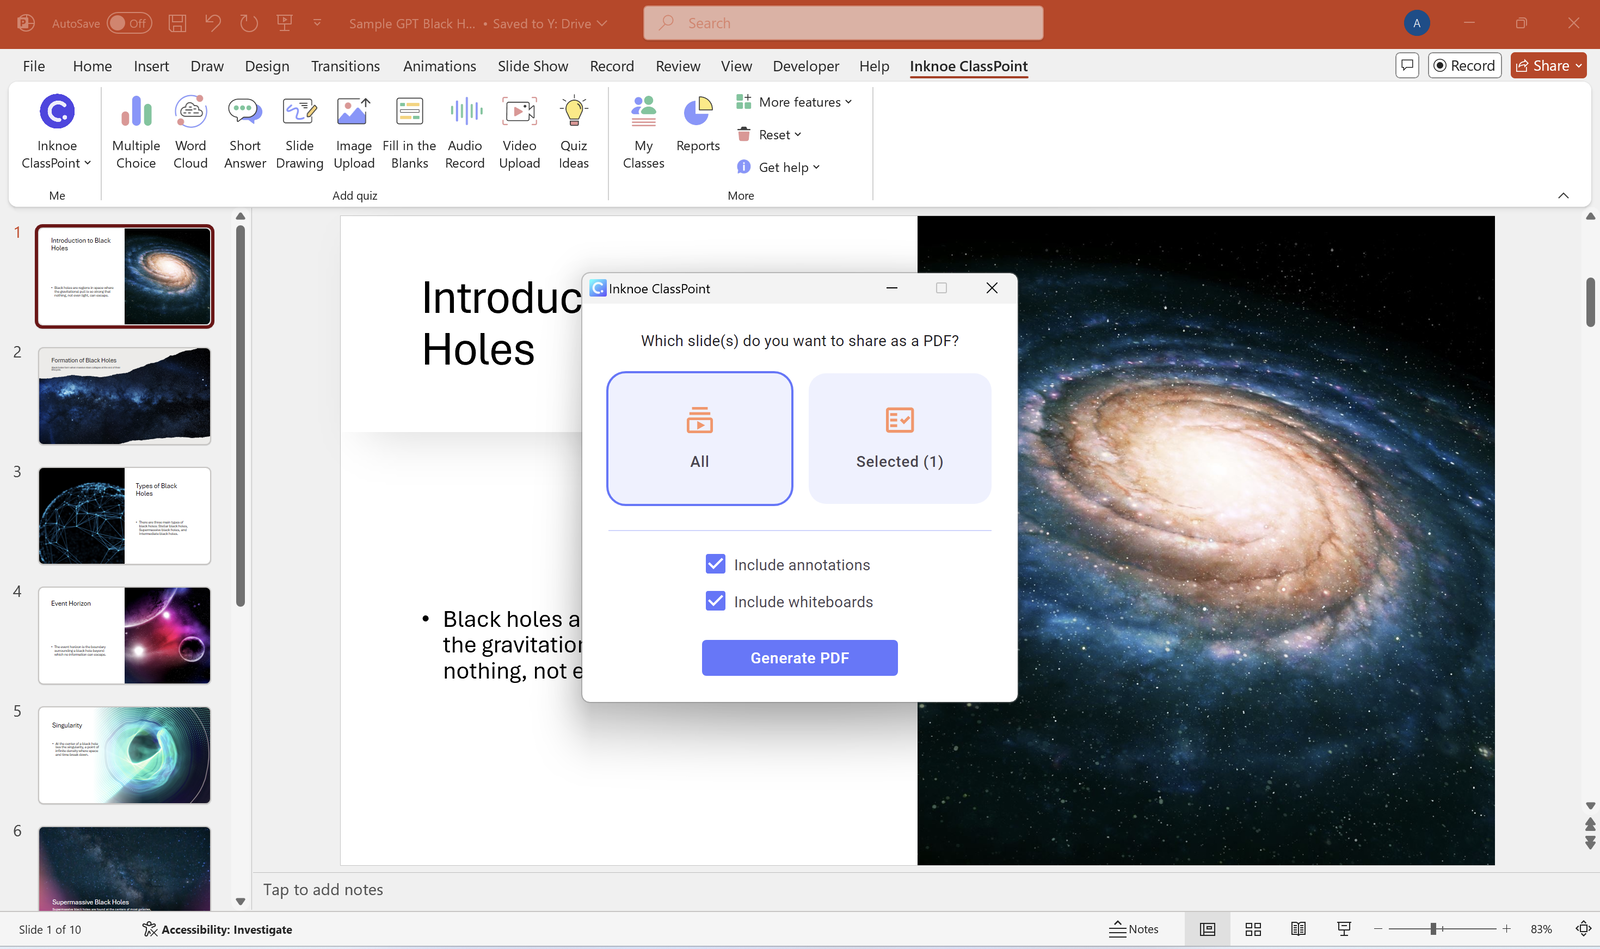
Once your options are set, click Generate PDF to create a QR code that’s ready for your audience to scan and download instantly.
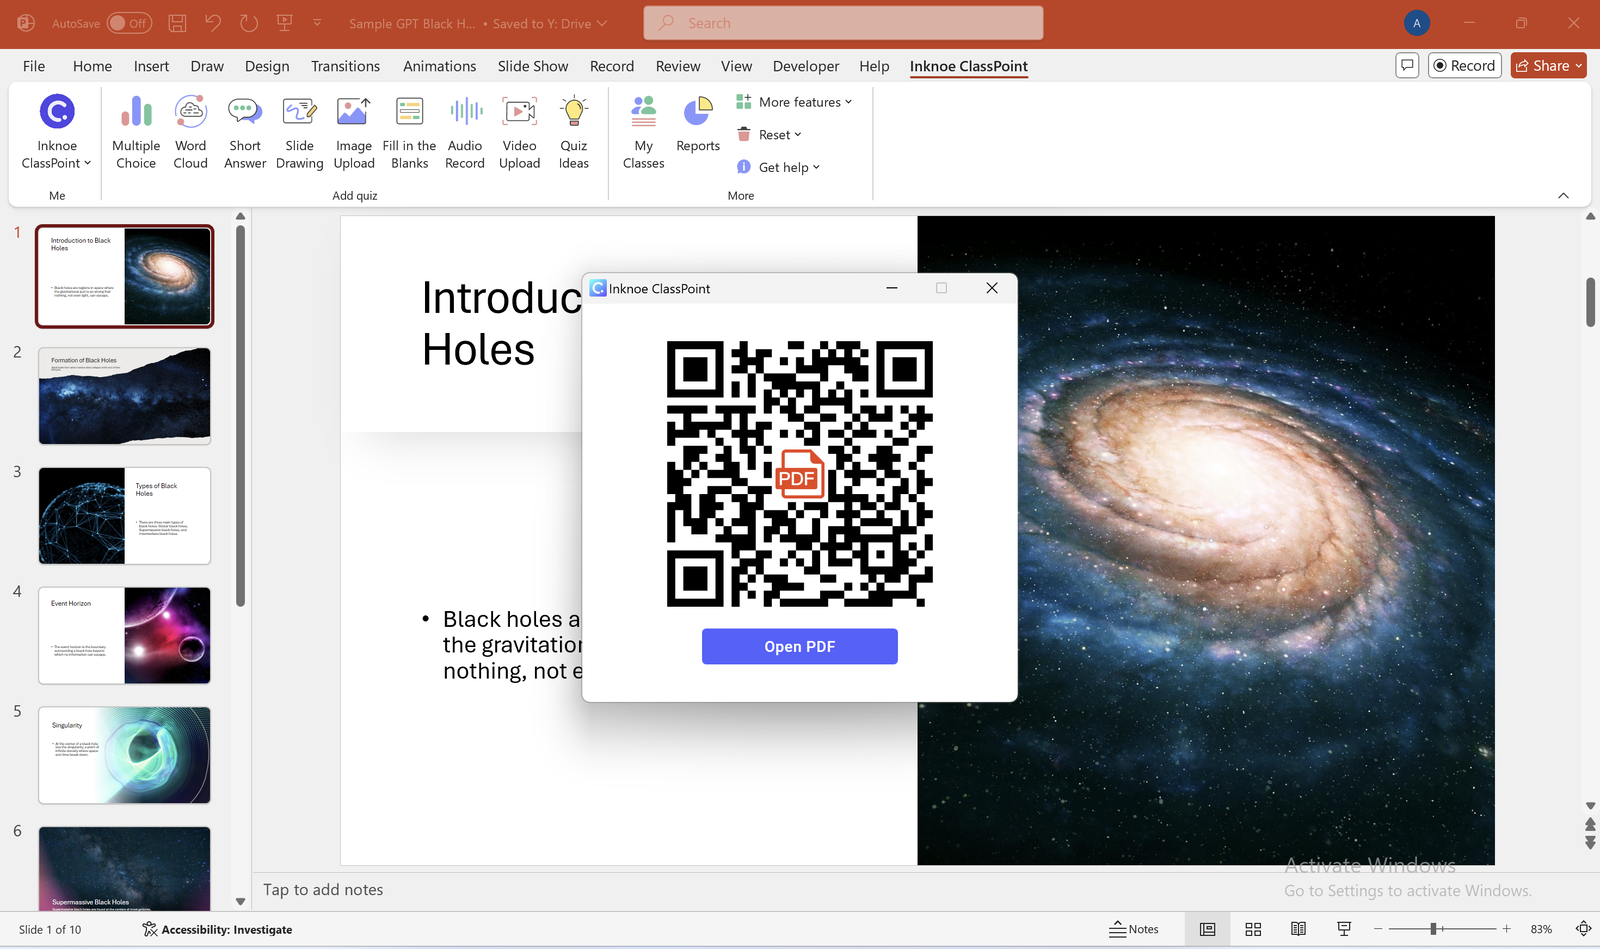
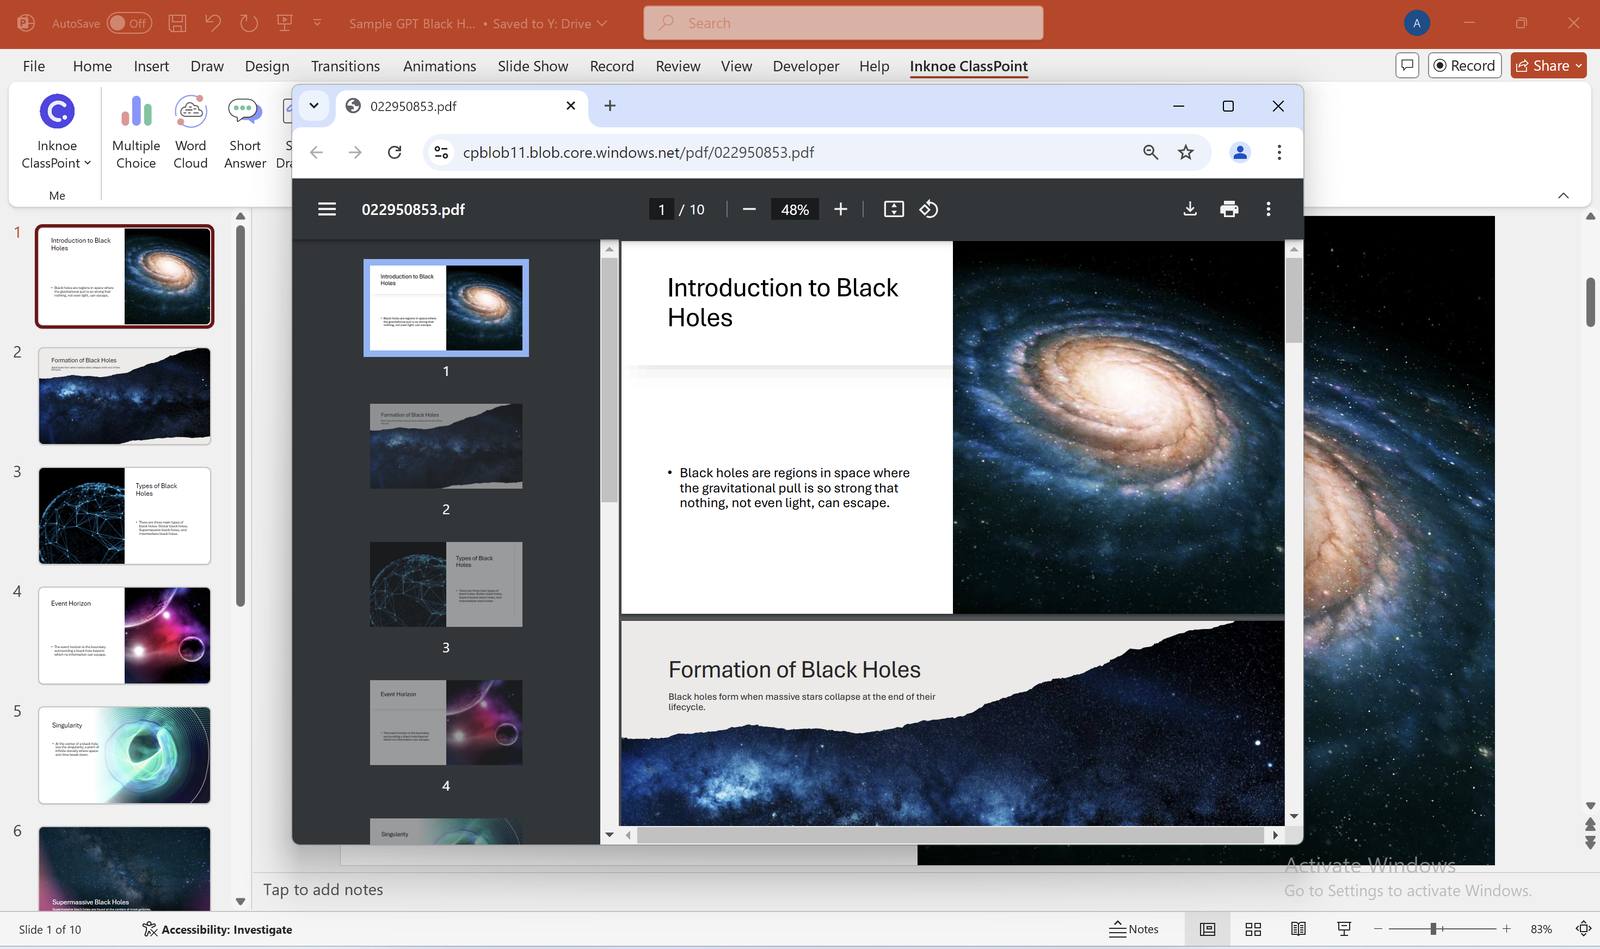
To save a copy for yourself, just click Open PDF to view the web preview and download—everything’s prepped and ready!
Bonus: How to Convert PDF to PowerPoint
After creating your PDF, you might need to go back and make edits. While PDFs aren’t meant to be editable, you can convert them back to PowerPoint. Plus, add some interactivity to your presentations with ClassPoint.
Make Any PowerPoint Interactive
Enhance PowerPoints with interactive elements using tools like ClassPoint. ClassPoint is an all-in-one PowerPoint add-in that turns your regular presentations into engaging, interactive experiences by allowing you to add in-slide quizzes, annotations, polls, and more.
This can transform a static lecture into a dynamic session that keeps your audience engaged. Adding these features before saving your presentation ensures that when shared in its original format, it serves as a powerful teaching or presenting tool.

FAQs
Can I Save PowerPoint as a Word Doc?
Yes! To do this, go to File → Export → Create Handouts in PowerPoint. Select the Word format and customize the layout.
Can I Save Multiple Slides Per Page?
Yes, click on File → Save As → Options, and choose the number of slides per page under Print Layout.
Can I Make Edits to My PDF After Saving?
Not directly. But you can use PDF editors like Adobe Acrobat or the website, ilovepdf.com to make minor edits or convert it back to PowerPoint for more complex changes.
Can I Save Only Specific Slides as a PDF?
Yes, you can. When saving your PowerPoint as a PDF, click Options in the Save As dialog box. Under Range, select Slides and enter the specific slide numbers you want to save (ie, 2-5).
Why Does My PDF Look Different from My PowerPoint?
This can happen due to font substitution, resolution settings, or layout issues. To avoid this, ensure that you embed fonts before saving by going to File → Options → Save → Check Embed fonts in the file.
How Can I Compress the PDF File Size?
If your PDF is too large, use a tool like Smallpdf or Adobe Acrobat to compress the file. You can also adjust the image quality settings in the Options dialog box before saving.
Final Thoughts
Converting your PowerPoint presentations to PDFs offers many benefits, from accessibility to maintaining consistent formatting. Whether you need a simple PDF for distribution or an interactive document, this guide on how to save PowerPoint as PDF has you covered. Remember to explore your options based on the type of content you want to share.
