Create a poll in Microsoft Teams to get feedback from all of your students as quickly as possible. Poll your students to get their feedback, for random questions about upcoming events, or to just get a quick update on how your students are understanding the lesson. No matter how you poll them, it helps you to further engage them.
Microsoft Forms is fully integrated into Microsoft Teams. With this tool, you can 1. poll your students in a channel discussion and 2. poll them during one of your online classes. You can find how to set up and run your poll for both cases here. In addition, if you are looking for more ways to engage your students with different question types, we have a tip at the bottom.
In this blog, we’ll look at 3 ways to poll using Microsoft teams:
- Poll in Teams channel discussions
- Poll in Teams during live online class
- Run advanced polls & questions inside PowerPoint during live class screen sharing
Poll in Teams Channel Discussions
Adding a poll to your channel discussion will give your students the opportunity to voice their opinion & participate fully, while you are able to get some insight into their progress. There are many different kinds of questions you can ask, such as: ice breakers, checking their understanding, or recap questions!
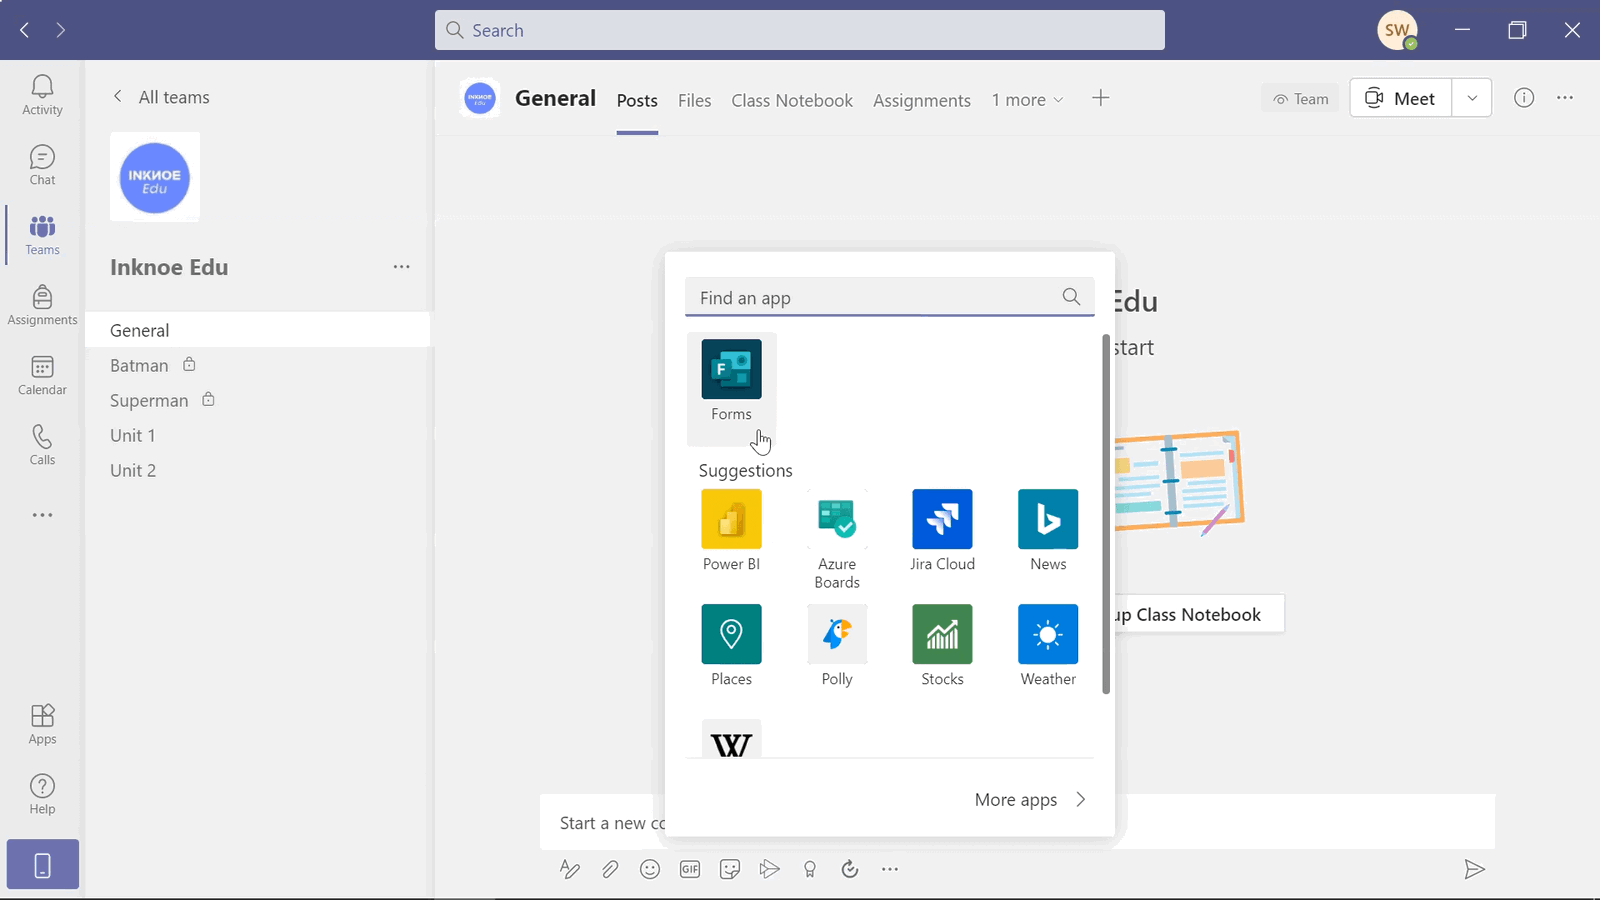
To add a poll to your channel, click on the three dots on the toolbar below the place to start a new post. Then, click on the Forms app. If you do not see it, just search for “Forms” in the search bar.
The next step is to create your poll. Add in your question and the different options students can choose from. You can add more options by clicking the plus sign. When that is complete, there are a couple of different customizations.
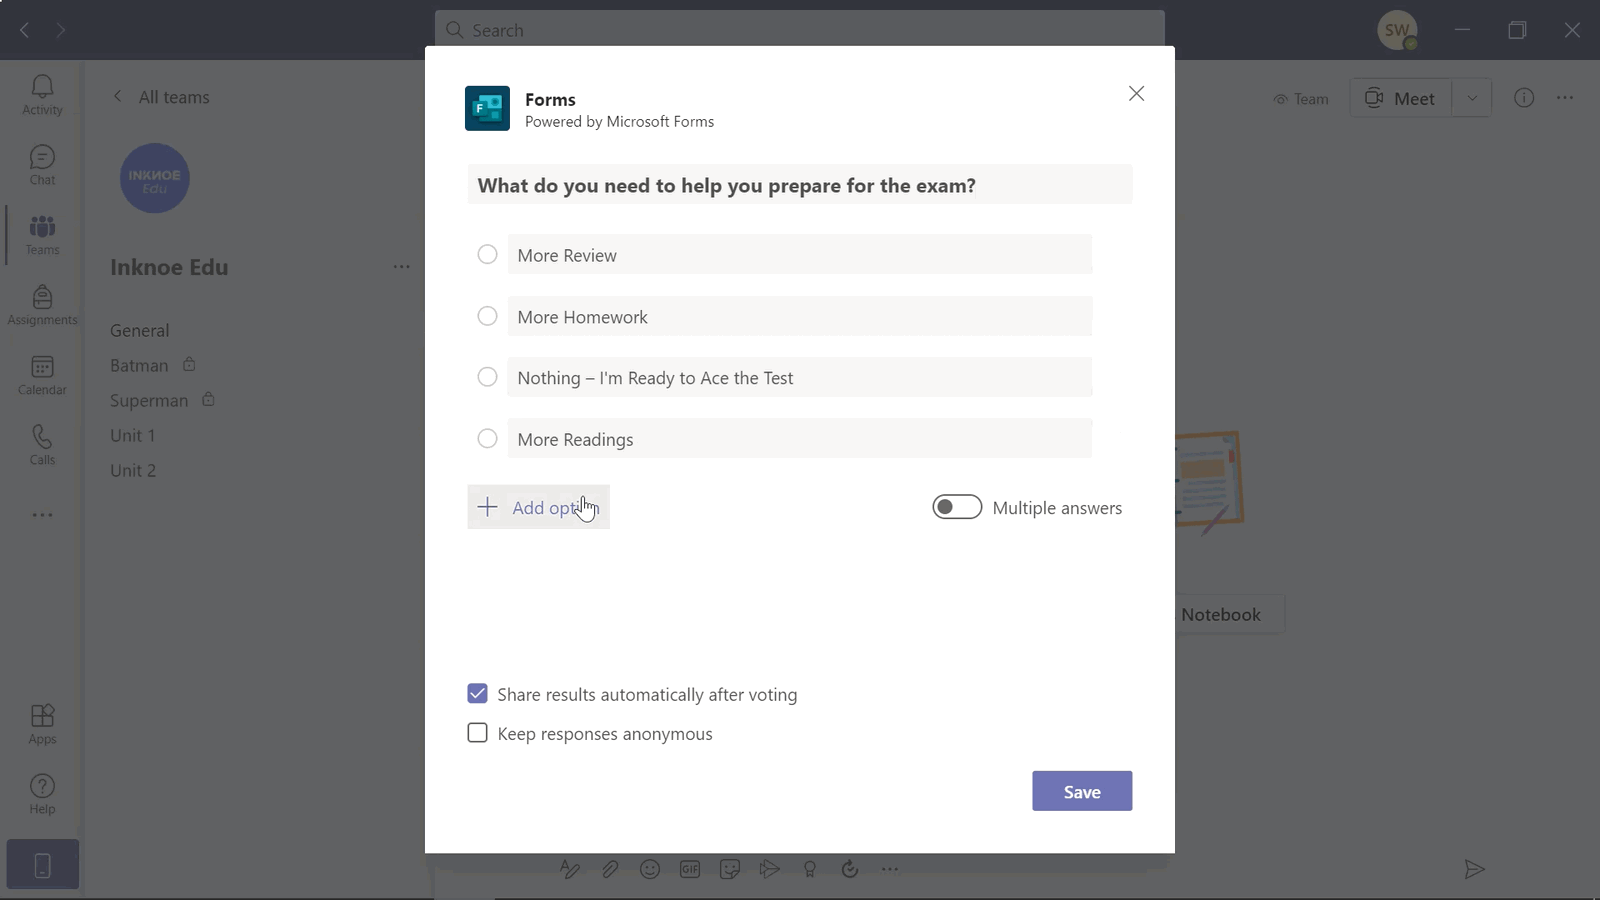
First, toggle the bar next to “Multiple Answers” if there is more than one correct answer. To share the results as soon as the question is answered, you can keep that box checked. If you uncheck, you can share the results after everyone has submitted them instead. The last option here is to keep the students anonymous or not.
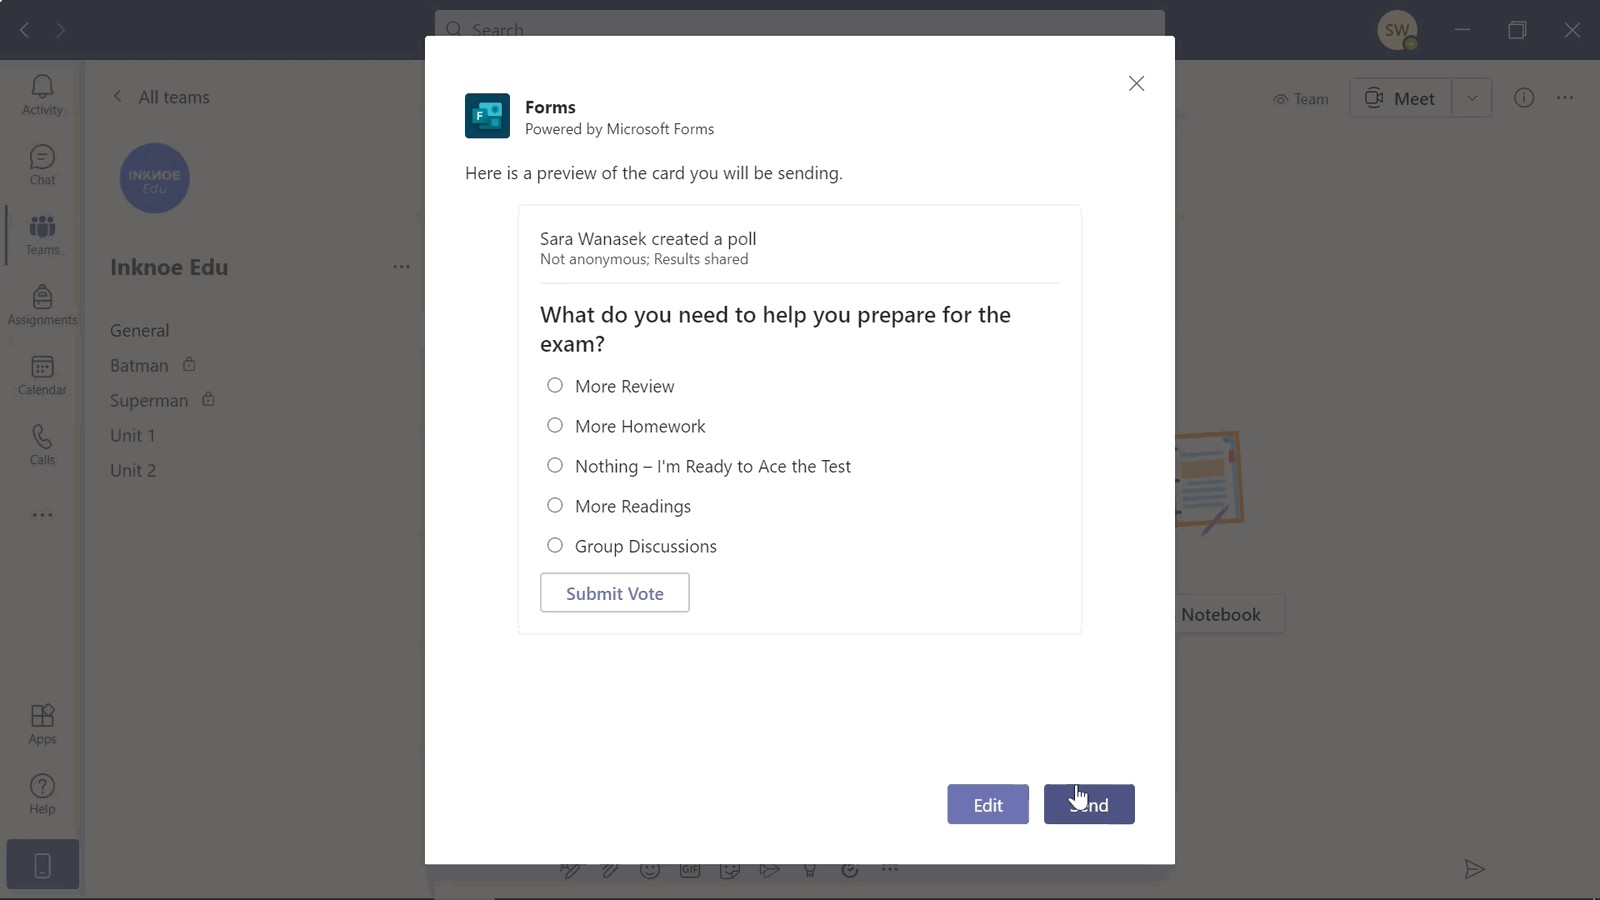
When everything is looking good, click Save. Before posting it to the channel, Teams will give you a preview of the poll to check out. If changes need to be made, you can go ahead and Edit. Otherwise, if everything looks good, hit Send.
Right away, you will be able to see the poll posted on your channel. If you chose to share the results right away, there will be two posts, one for the question and one for the results. You and your students are now free to choose an answer and submit it!
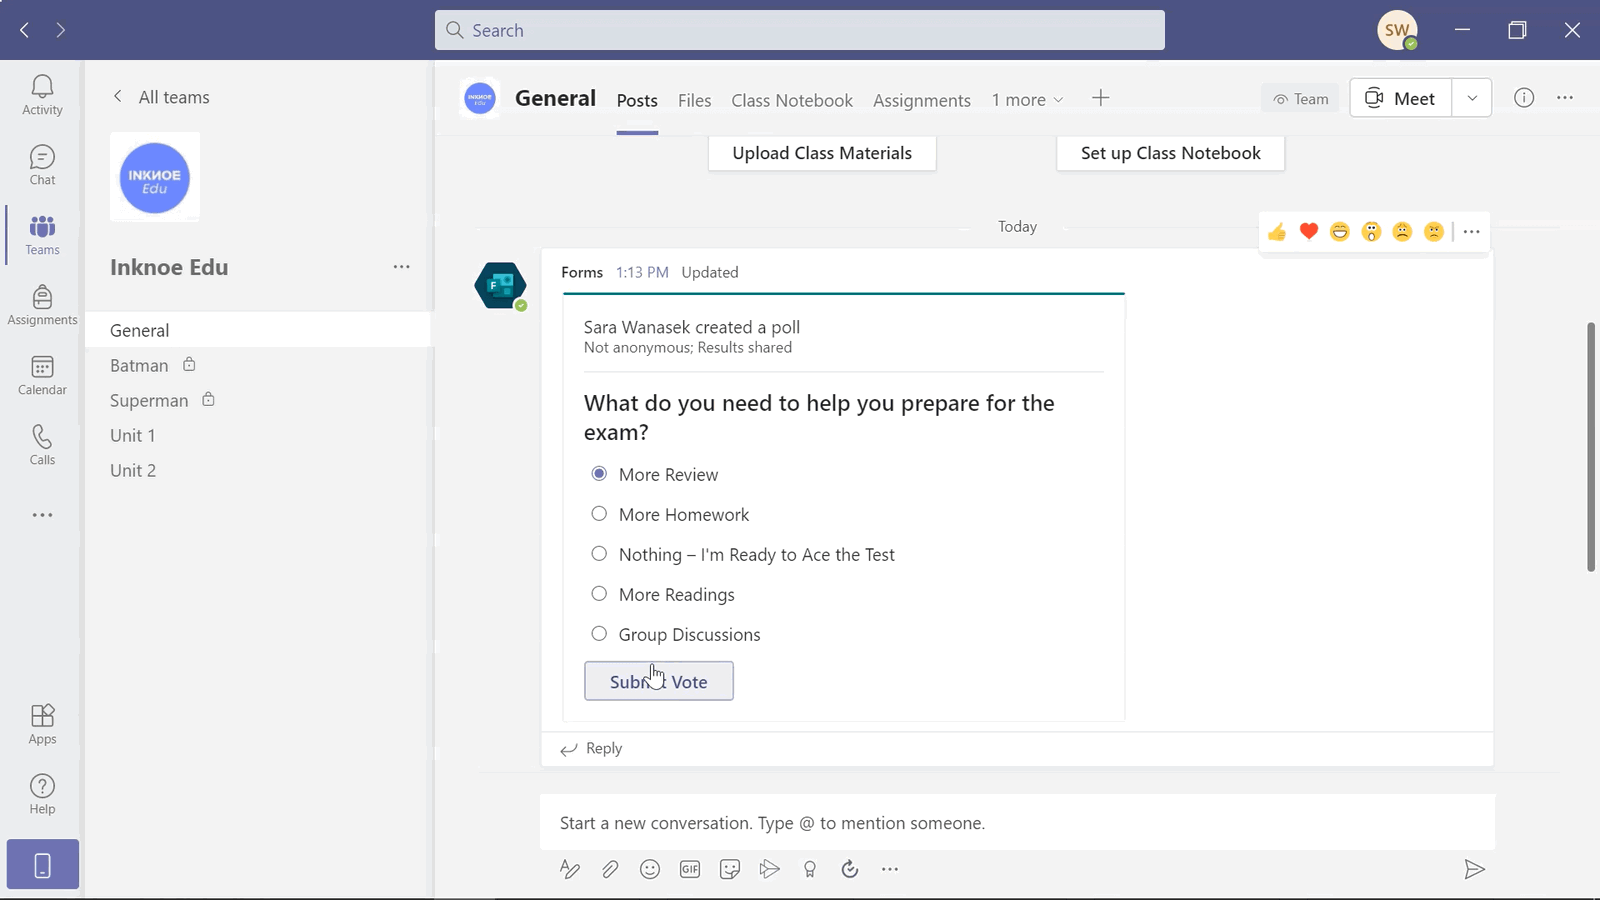
When adding a poll to your channel, you can post it at any time, giving your students more time to respond. If you prefer to have instant results, consider setting up the poll to be used in your next online class instead.
Poll in Teams During Live Online Classes
To poll your students during class so that you can receive instant feedback, there is a little setup that needs to be done first. You must create at least one poll before the class begins. You can always add more before or during the class.
Set Up the Poll Before Class Begins
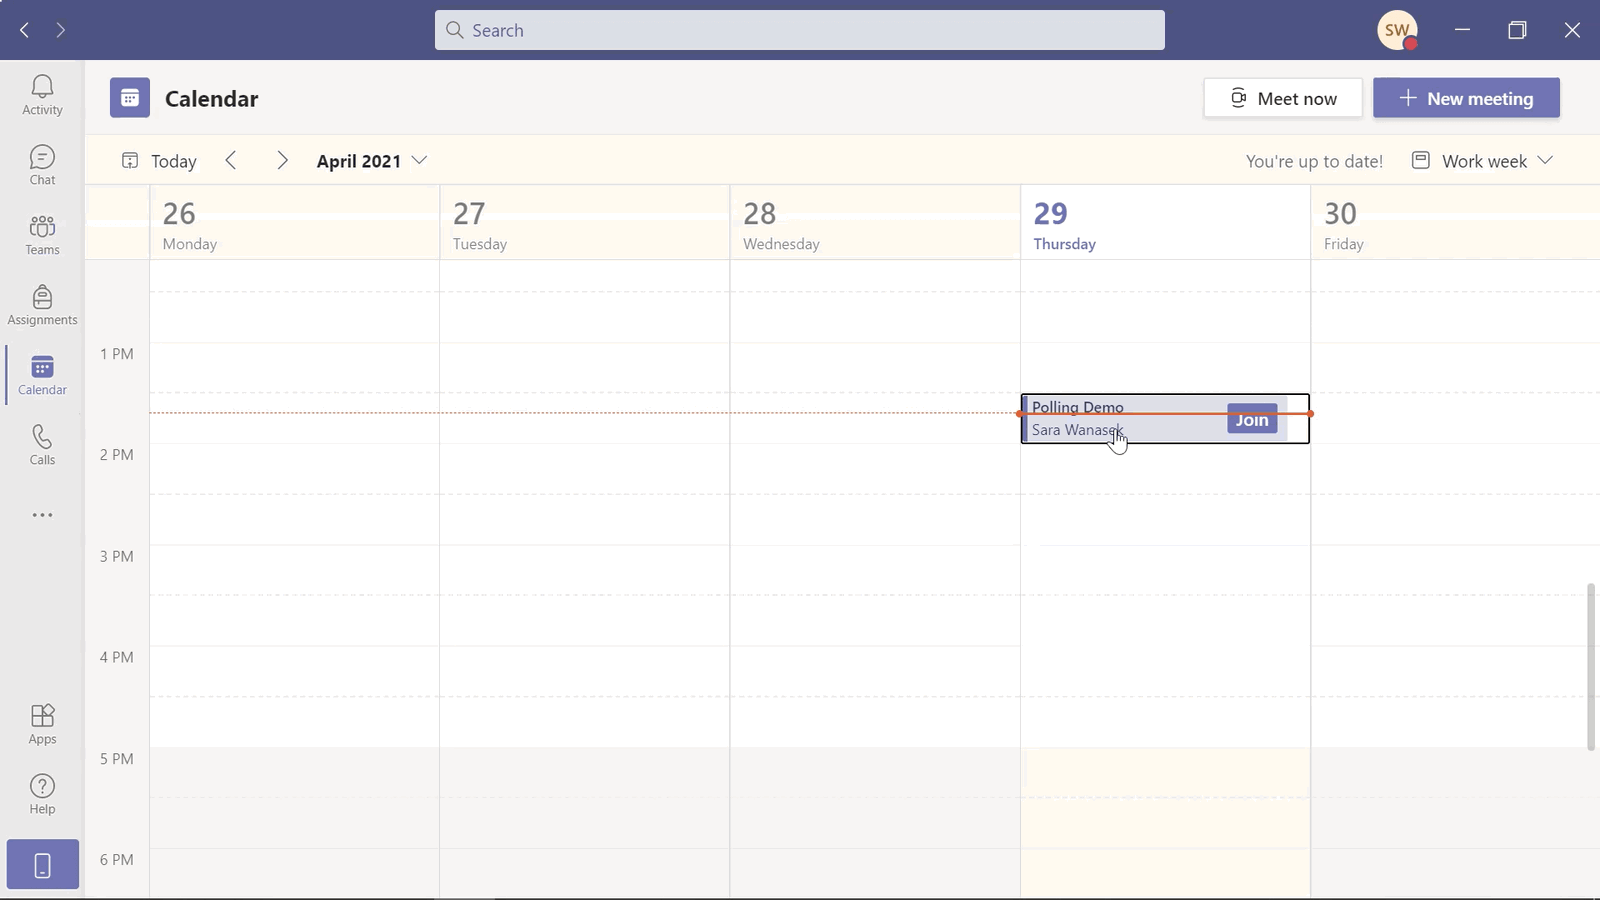
Start by opening up your calendar and clicking on a meeting you have already created. If you don’t have a class set up yet, you can go ahead and create one. Just ensure you have invited students to join your class, otherwise, you won’t have access to the polling feature.
To add in a poll, click the Plus sign on the top toolbar, then click Forms and Save. This will add a Polls tab to the top toolbar of your meeting. You can now go ahead and create a new poll by adding in a question and all the answer options. Similar to adding a poll to your channel, you have some customizable options. Decide if you want Multiple Answers on, to share the responses automatically, keep responses anonymous, and/or to have a co-author. Then click Save.
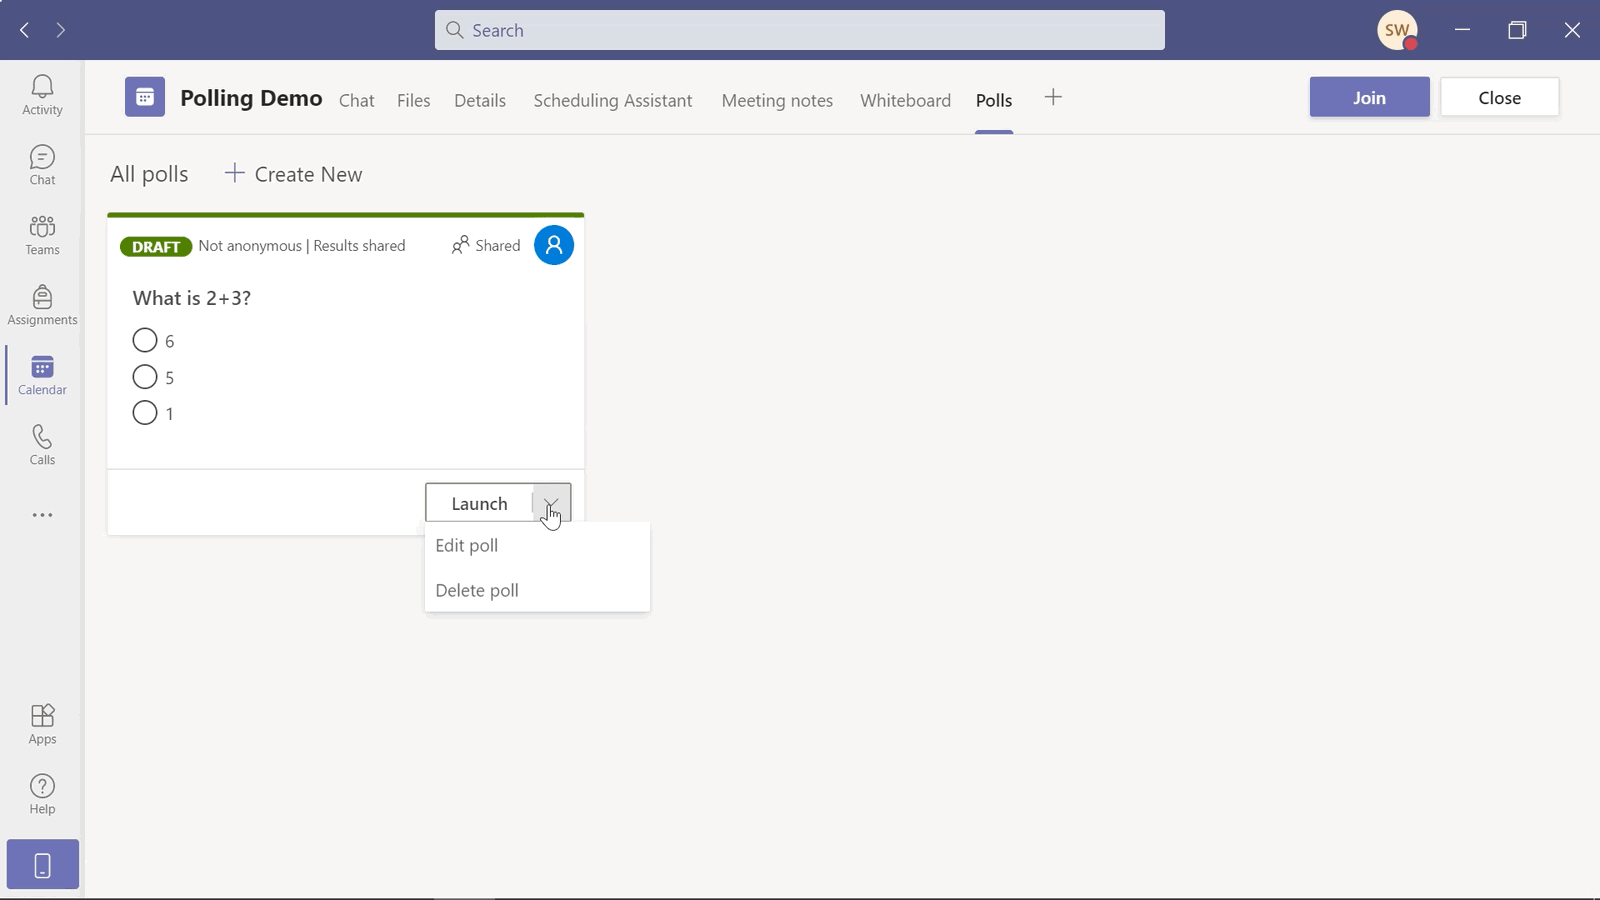
You will see that the Poll now appears as a Draft. With the drop-down arrow next to the Launch button, you can Edit or Delete the poll. Now, the poll can go live before the meeting begins, or it can be launched at the right moment in your class. If you choose to launch the poll before the class begins, students can answer in the Chat tab of Teams.
If you want to prepare other questions before class begins, go ahead with the Create New button at the top of the page.
Launch the Poll During Class
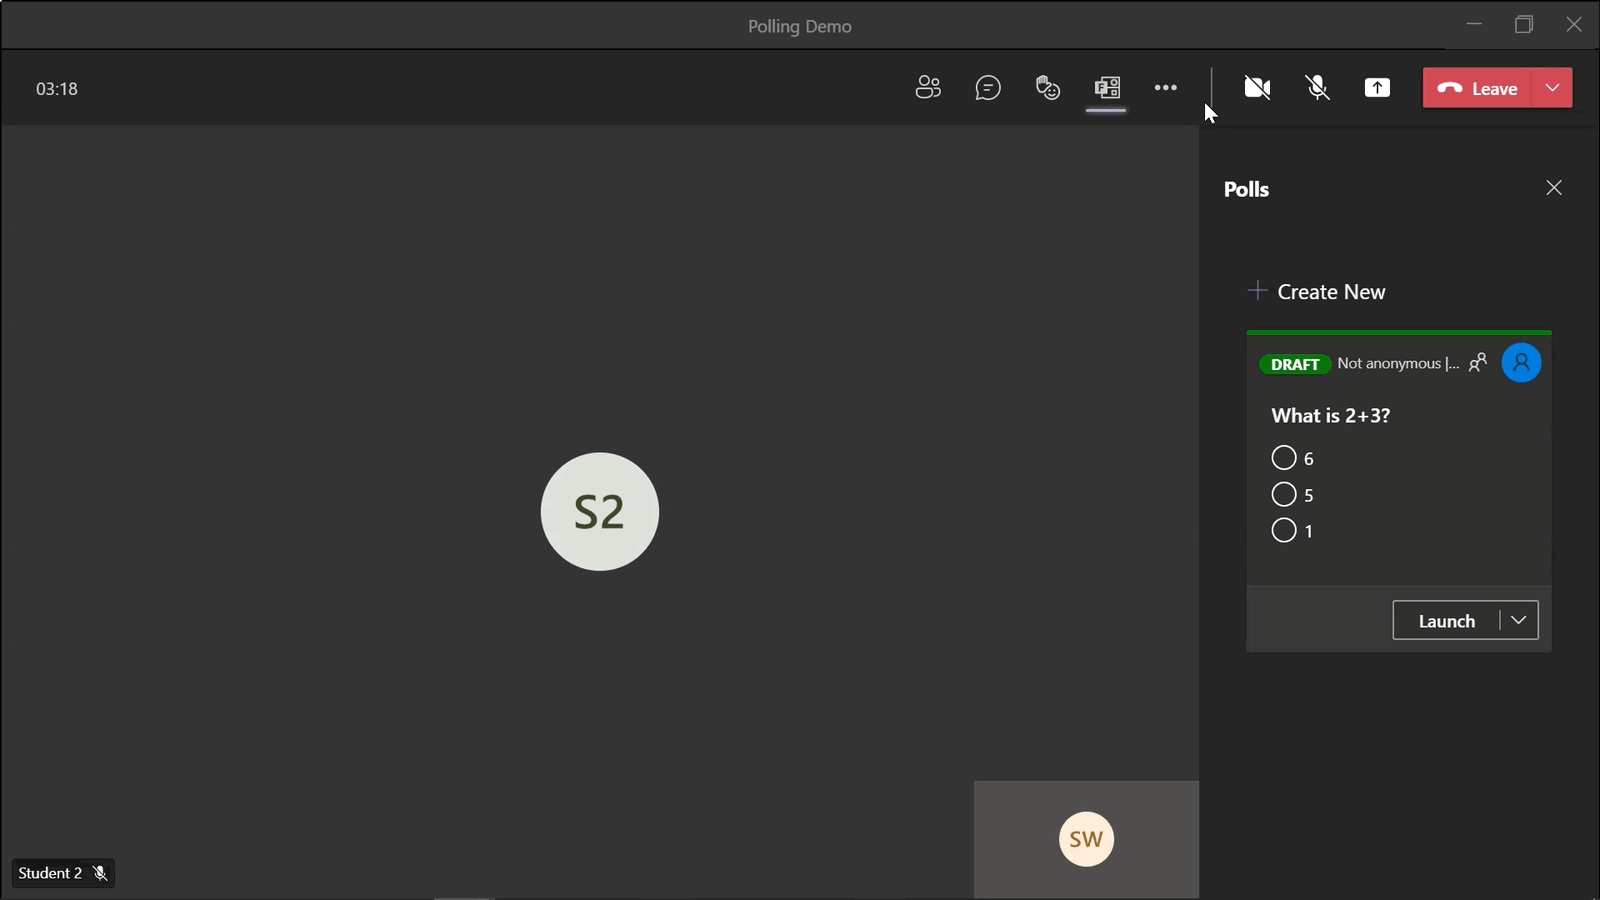
When you have started class and your students have joined you’ll notice the Poll icon on the top toolbar. If you click on it, it will open the side menu with your different poll drafts. This is where you will launch your polls, view the results, and create more polls if needed.
Click the Launch button on the poll you want to open. A pop-up will appear on screen for you to submit an answer.
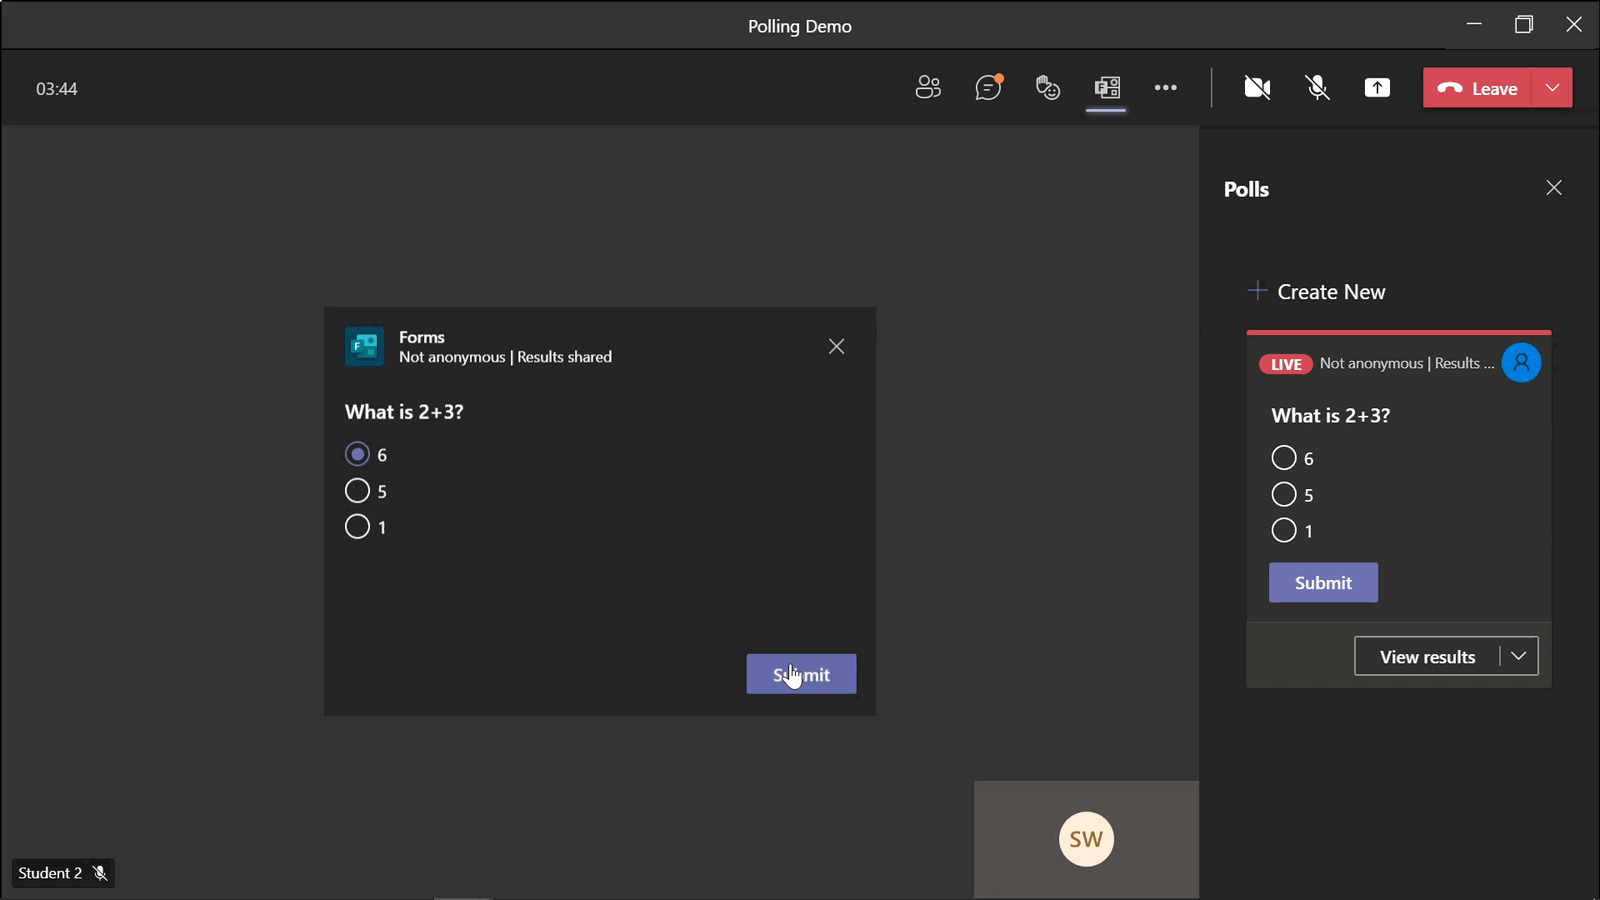
On the student side, they will have a notification in their chat. They can submit their response, and view the results if that feature was turned on.
Close the Poll & View the Results
When all the responses are in or after a time limit of your choosing has passed, you can close the poll. In the side polling menu, next to the View Results button on the poll you want to close, click the drop-down arrow. There is the option to Close, Export the Results, or Delete the poll.
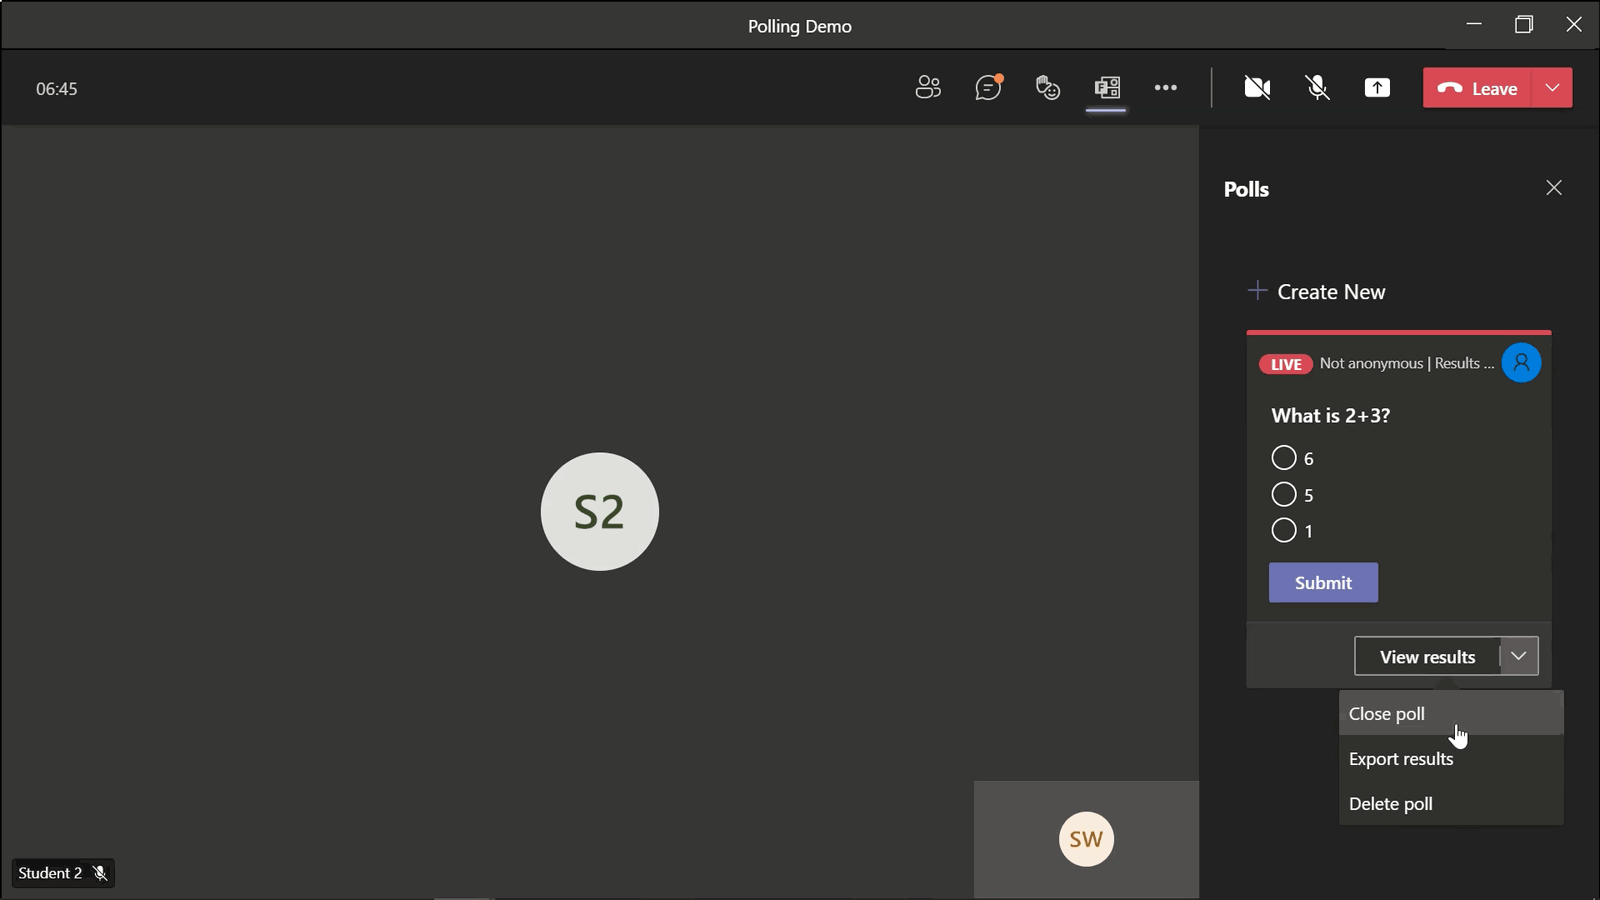
I recommend closing the poll, then exporting the results so that you have all the accessible data. The file will be downloaded as an Excel file on your desktop. You can open the file and look at the data at your own convenience. In addition, you can view the poll results right in Teams after the meeting.
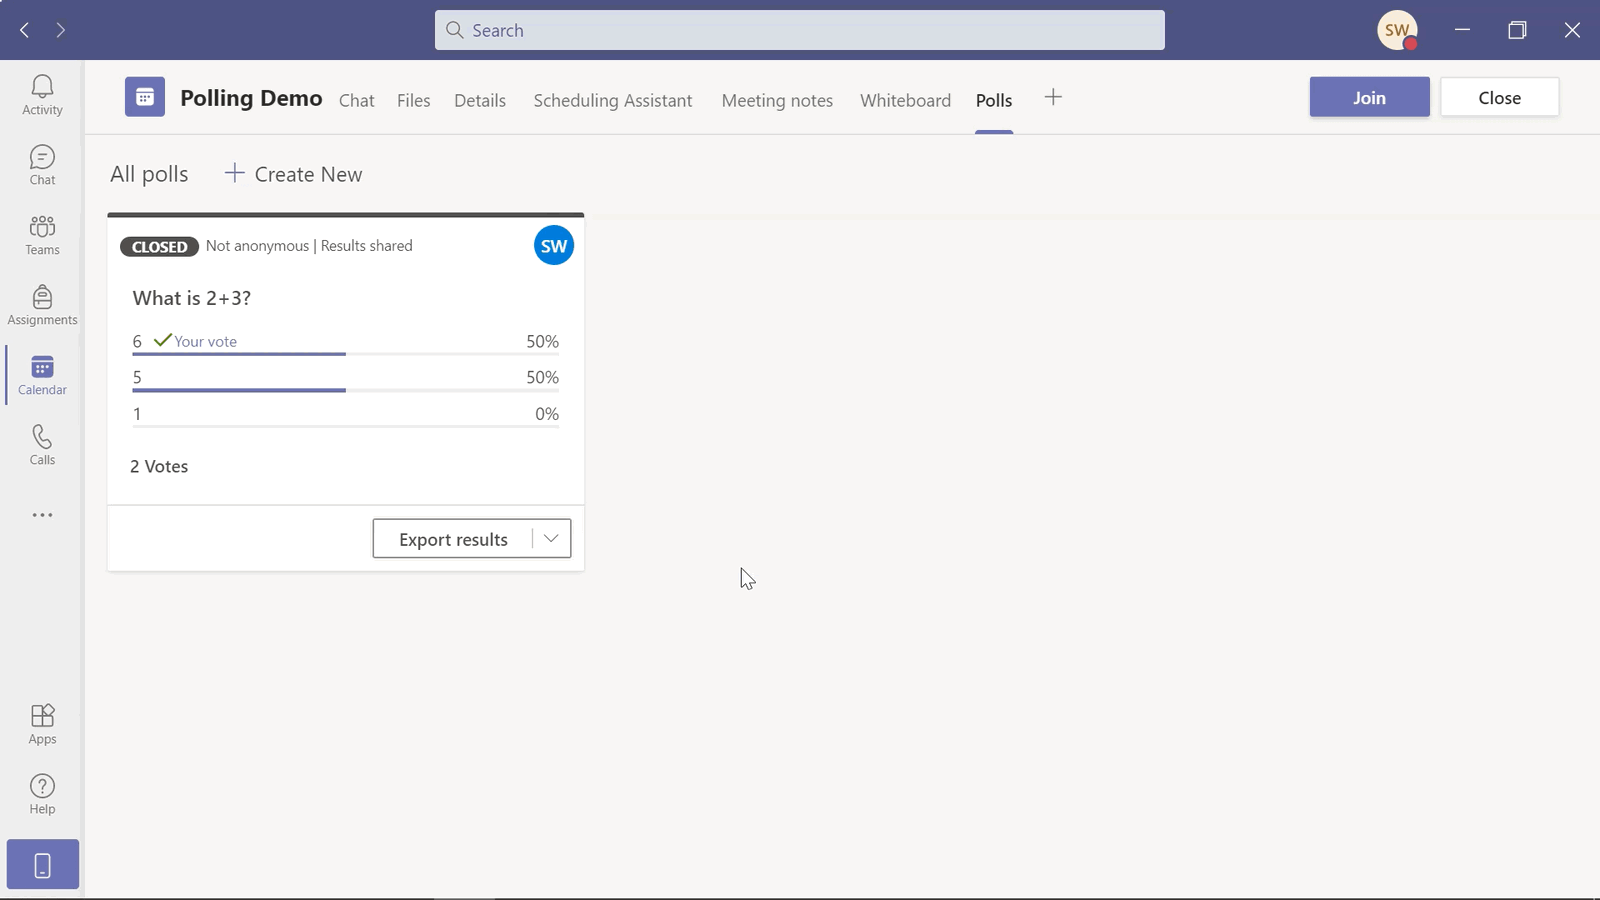
If you did not export the results during the meeting, you can go back to view and export the poll results from your Teams Meeting at any time. Go into that specific class meeting, and click the Poll tab on the top toolbar. Now, you will see the closed poll, and the button to export the results. You don’t have to stress about losing any data!
Run advanced Polls in PowerPoint with ClassPoint
While Microsoft Team’s built-in polling is super helpful, being limited to multiple-choice polling questions, may get repetitive. To add more variety in the type of questions you are asking your students, try using PowerPoint add-in, ClassPoint in conjunction with your online classes.
ClassPoint, an all-in-one audience engagement tool, allows you to run interactive questions inside PowerPoint with your live audience. This tools works for online or in-person lessons, but if you are using PowerPoint while teaching via Microsoft Teams, you can turn any slide into a Iive poll.
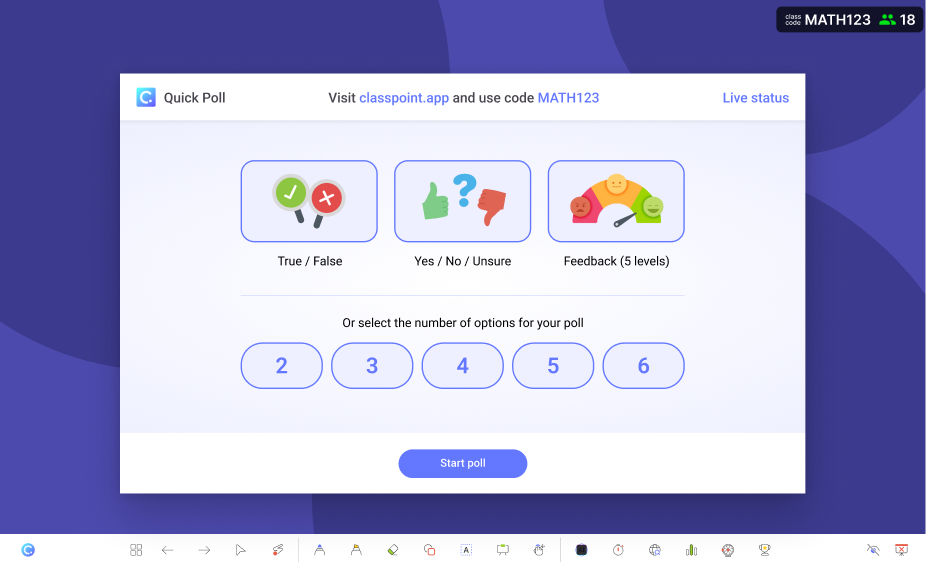
Without leaving PowerPoint, you can run a quick live poll and on top of that, 8 interactive live quizzes, including open-ended Short Answer, Word Cloud, Fill in the Blanks, Slide Drawing, and more. Get live responses, with or without student names, and view them in a visual manor -as a class, or after class.
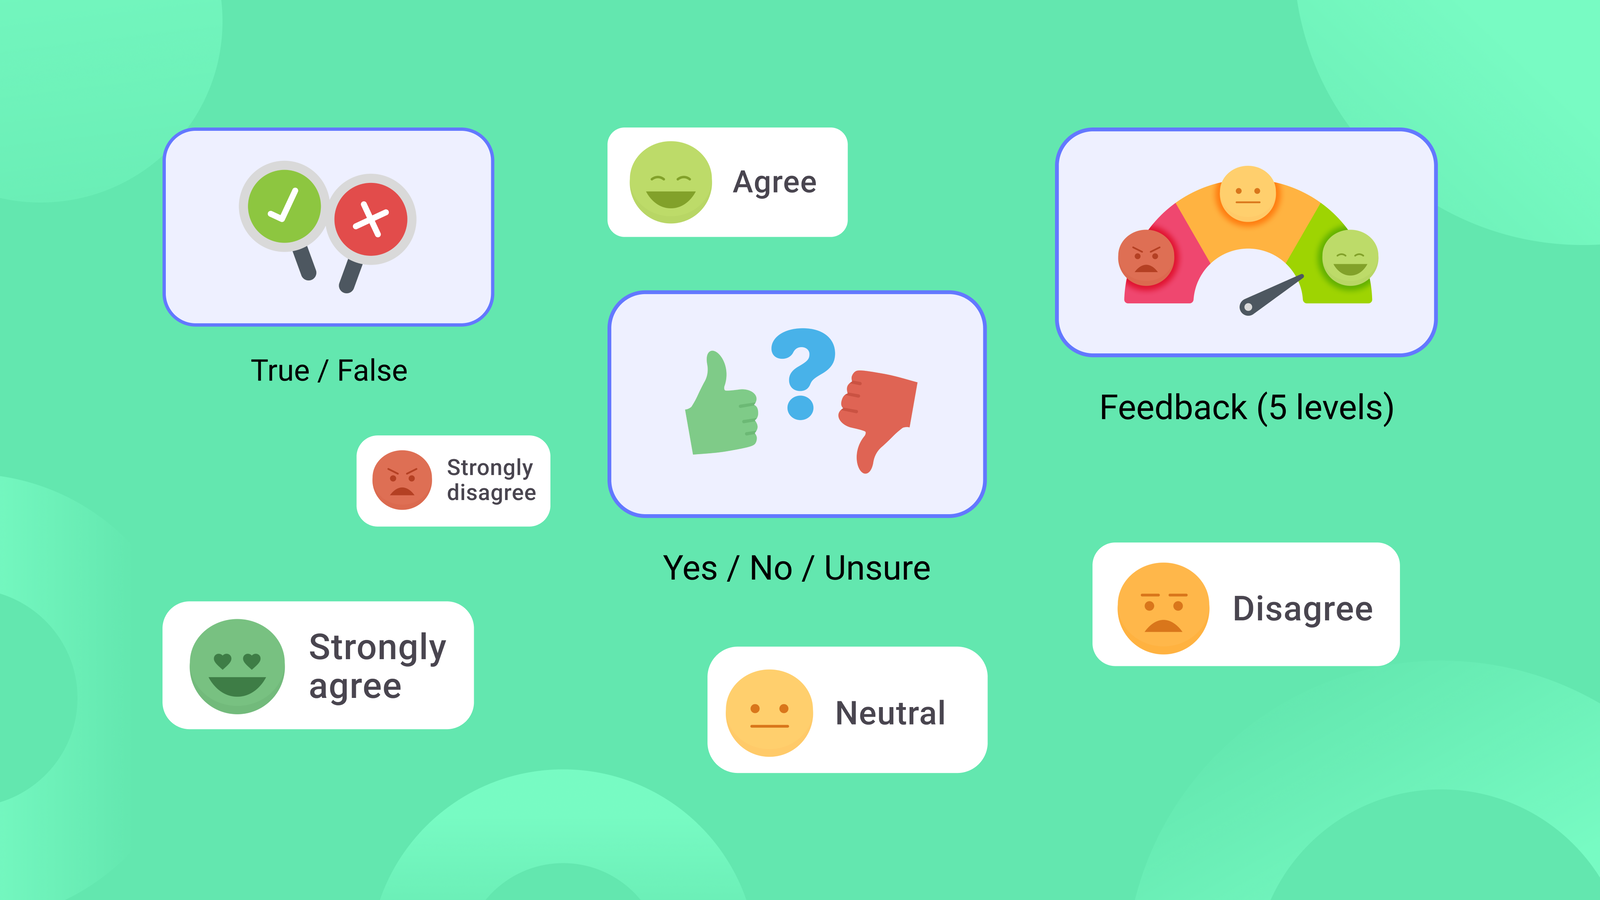
ClassPoint is free to download and 5 out of the 8 question types are included in the Basic, free version. Learn more about how the PowerPoint add-in enhances presentations with audience engagement tools, and try it out with a free account!
Time to get audience feedback and get interactive with polling. If you have any questions regarding ClassPoint’s Polling or Polling in Microsoft Teams, drop a comment below!
