Are your PowerPoint presentations lacking the visual impact you desire? With so many PowerPoint transition effects available, it can be challenging to choose the right one to keep your audience engaged. While we have already covered a few powerful animations in the past, in this blog, we focus on a particularly captivating transition: the PowerPoint Ripple Effect.
The PowerPoint Ripple Effect can add a unique touch to your presentations, adding a dynamic wave-like motion that can uniquely capture attention in a very subtle and specific way. Let’s explore briefly what the PowerPoint Ripple Effect is, what its different effect options look like, and the best scenarios for its use. Plus, we’re offering free downloadable templates to help you easily incorporate this stunning effect into your presentations.
What is PowerPoint Ripple Effect (+ Sample Downloadable)
The PowerPoint Ripple Effect is a transition that creates a wave-like motion, simulating the natural movement of water across your slides. This effect can add a touch of elegance and fluidity to your presentation, making your transitions more engaging and visually appealing.
Different Ripple Effect Options
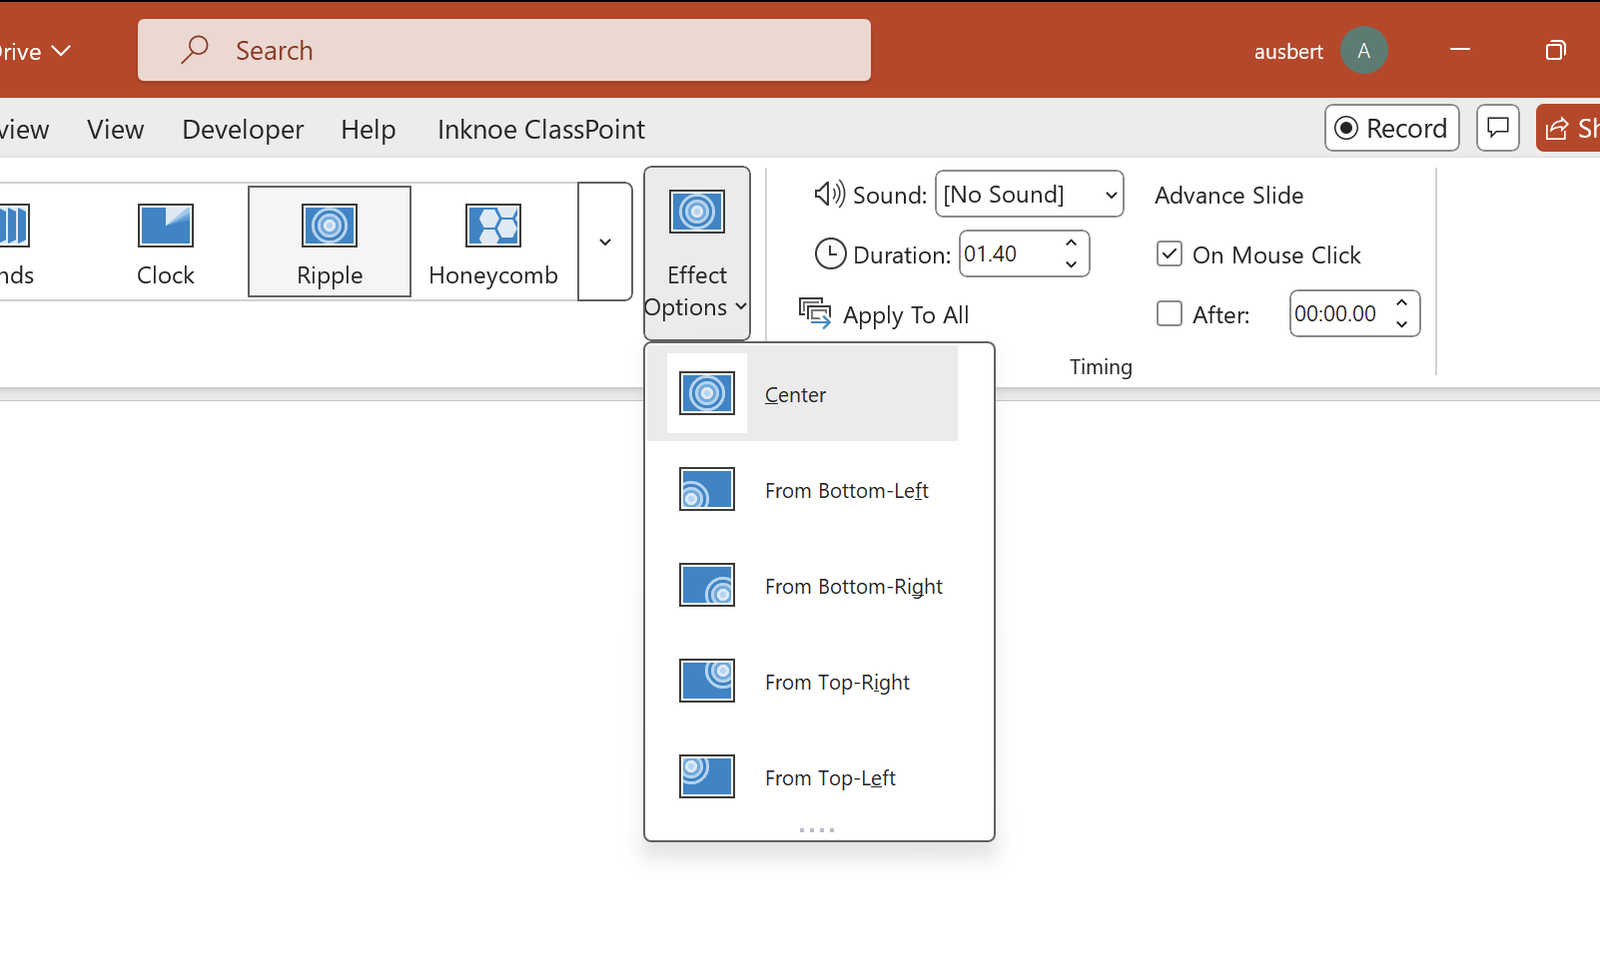
PowerPoint offers several variations of the Ripple Effect, allowing you to customize the direction from which the ripple originates. Here are the available options:

- Center: The ripple starts from the center of the slide and moves outward.
- From Bottom-Left: The ripple begins at the bottom-left corner and spreads across the slide.
- From Bottom-Right: The ripple starts at the bottom-right corner and moves diagonally.
- From Top-Right: The ripple originates from the top-right corner and flows across the slide.
- From Top-Left: The ripple begins at the top-left corner and moves diagonally downward.
How to Add the Ripple Effect
Adding the Ripple Effect to your slides is straightforward. Here’s how you can do it:
- Open your PowerPoint presentation and select the slide where you want to apply the Ripple Effect.
- Go to the “Transitions” tab in the PowerPoint ribbon.
- Click on the “Ripple” transition in the list of available transitions.
- Customize the effect options by selecting the direction from which you want the ripple to originate (center, bottom-left, bottom-right, top-right, or top-left).
- Adjust the duration and timing settings as needed to achieve the desired visual effect.
When It’s Best Used
PowerPoint Ripple Effect is best used with visuals that complement its wave-like motion. Here are some ideal scenarios:
- Ocean and Beach Scenes: Enhance images of waves, shorelines, and underwater life.
- Aquatic Themes: Perfect for presentations about marine biology, swimming, or water sports.
- Fluid Dynamics: Ideal for scientific presentations involving fluid mechanics or flow dynamics.
- Relaxation and Wellness: Use with images of water features like fountains, lakes, or streams to convey calm and tranquility.
- Travel and Nature: Highlight scenic water views, such as rivers, waterfalls, or coastal landscapes.
Here is an example of a beach-themed PowerPoint presentation free for you to download.

Sample PowerPoint Ripple Effect Slides
Get this downloadable PowerPoint with Ripple transitions that you can edit with your own content!
Learn how to start and end your PowerPoint presentations in fun, creative ways!
Creating Dynamic Ripple and Pulsating Effects: Template and Tutorial
To help you bring your presentations to life, we’ve paired the PowerPoint Ripple Effect with a pulsating animation using the Grow/Shrink feature. This combination adds an extra layer of dynamism, making your slides even more captivating. How so?

- On a blank PowerPoint slide, set a background image. In this example, we’re using an illustration of water to go with our topic.
- To set a background image, don’t just copy and paste. Instead, right-click on a blank PowerPoint slide and select Format Background.
- From the side panel that appears, under the Fill dropdown, select Picture or texture fill and insert or paste your image.
- Insert a large enough teardrop shape in the middle of your slide.
- Adjust the teardrop to your liking with the transform controls available.
- Add a rectangle on top that should be twice or thrice as big as the slide canvas. Send the rectangle to the back afterward so that the teardrop is on top.
- Select the rectangle, hold Shift, then select the teardrop next.
- Go to Shape Format from the PowerPoint ribbon. Under Merge Shapes, select Combine.
- Color it white and remove the outline.
- Select the shape. Then, go to Animations and apply the Grow/Shrink animation.
- Go to Animation Pane and apply the following settings:
- Under Effect Options:
- Property / Size: Smaller
- Tick the checkbox for Auto-reverse
- Under Timing:
- Start: With Previous
- Repeat: Until End of Slide
- Under Effect Options:
- Enter your slide content, ideally surrounding the teardrop at the center.
Watch our short video tutorial on the above steps here:
To incorporate the PowerPoint Ripple effect:
- Add a title slide as the first slide.
- Select the slides, and apply the Ripple transition.
PowerPoint Ripple Effect With Pulsating Animation
Have access to our designed PowerPoint presentation, set with the Ripple transition paired with Grow/Shrink animation!
Parting Thoughts
Incorporating dynamic transitions and animations into your PowerPoint presentations can significantly enhance the audience’s experience. Effects like the Ripple and pulsating animations add a layer of sophistication and engagement, making your content more memorable and impactful.
Remember, the key to a great presentation is not just the information you share but how you present it. Using creative transitions and animations thoughtfully can help convey your message more effectively, keeping your audience attentive and engaged throughout your presentation.
Check out our rundown on 27 Super Hidden PowerPoint Tips and Tricks Only The Pros Know!
