
Pen tablets can be a valuable tool for teachers in the classroom to make teaching easier and more efficient. They help to make learning more engaging, interactive, and accessible for students when teachers can add annotations to their teaching material, especially during their presentations.
The ability to annotate and draw on teaching material during lessons is an essential & effective teaching tool, but while some are lucky to have interactive whiteboards in their classrooms, others may need to use pen tablets. Wacom, for example, is a popular pen tablet that allows for teachers to draw on their presentations. But if you have an iPad, there is no need to buy another tablet! Let me show you how you can use your iPad as a pen tablet so that you can walk away knowing how to annotate on top of any presentation!
Step 1: Install Remote Desktop Software on Your PC & iPad
To use your iPad as a pen tablet, you first need to install a remote desktop software on your PC. This is just a simple free installer you can add to both your PC and iPad. There are several options available, but some of the most popular are AnyDesk, TeamViewer, and Chrome Remote Desktop. All are free to use and offer a reliable performance.
For the steps in this blog, I will be using AnyDesk, but the steps are essentially the same for any of the remote software tools above.
So, to get started, go to the AnyDesk website and download the software for your PC. Then, head to the app store on your iPad and download the AnyDesk app on your device.
Step 2: Request to Connect iPad to PC with Remote Desktop Software
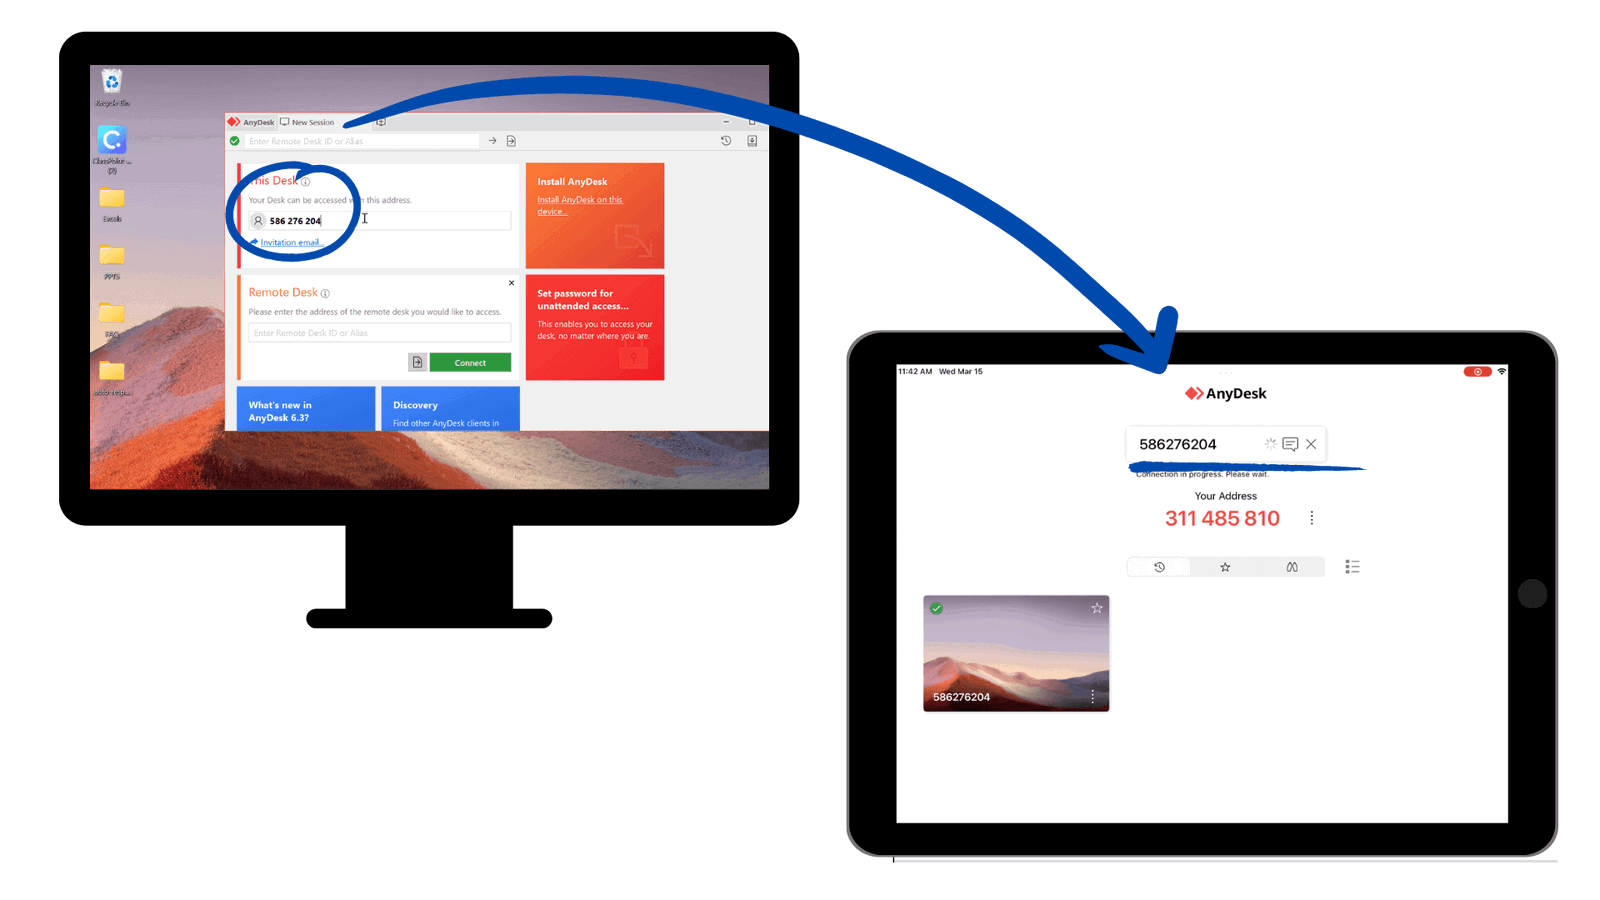
Launch the remote desktop software on your PC and iPad. With AnyDesk, you will see a number assigned to your devices. Type the number that appears on your PC into your iPad, then Request Control. A pop-up will now appear for you to authorize the connection.
Click the authorization button to connect and you will see the PC interface appear on your iPad!
Step 3: Control Your PC
Once the connection is established, you can control your PC using your iPad. Use your iPad’s touch screen to interact with your PC, just as you would normally. Your finger or Apple Pencil now acts as your mouse.
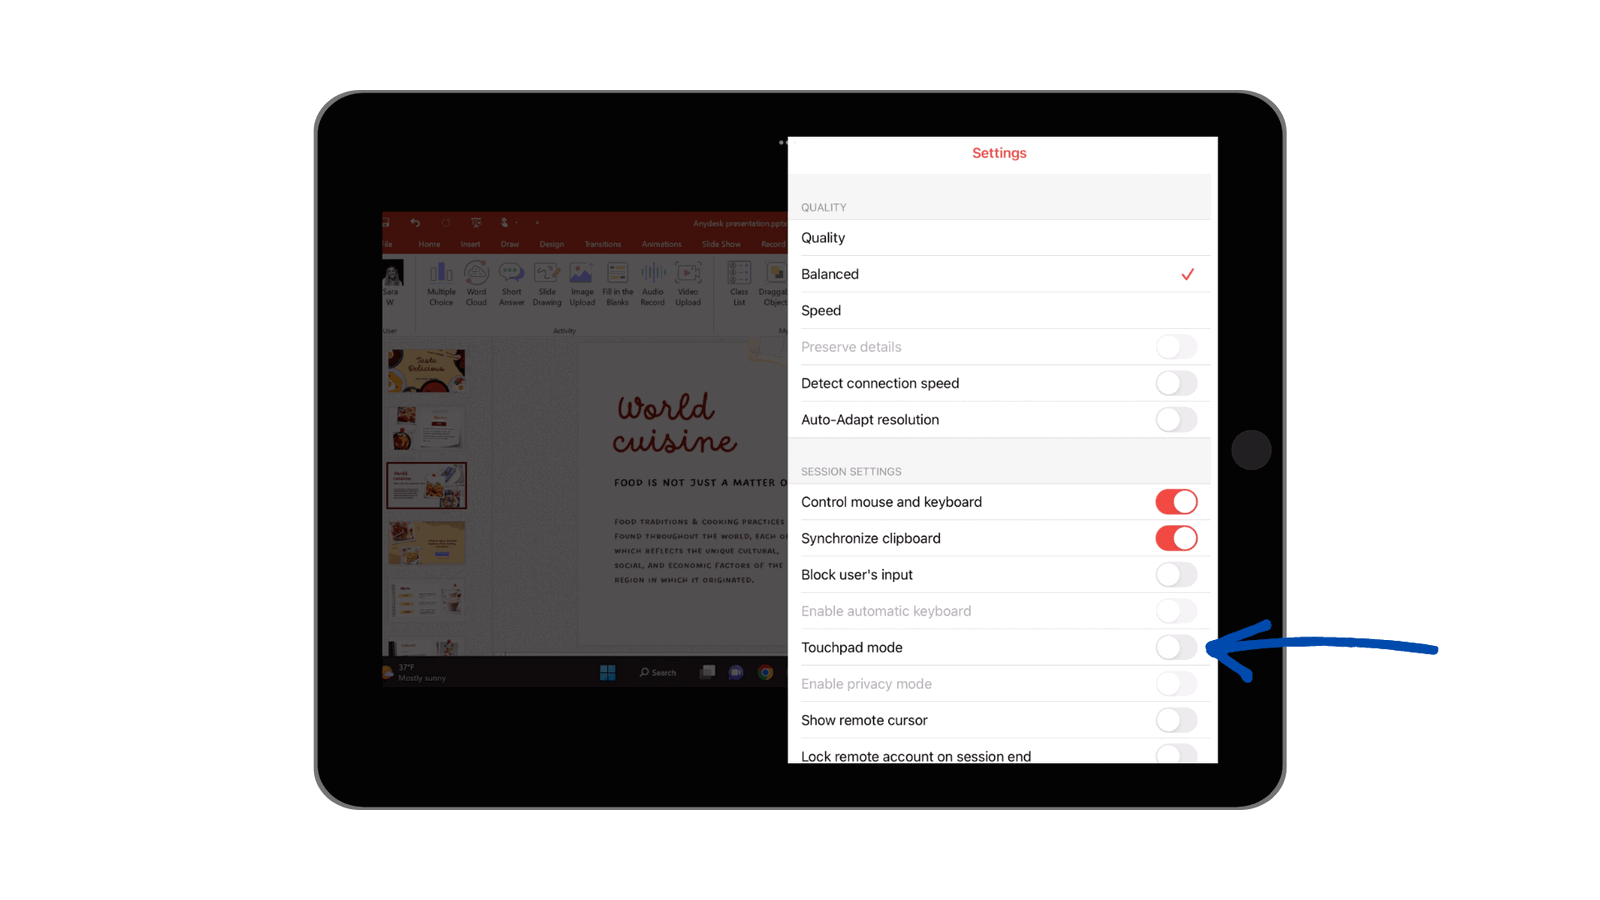
To return to “tablet mode” where you do not need to drag your finger like a mouse (i.e. just tapping on a certain location) swipe your finger from the right of your iPad to the left to bring up AnyDesk’s menu. From here, select the Settings icon at the top, and toggle off “Tablet Mode.” Now, you can interact with your PC through your iPad without dragging your finger like a mouse, just tap to click!
In addition, if you need to type while controlling the screen, access the keyboard from that same side menu.
Step 4: Annotate within your Presentation

With your iPad, you can continue to use it as you would like to navigate through your presentation, for this example: PowerPoint slides, and interact with your audience.
If you wish to begin annotating on top of your PowerPoint slides, make sure we have that Tablet Mode toggled off. Slide your finger from right to left on your screen to bring up the side menu again, and ensure Tablet Mode is off. Now, you can drag your finger to annotate, not be controlling your screen like a mouse.
If you are annotating on top of PowerPoint, I recommend using the add-in ClassPoint for easy access to an advanced, yet user-friendly annotation toolbar. Once downloaded (for free!), a toolbar appears on the bottom of your screen with pens, highlighters, text boxes, and shapes.
Keep in mind that remote desktop software requires a stable internet connection and may have some limitations in terms of performance and functionality. However, it can be a super helpful tool for accessing your PC and adding some engagement to your teaching.
There are some amazing pen tablets designed just for helping teachers interact with their learning material, such as the One by Wacom, but if you already have an iPad or other tablet, use this shortcut to turn it into your next favorite teaching device! Check out our video tutorial below for more information and tips on how to use your iPad as a Pen tablet to enhance and annotate within your presentations.
